
How To Clean Fujifilm Sensors - Tools, Methods & Tips!
A must for used cameras and old equipment...
Table of Contents
So you just picked up a used camera, and now you’re wondering if it's a good idea to do a full sensor clean-up before you start shooting, the short answer is yes, 100%. So if you’re wondering what the whole sensor cleaning process entails, and how to do it, then this post is for you.

If you are familiar with my YouTube channel, then you know that I recommend testing and cycling through used equipment, it’s a great way to try new things, learn and grow without breaking the bank.
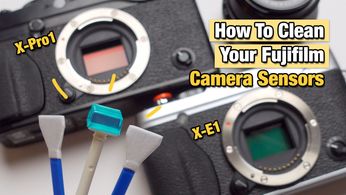
A couple of weeks ago I picked up a used Fujifilm X-E1, and now that I’m working towards a full review I thought it might be a good idea to showcase my cleaning process with used cameras and used equipment.
So we’ll talk about how to check if your sensor needs cleaning, the most common tools available to clean the sensor and 2 different cleaning methods. I’ll show you step-by-step how to clean your Fujifilm sensor, so let’s get started.
Checking If Your Sensor Needs Cleaning
The easiest way to identify or check if your sensor needs cleaning is just to do a visual inspection, and start with the basics.
Use a bright source of light, can you visually see any spots? any dust particles or smudges? Is that something you can quickly clean with an air blower?
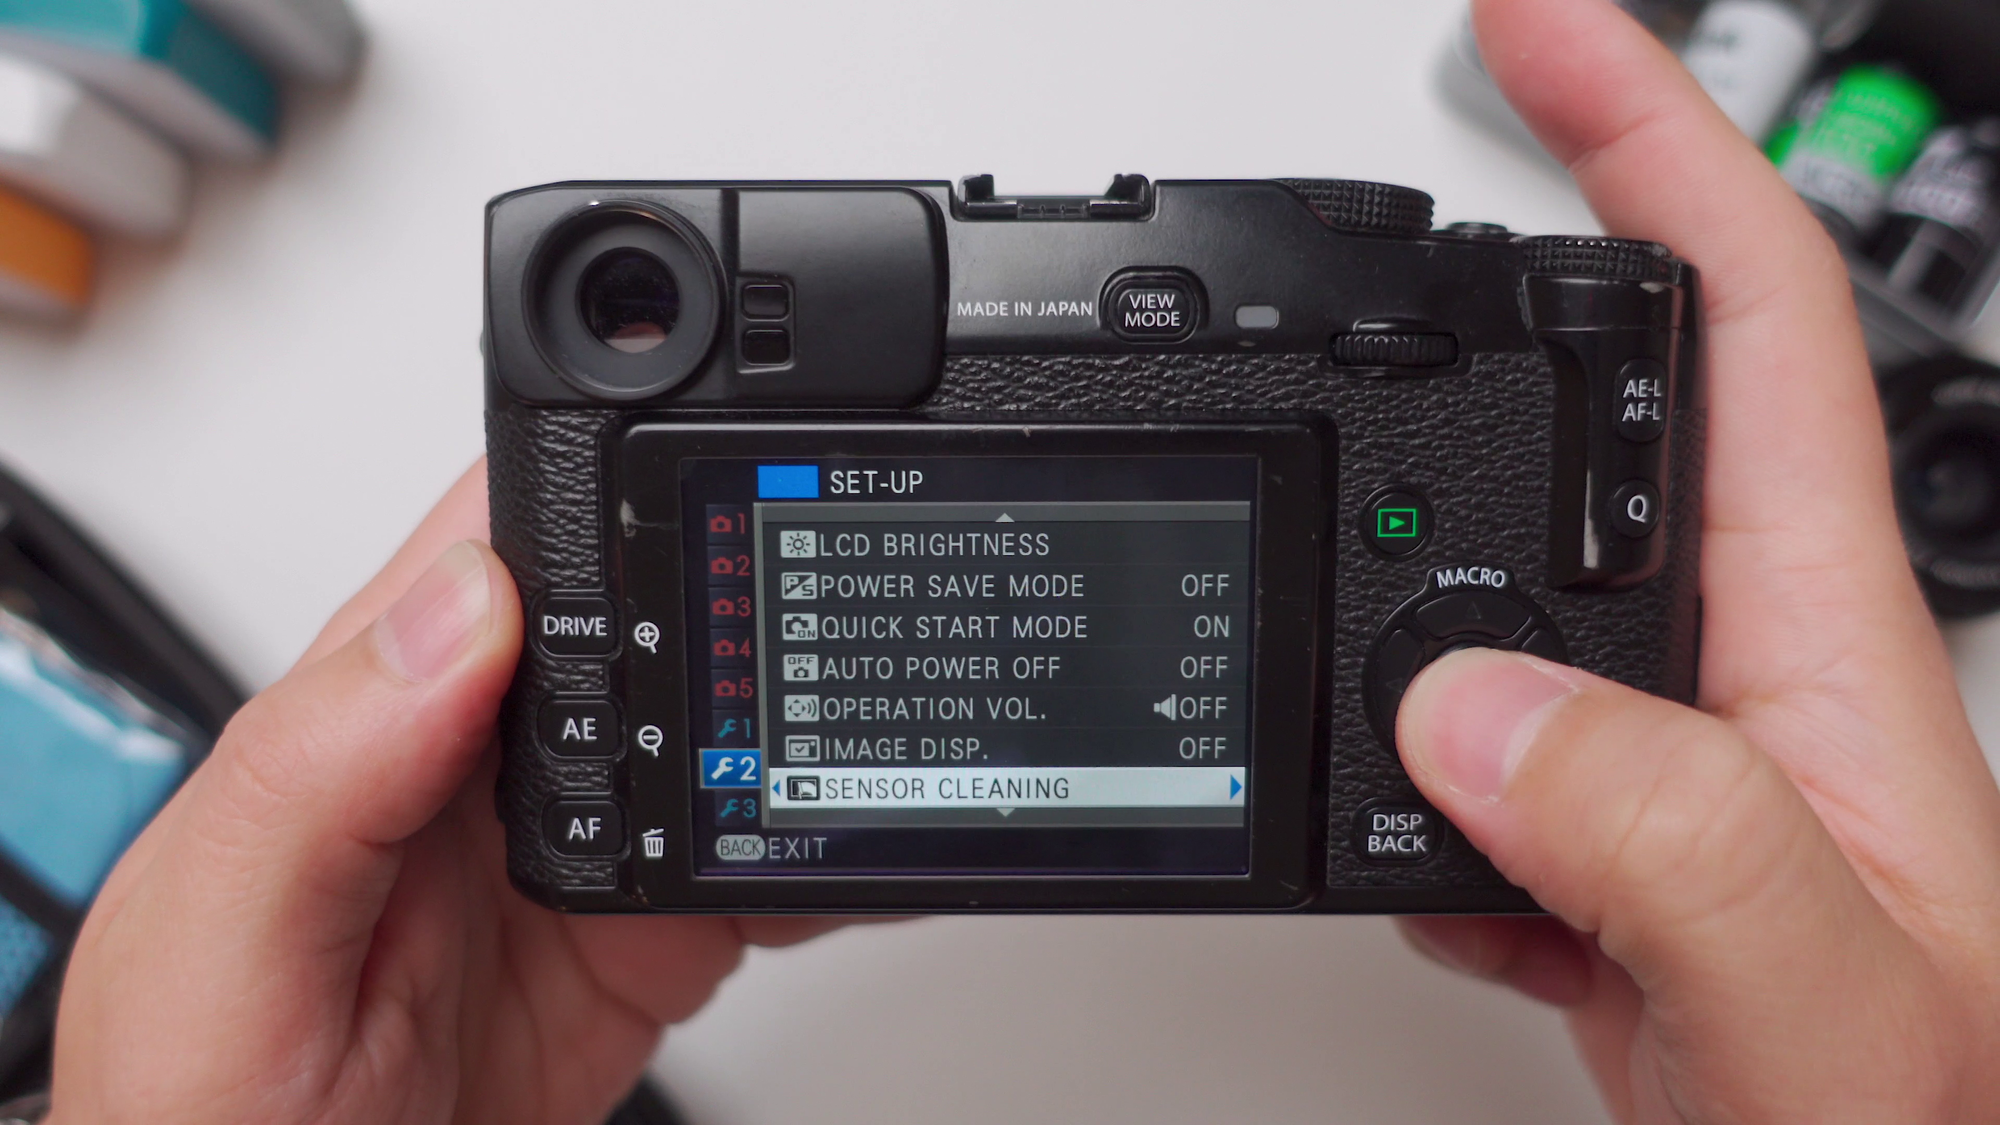
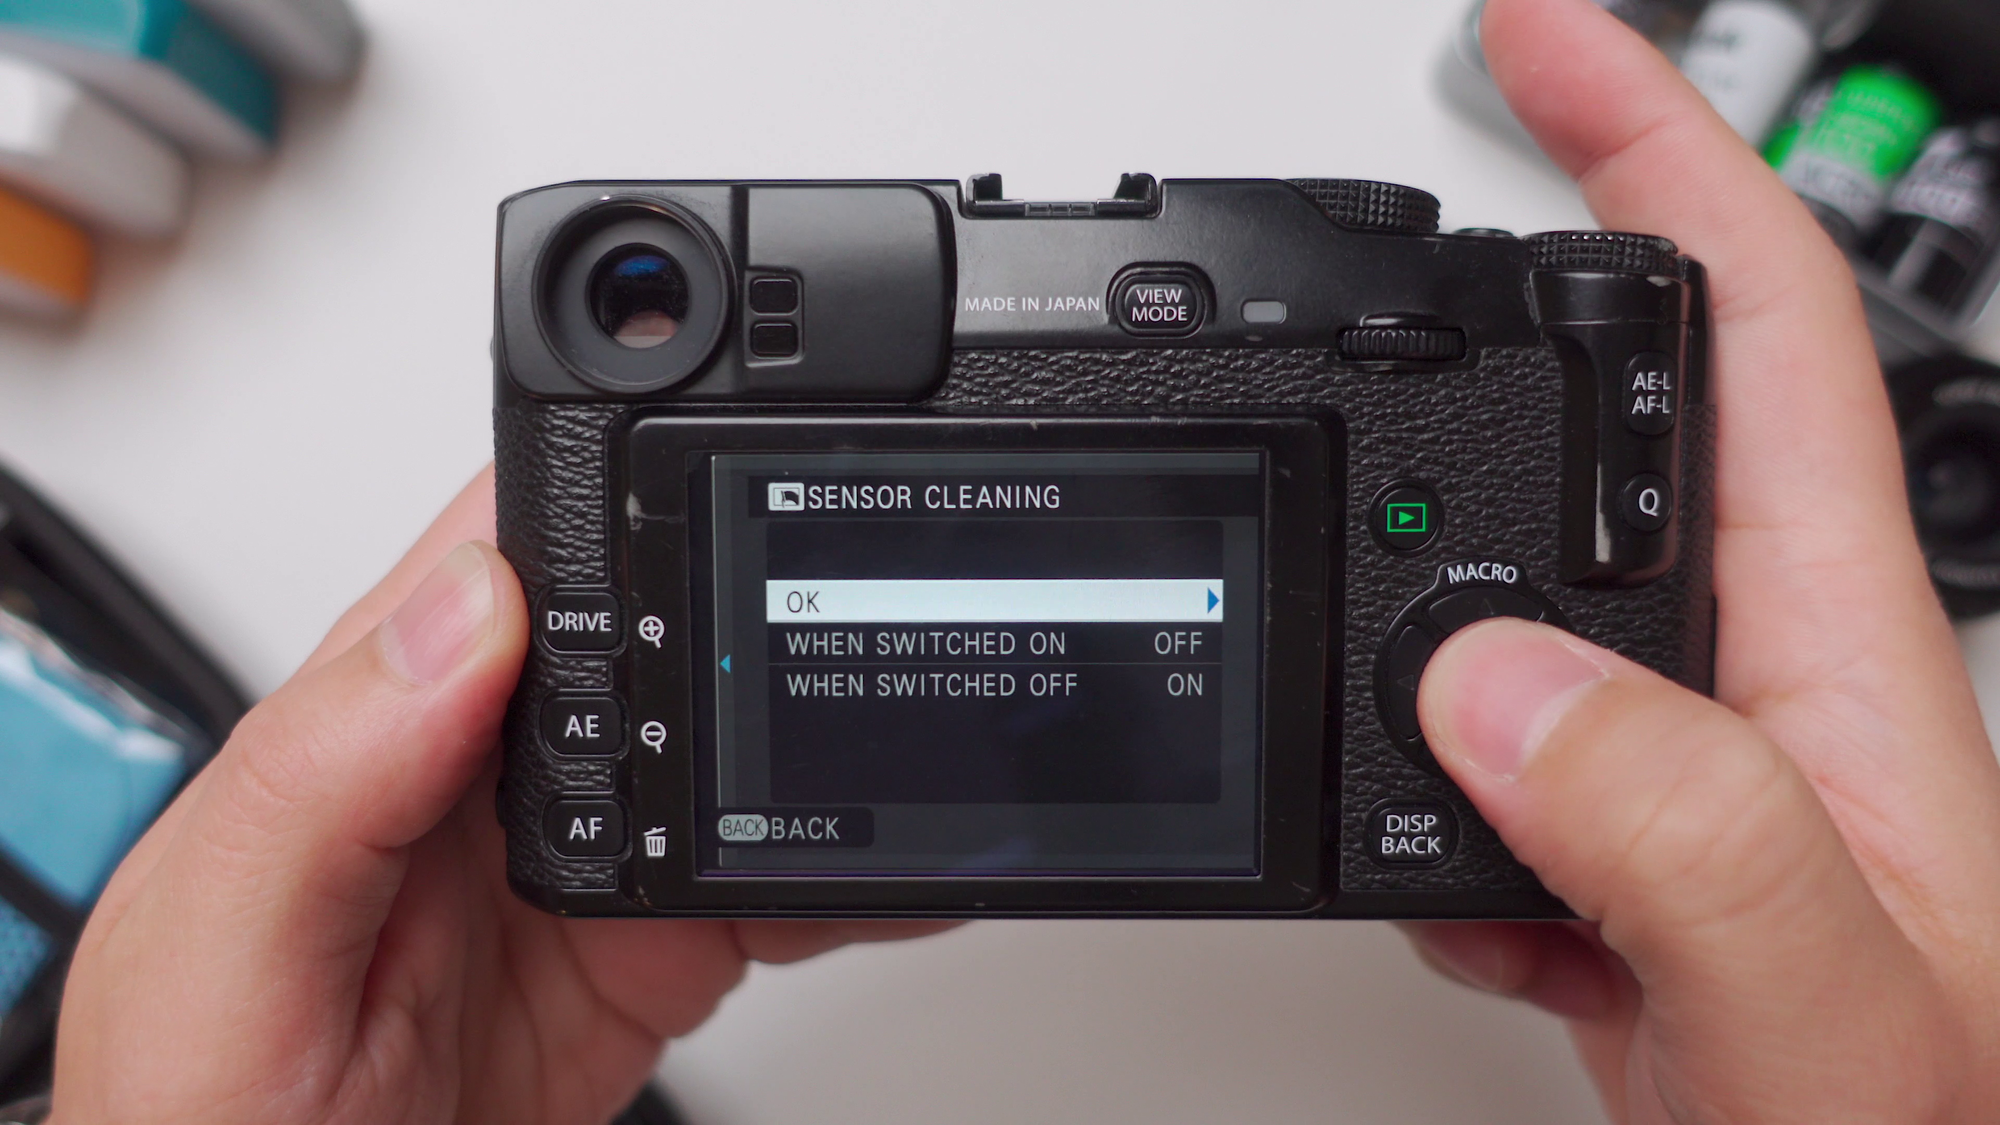
Sensor cleaning from the menu
Inside your camera menu, head to the setup page, and then do a quick sensor cleaning, just to be safe.
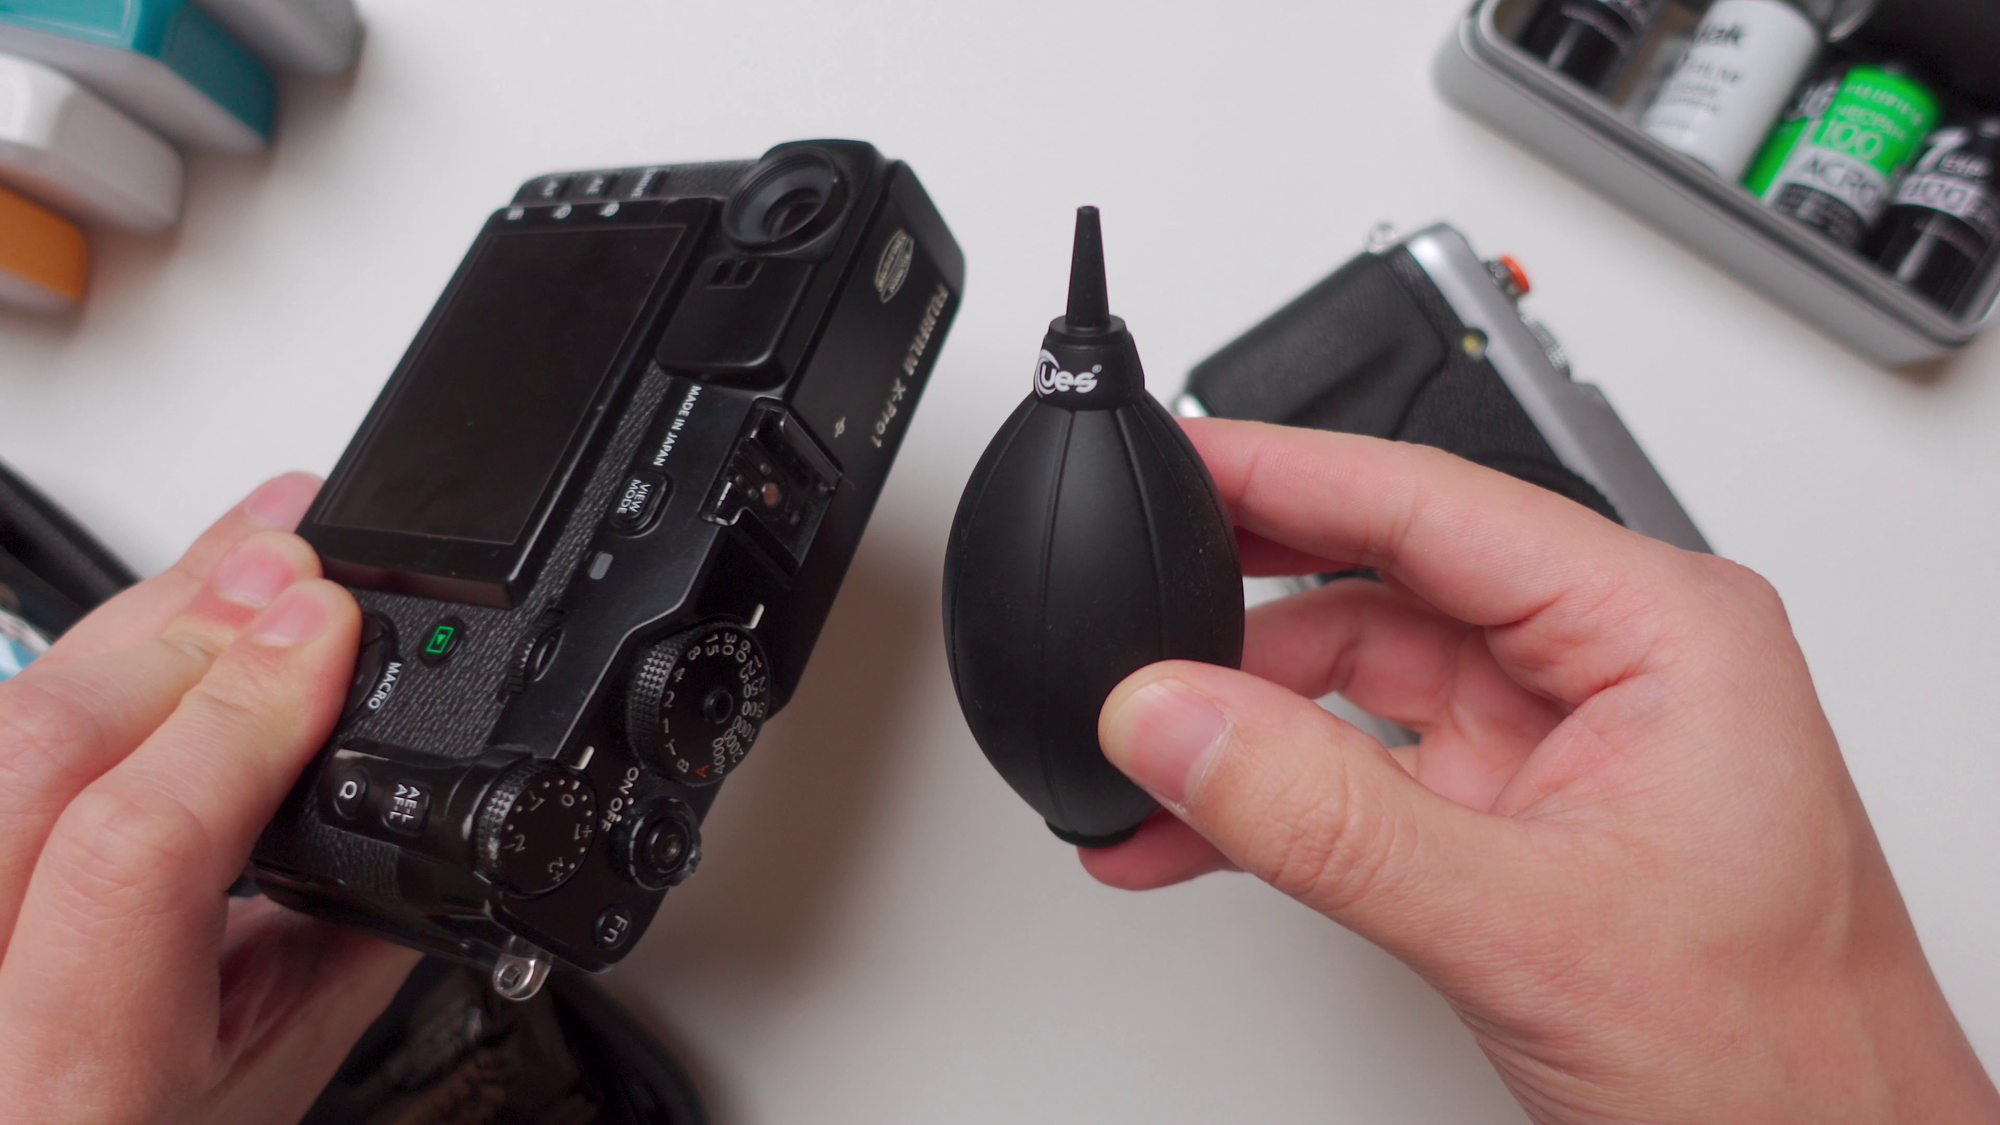
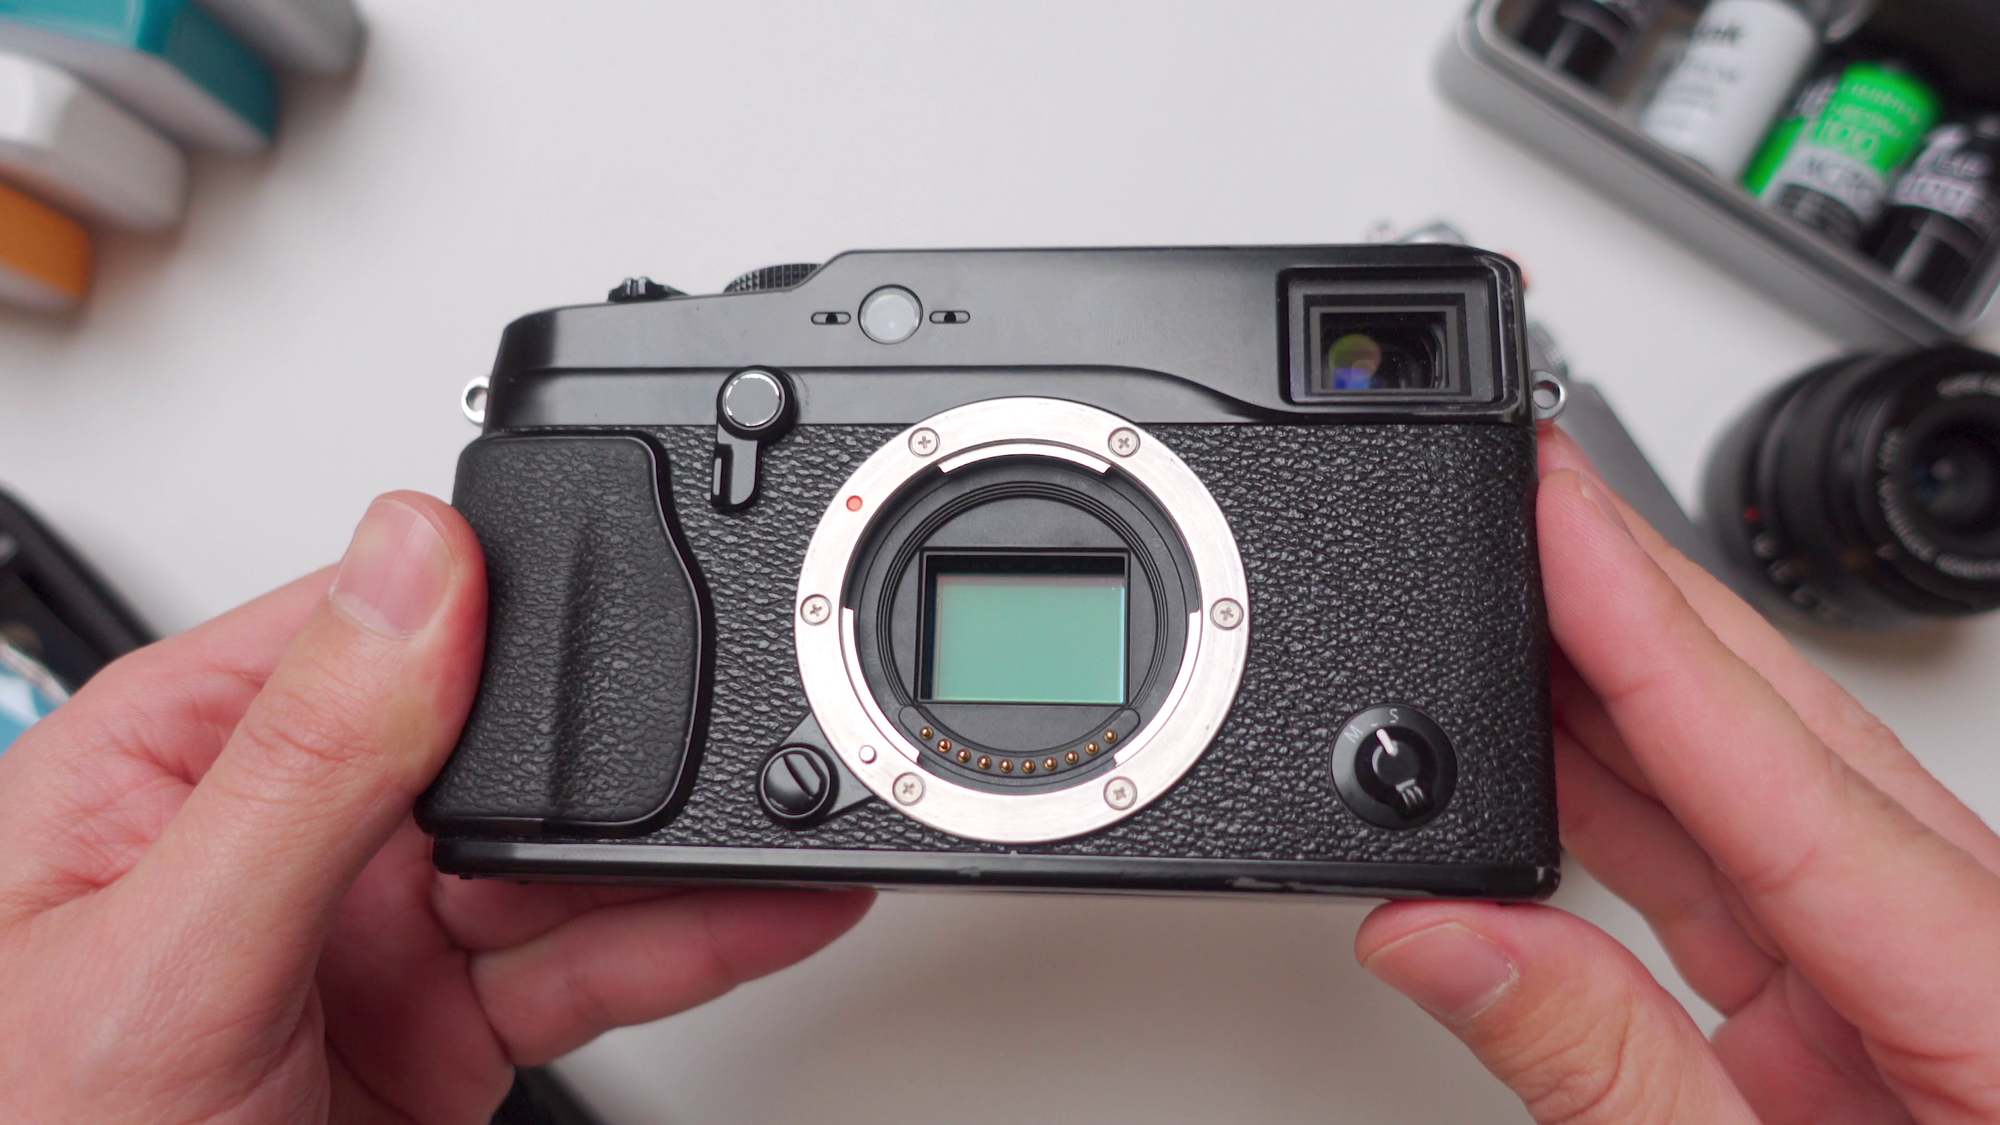
Grab your camera and remove the lens cap. Make sure to point the camera downwards while removing the lens cap, while changing lenses and in other situations where the sensor is exposed. Use the blower to try to clean the sensor.

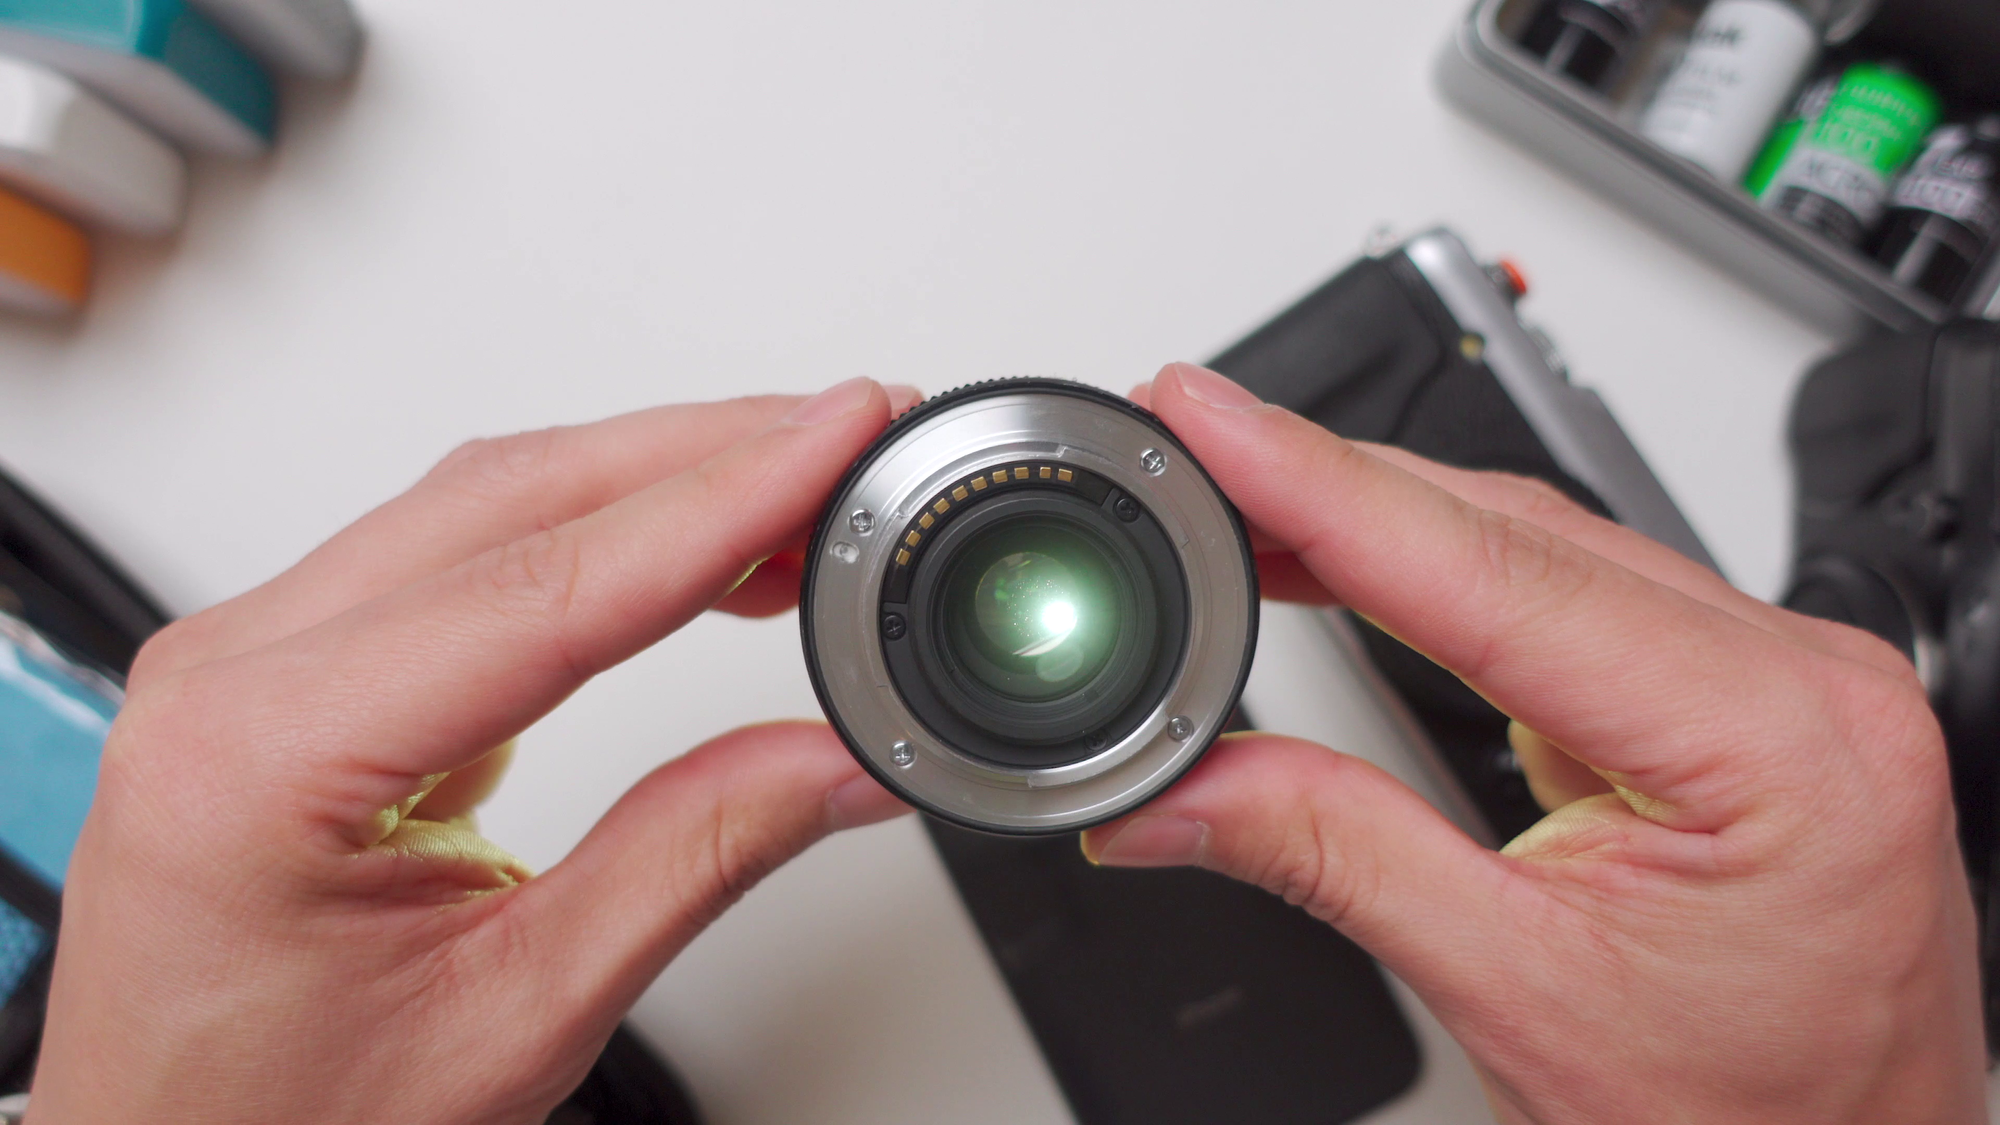
Checking for spots on the lens via back-light
With a pocket LED light or your smartphone quickly check your lenses as well. Is the lens the issue here? or is it the actual sensor?
Whatever the case may be, after picking a used camera, you generally do want to do a full cleanup. You don’t know how many people owned the camera or in what circumstances they used it.
The best way to check in my opinion is to take a photo of a clear blue sky, a white wall, a white computer screen, or a bright light source and then check the digital file for dust, smudges and spots.
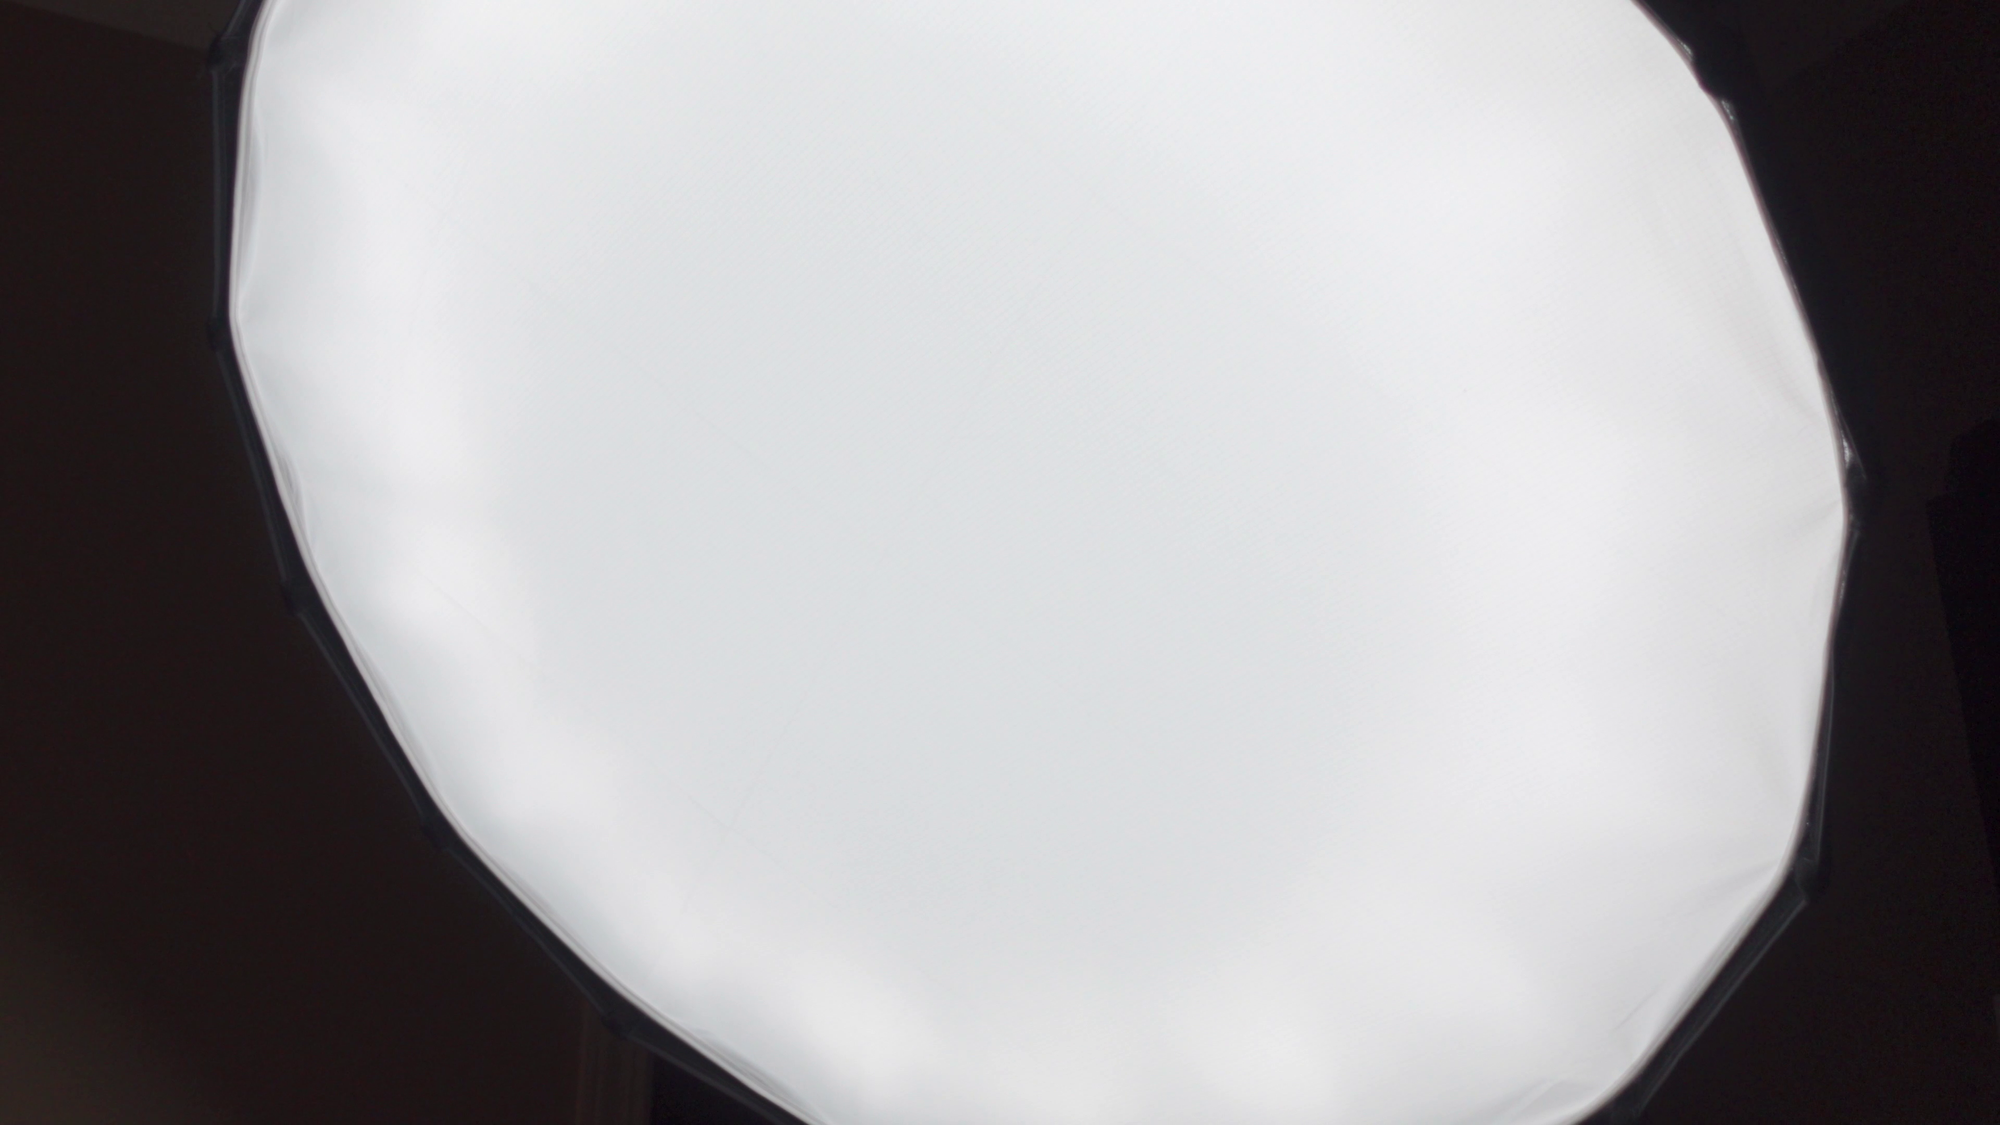
To demonstrate my point, I will be taking a photograph of my main video key light here.
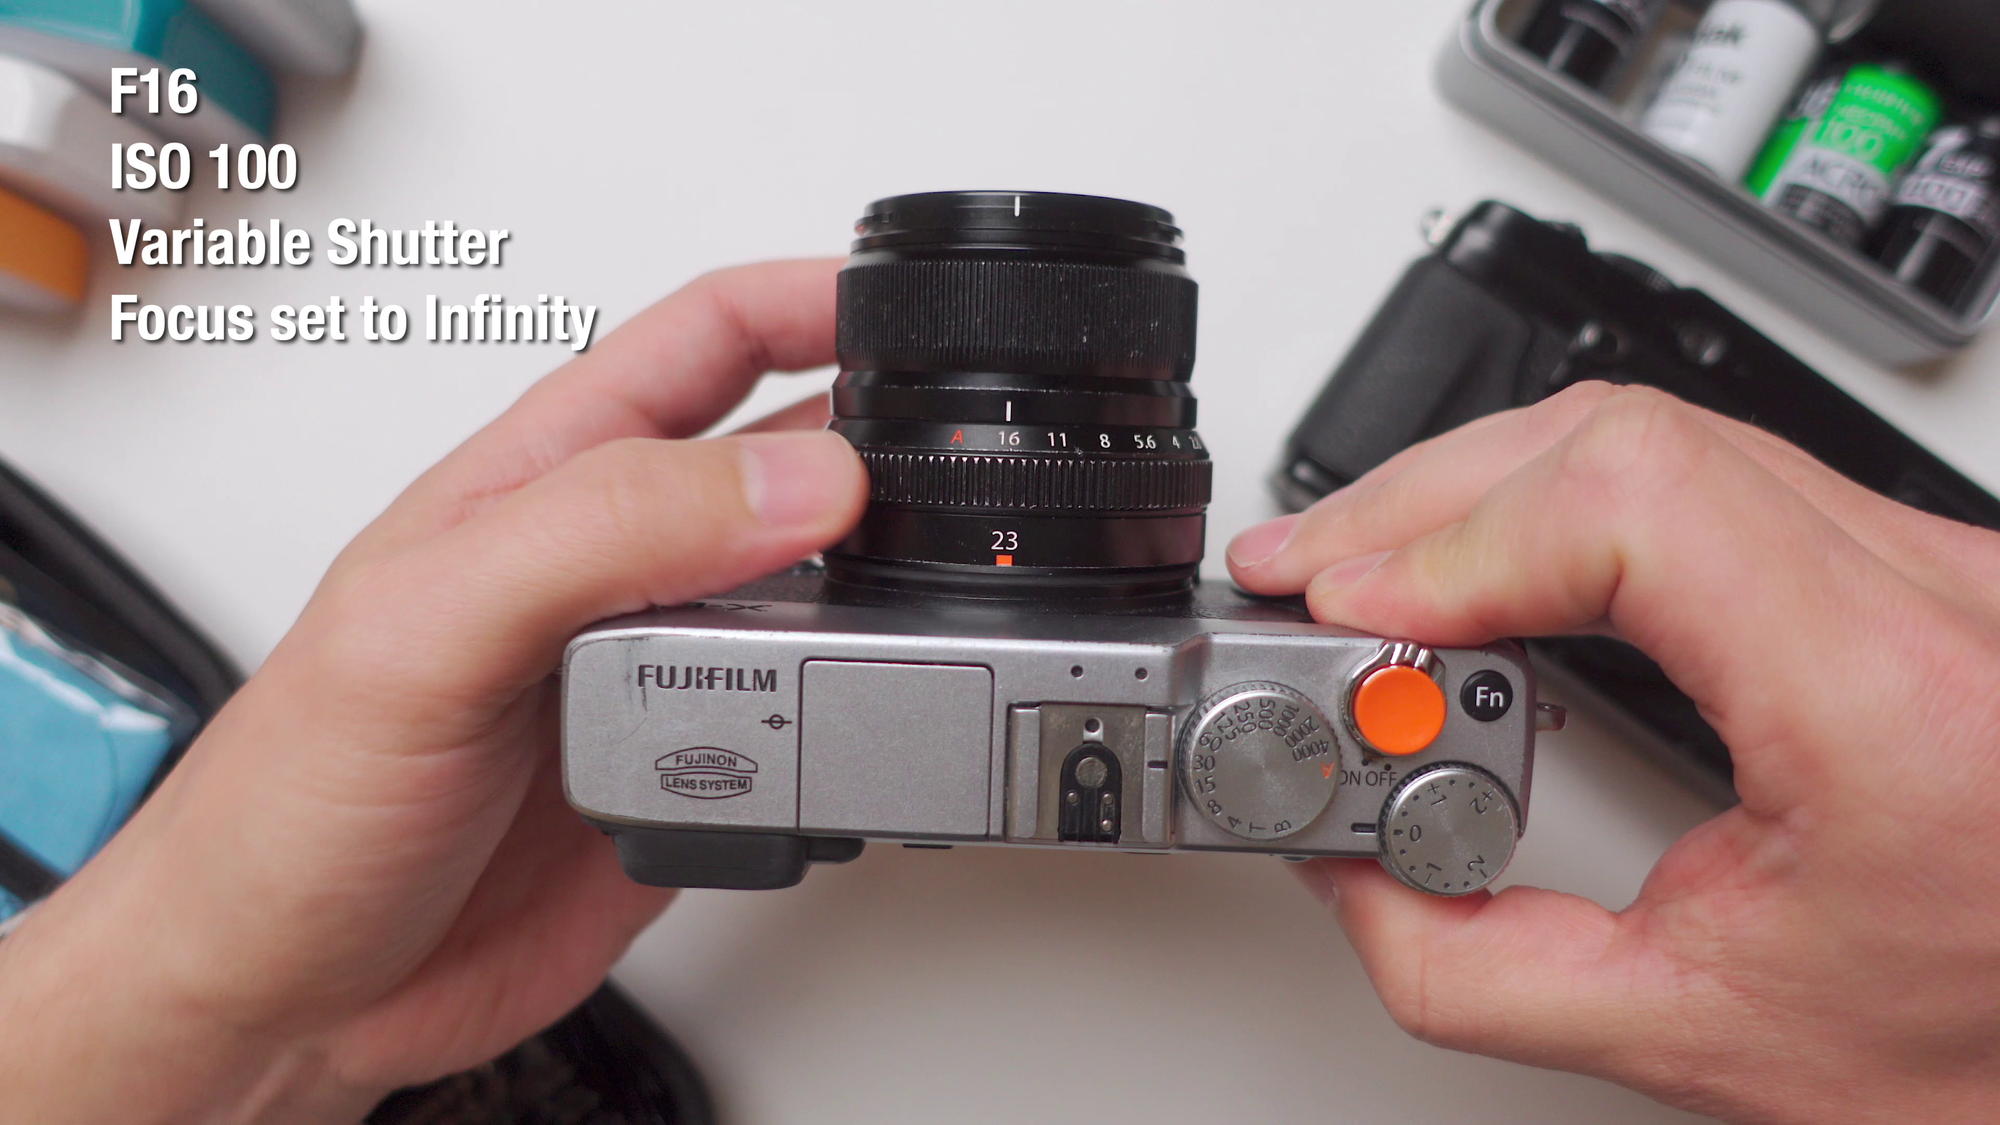

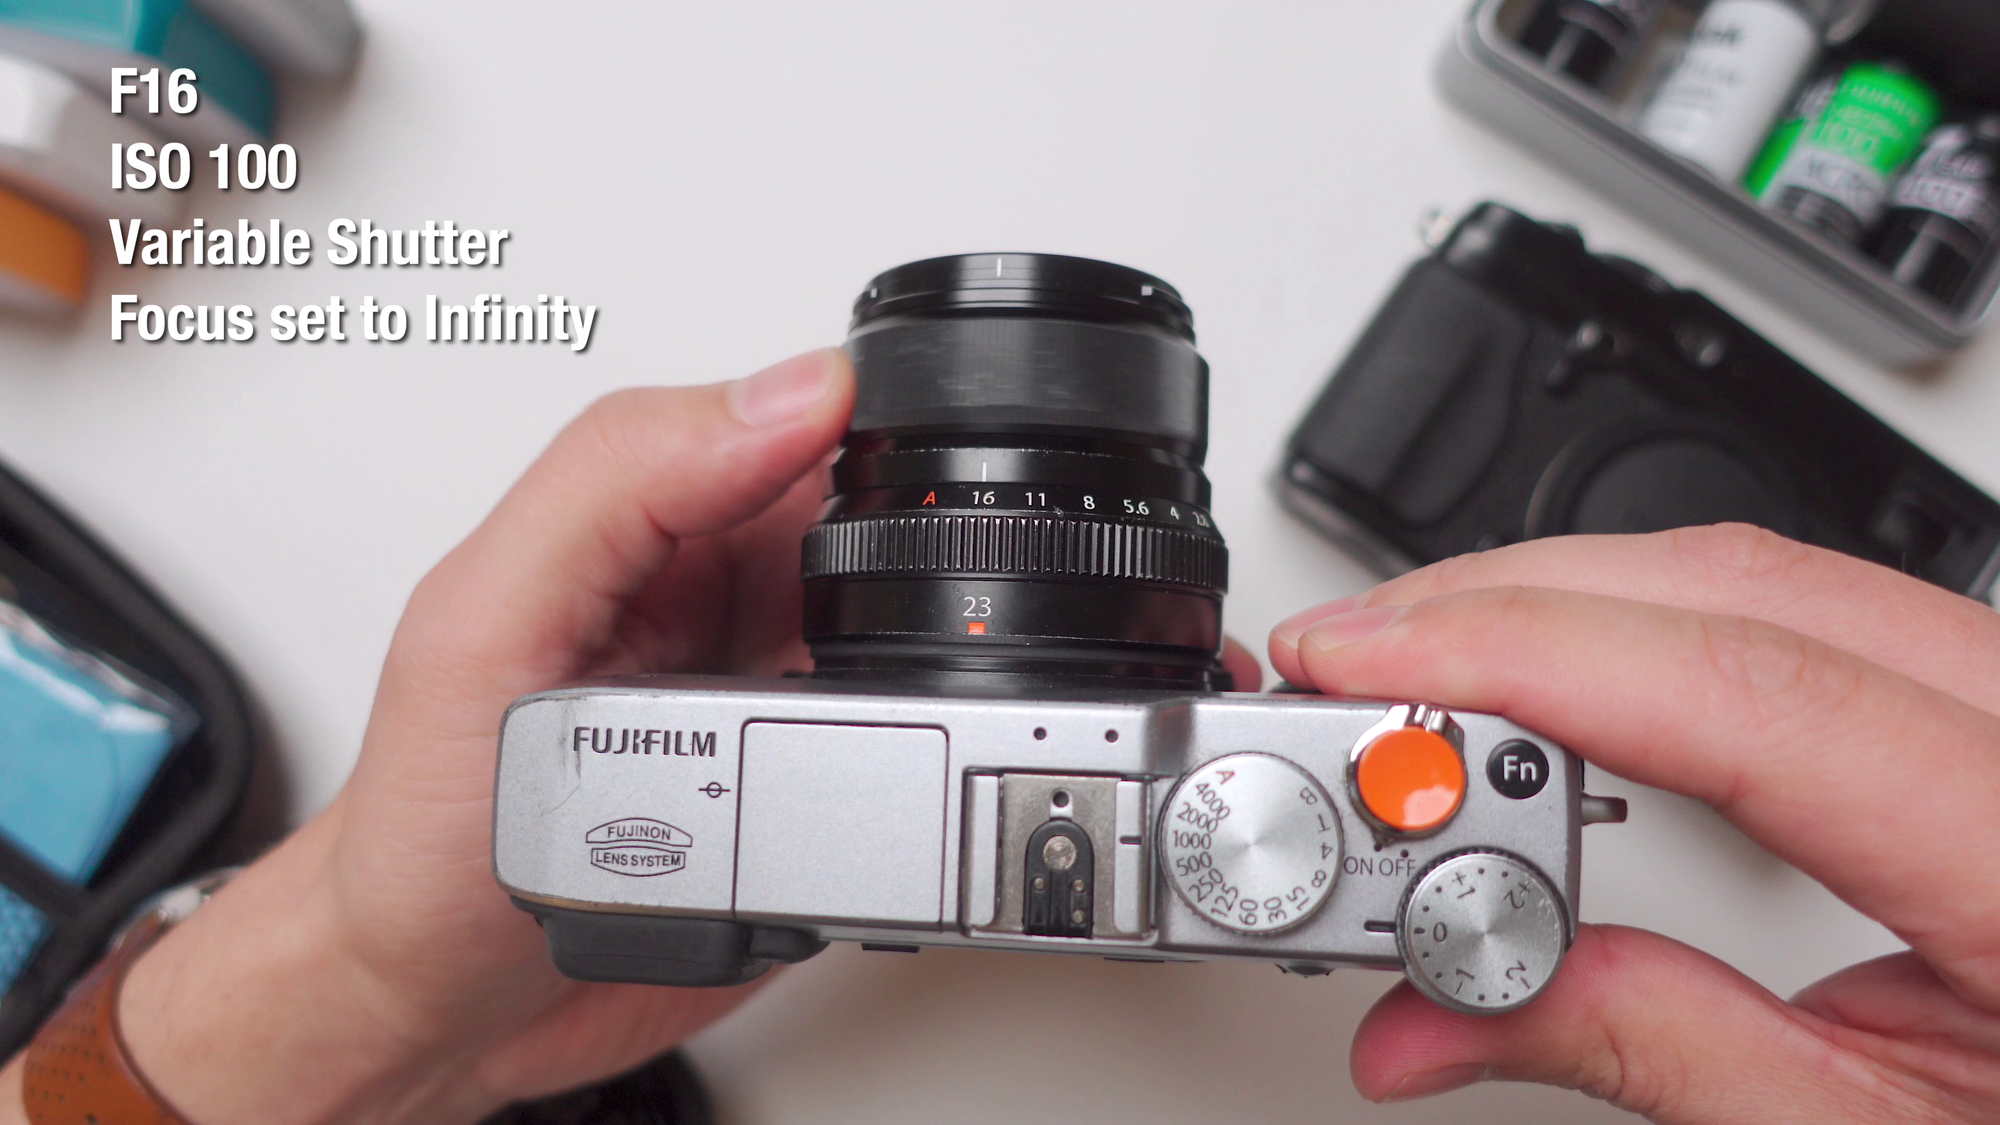
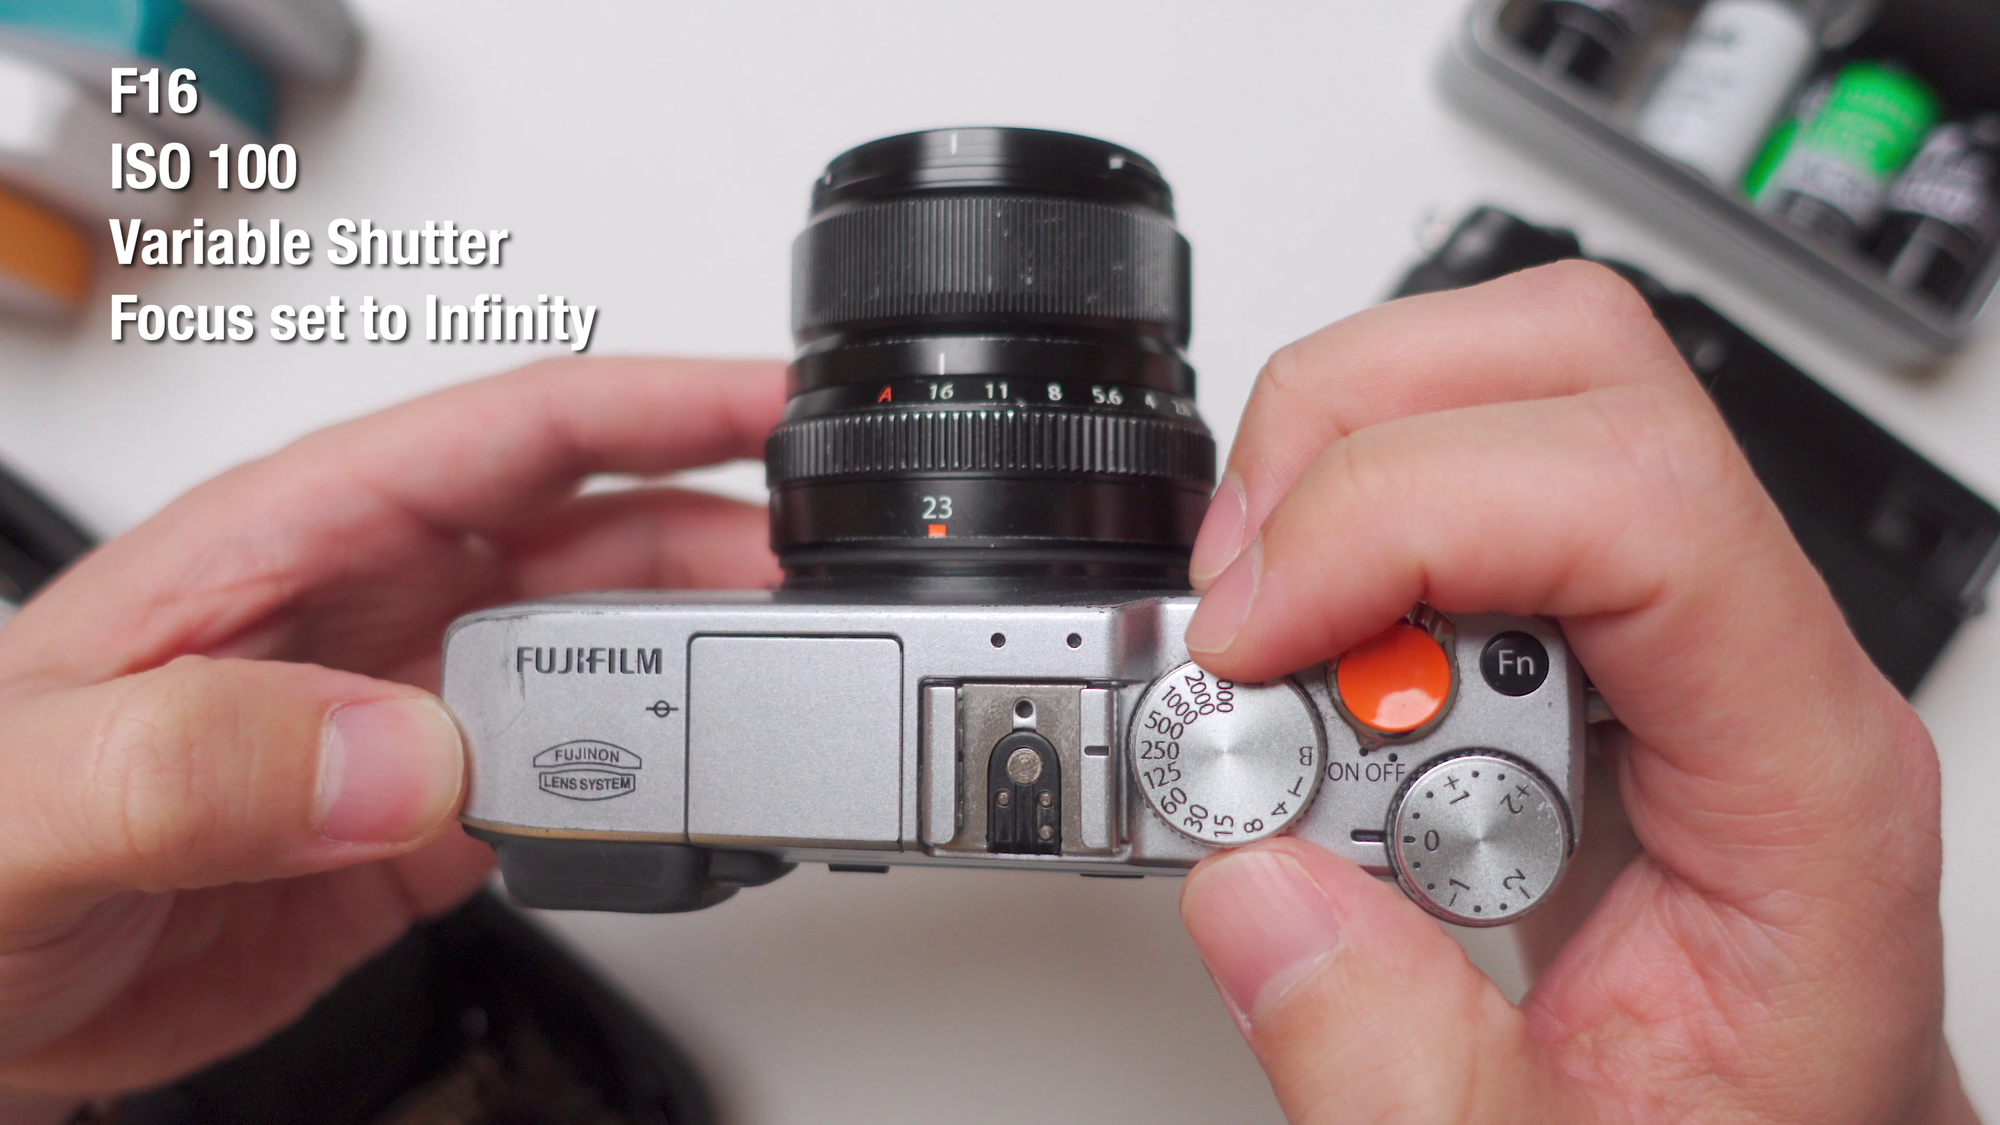
- Set your camera to the highest F-stop available, in my case, F16.
- Set the lowest ISO possible, in my case, ISO 100.
- Set your shutter speed according to exposure to the right.
- Last but not least, make sure you manually focus on infinity.
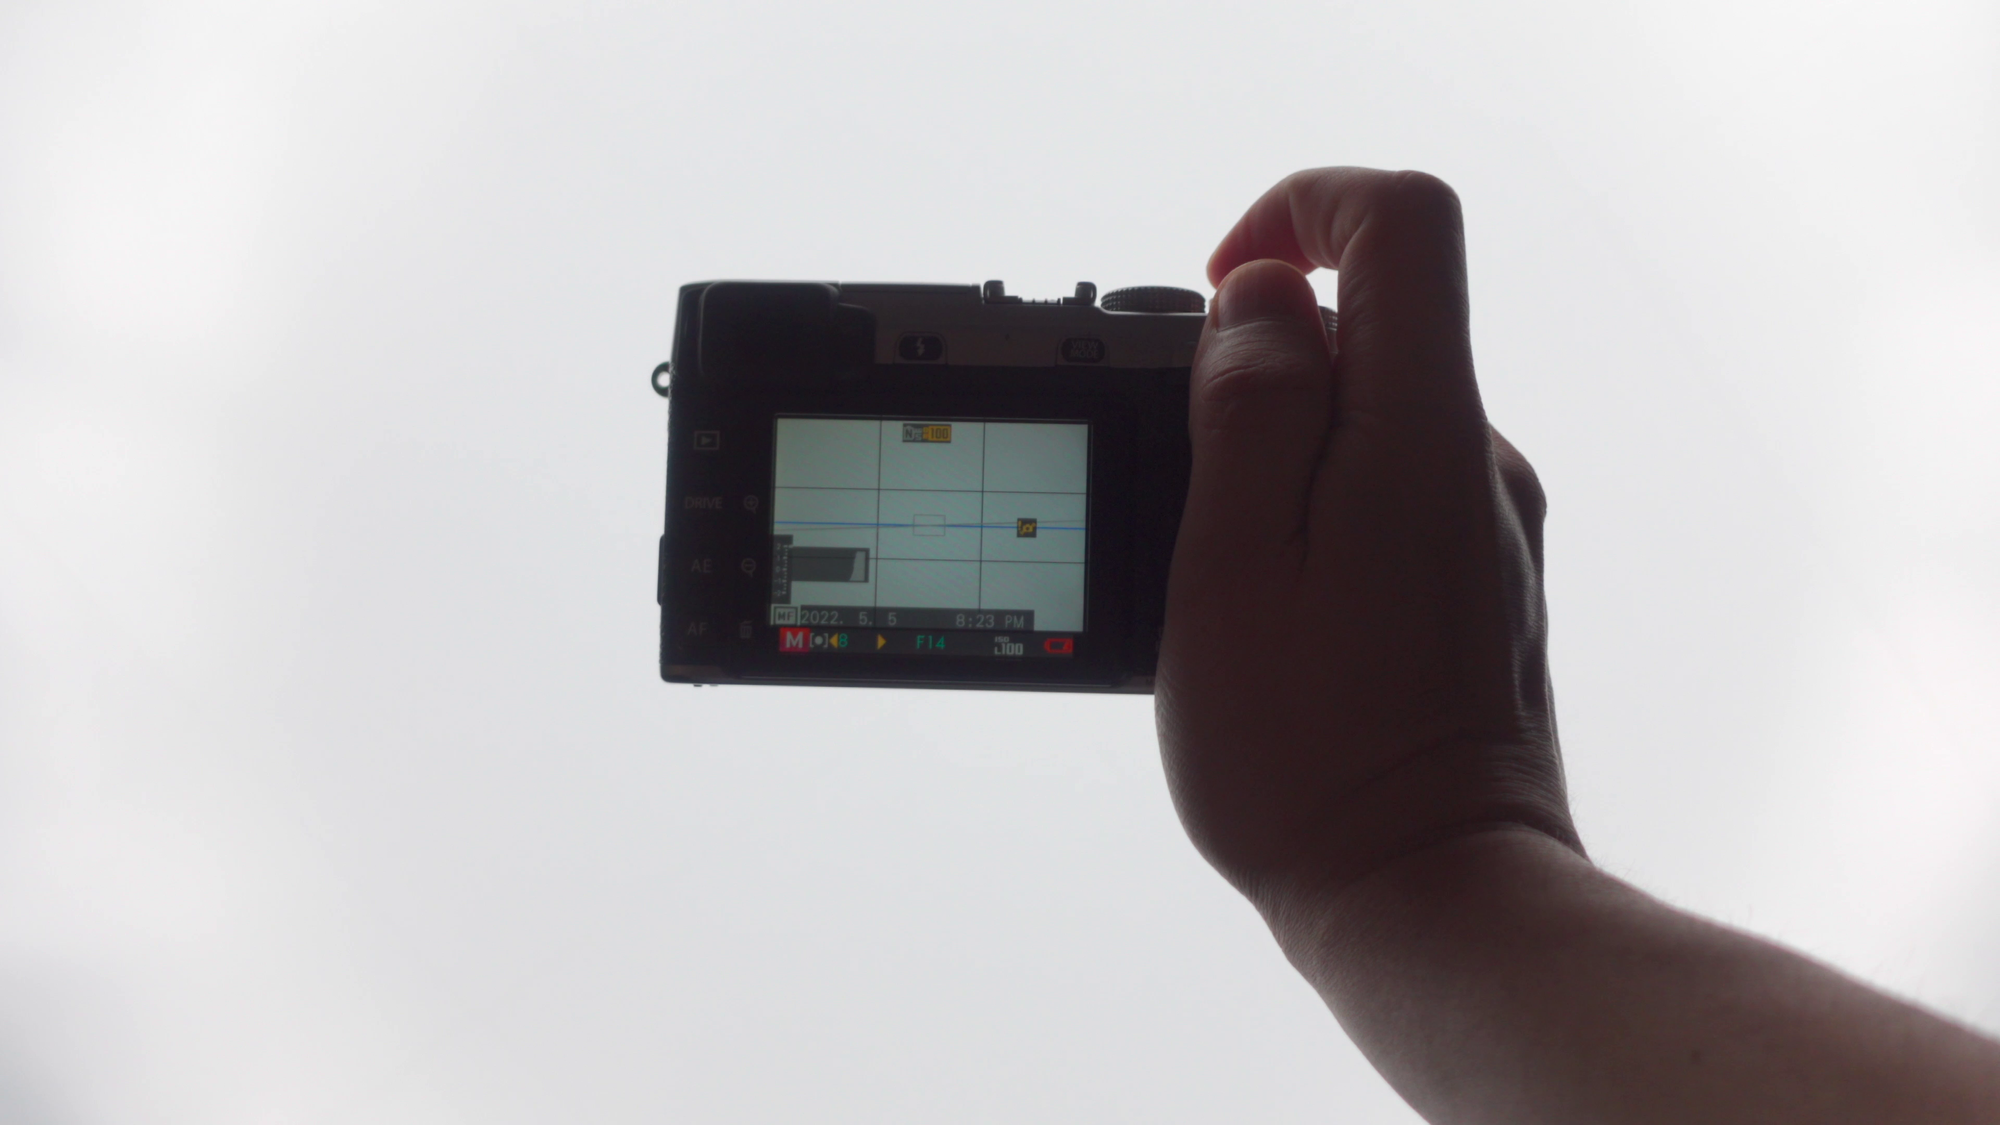
Now you can take a shot of your light source and move the camera around a bit, and that should be enough.
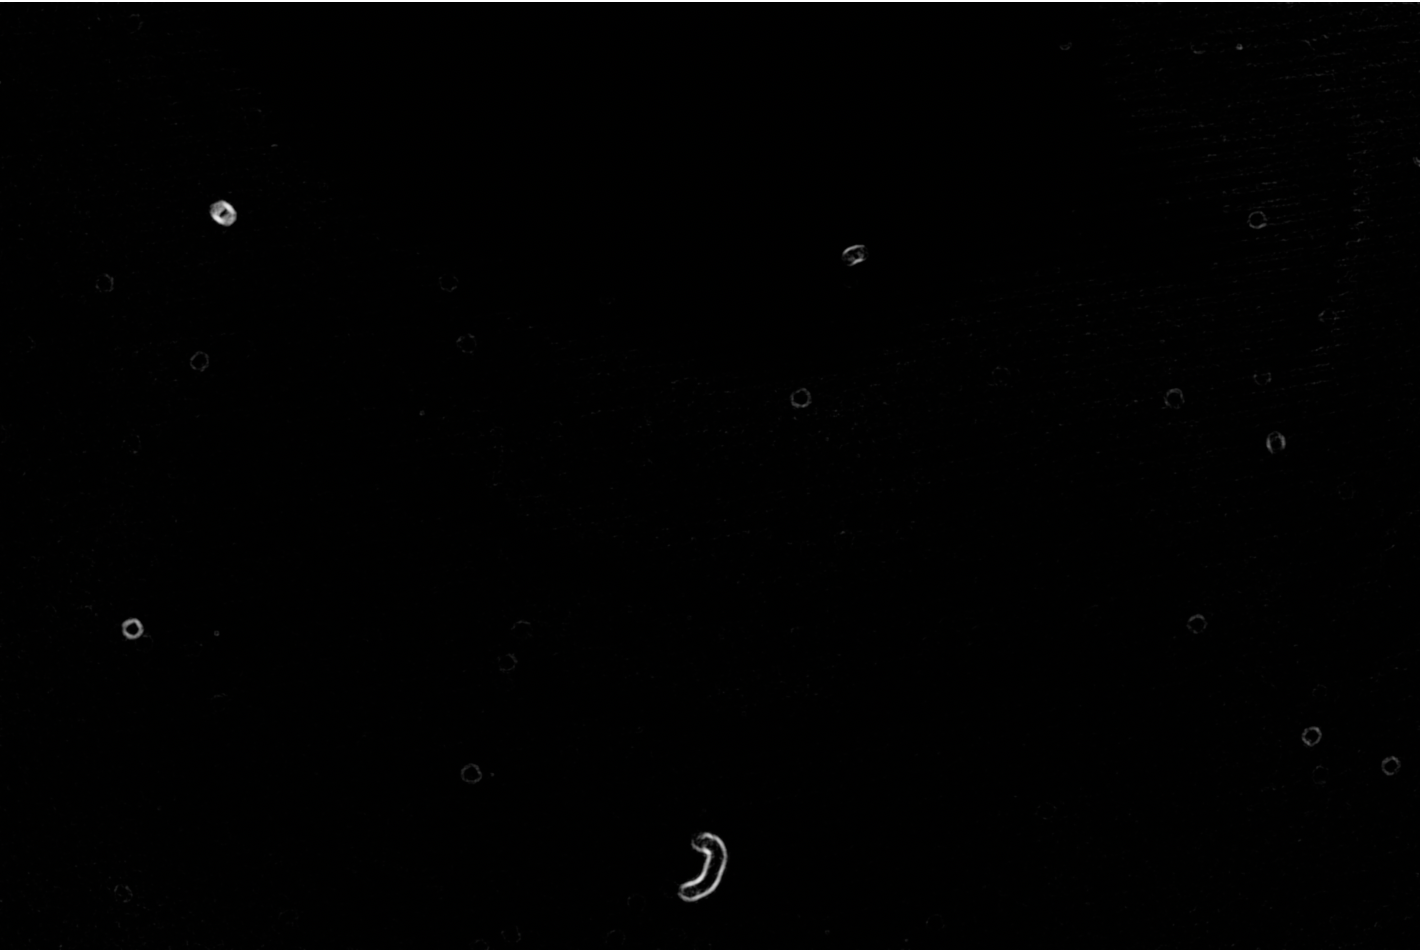
Now you can take the files to your computer, open your photograph in Adobe Lightroom, make sure you’re in the develop tab, and then click the spot removal tool. here at the bottom, make sure you enable "visualize spots", and play with the value until it's obvious to you.
Now that you know, you’ve visualized it and decided whether you need to go ahead with the sensor cleaning or not, we can talk about some of the most common cleaning tools available.
Common Tools For Sensor Cleaning
The most common tools for cleaning sensors are sensor-cleaning swabs, gel sticks, or gel brushes.
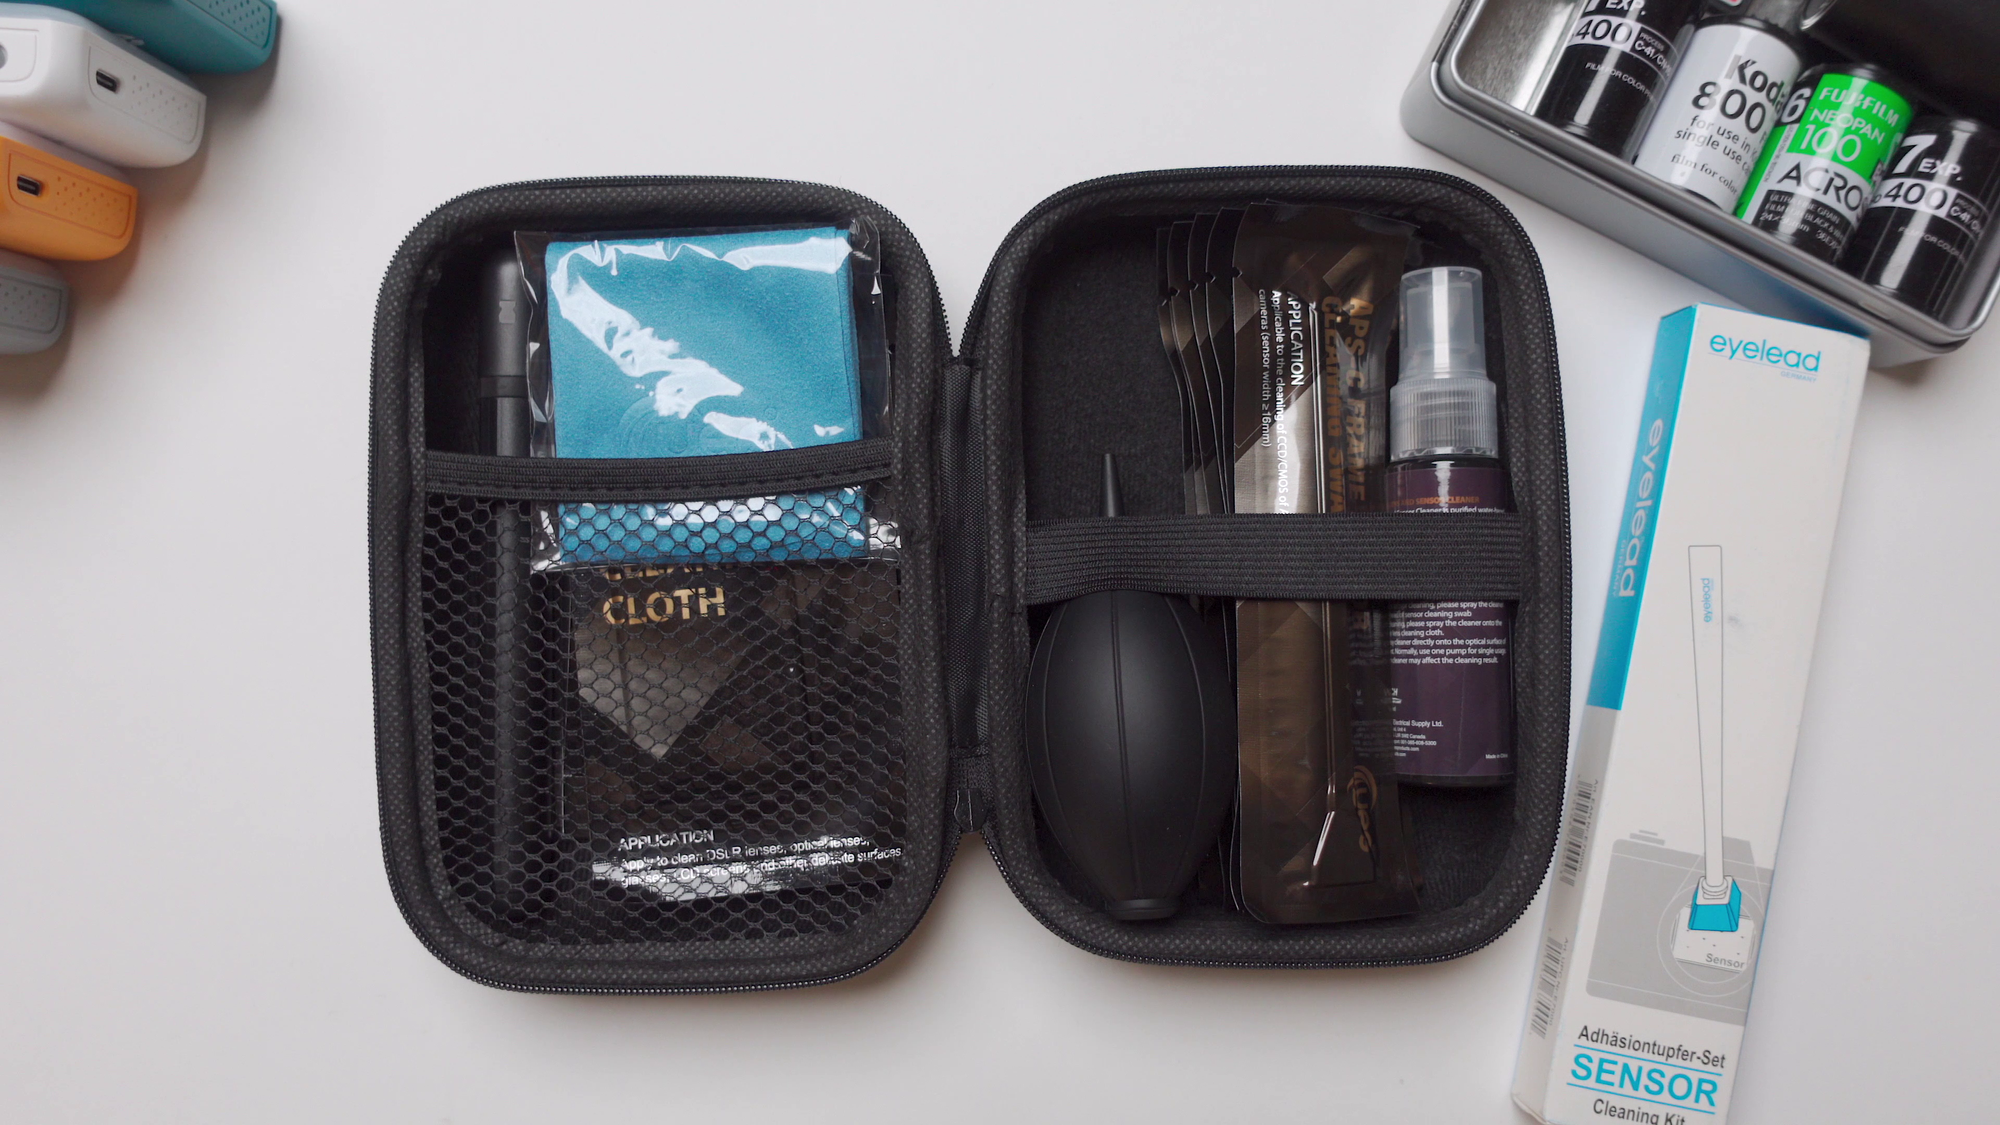
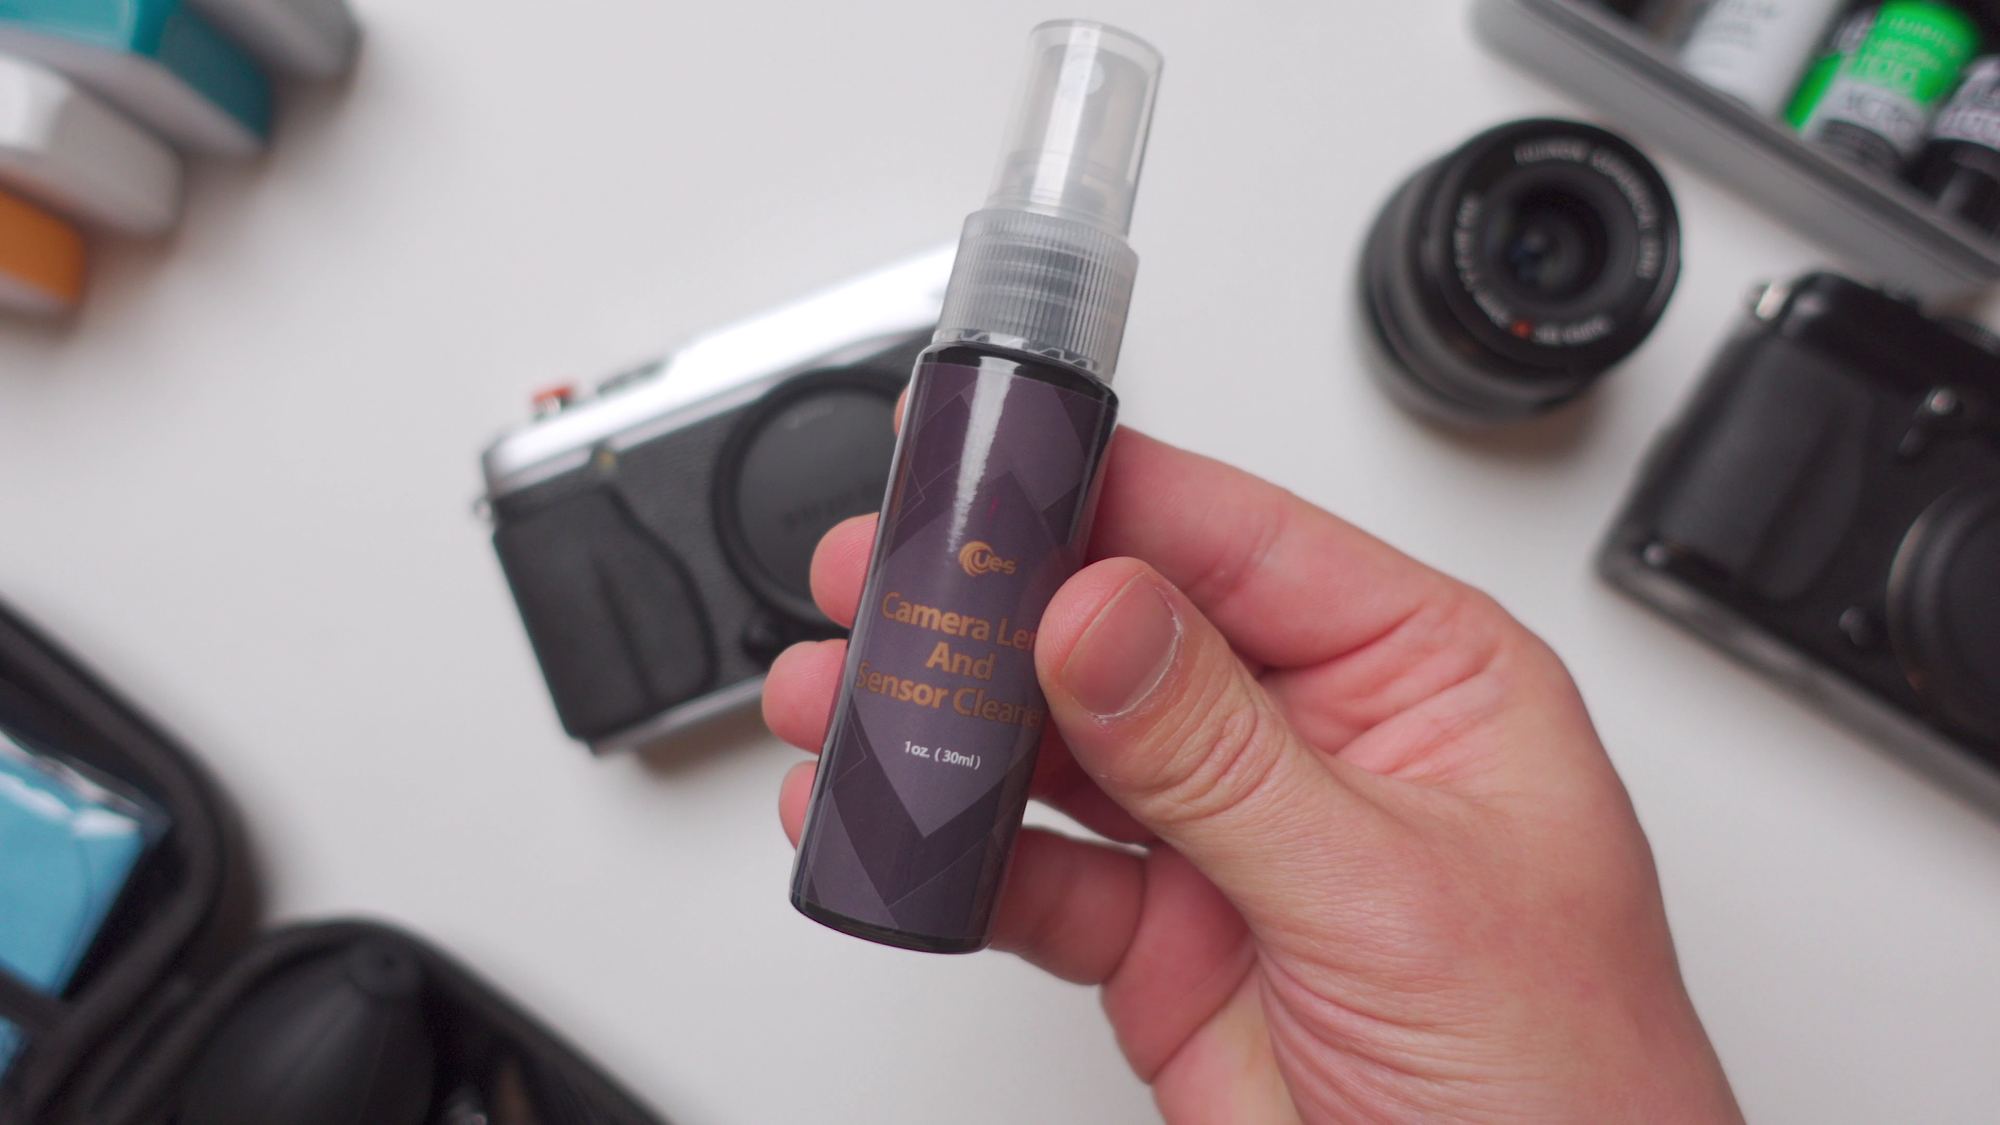
For this video, I’ll be using the Eyelead SCK-1 cleaning stick, and the UES sensor and lens travel kit as well. I happen to like these items, but you can use any other products you want really. Both of these items will be listed on my gear page, linked in the description of the video just in case you’re curious. I highly recommend them.
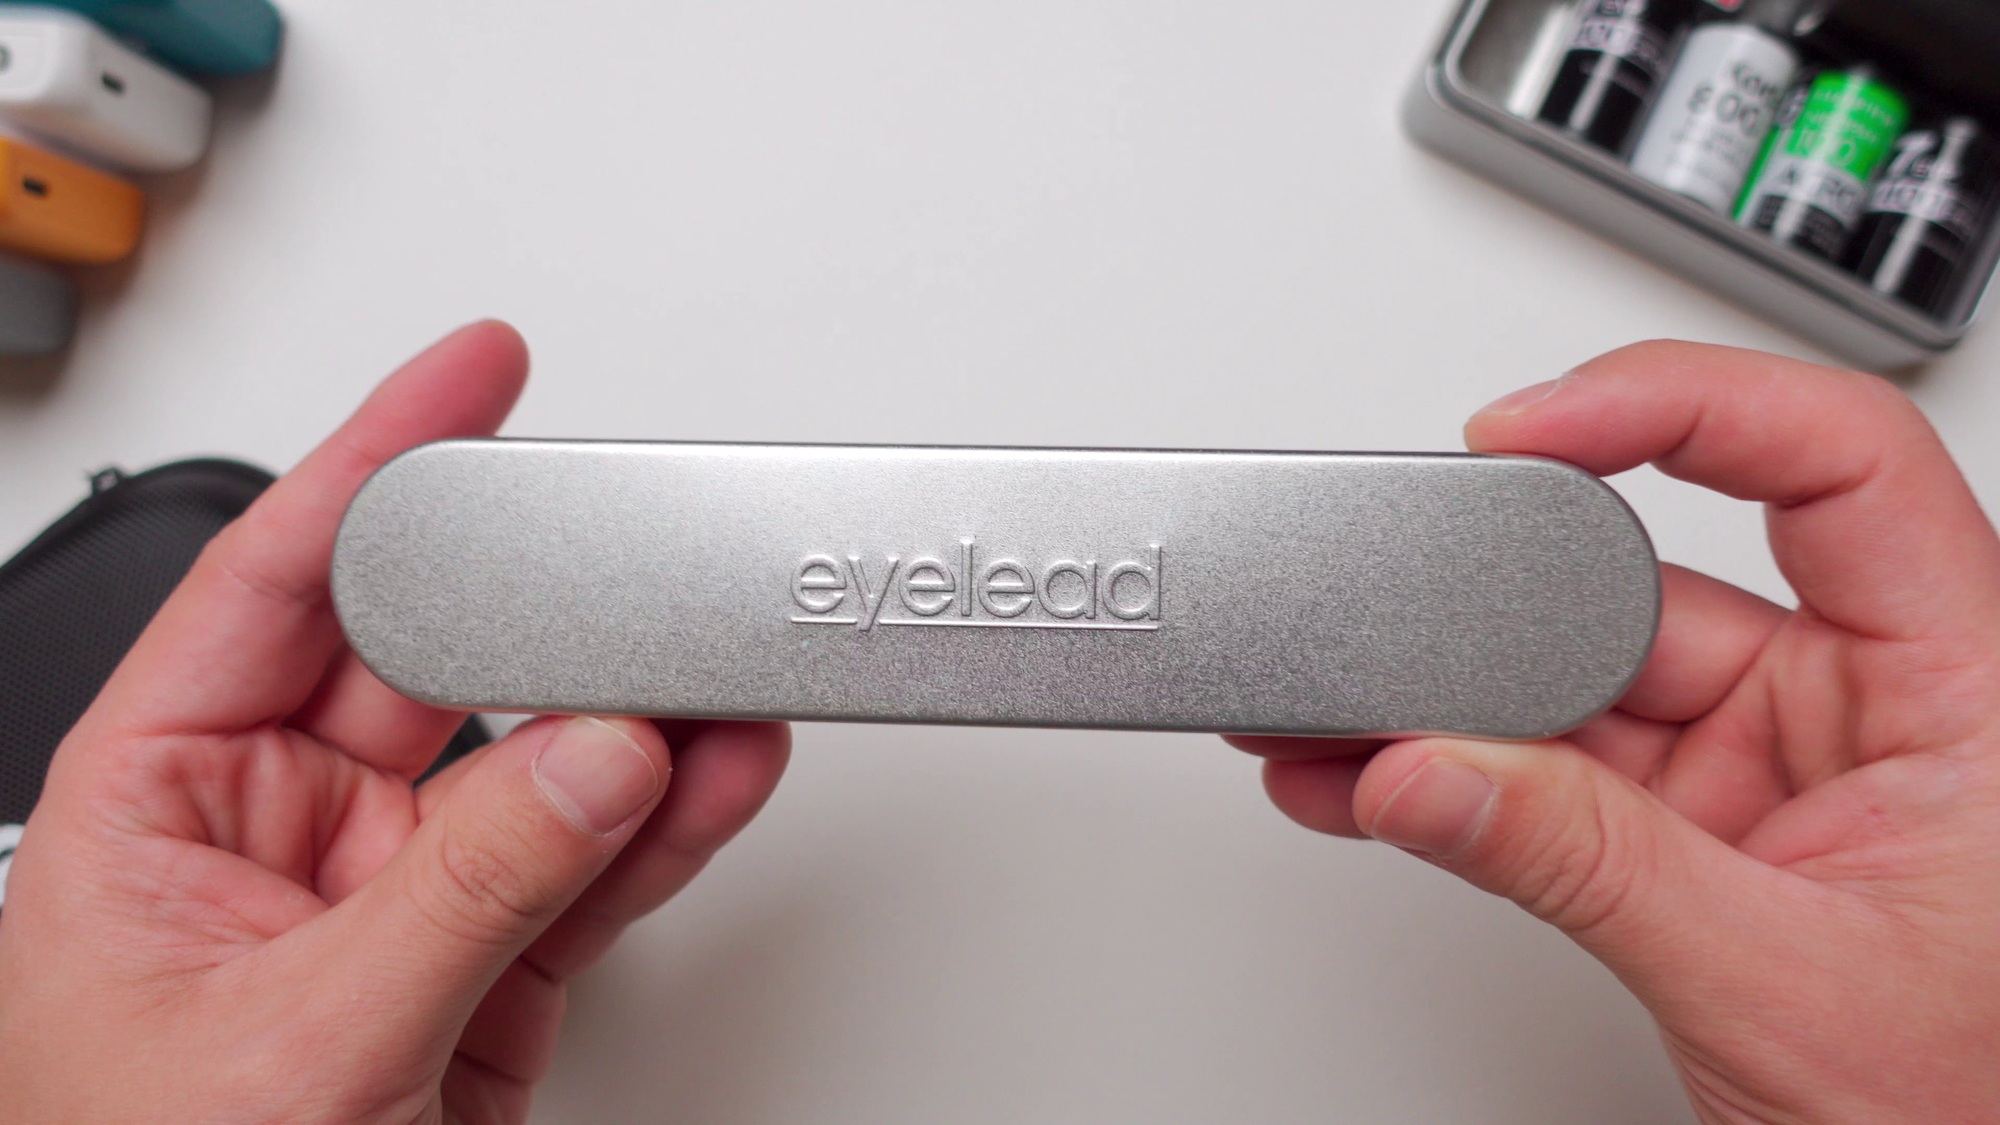
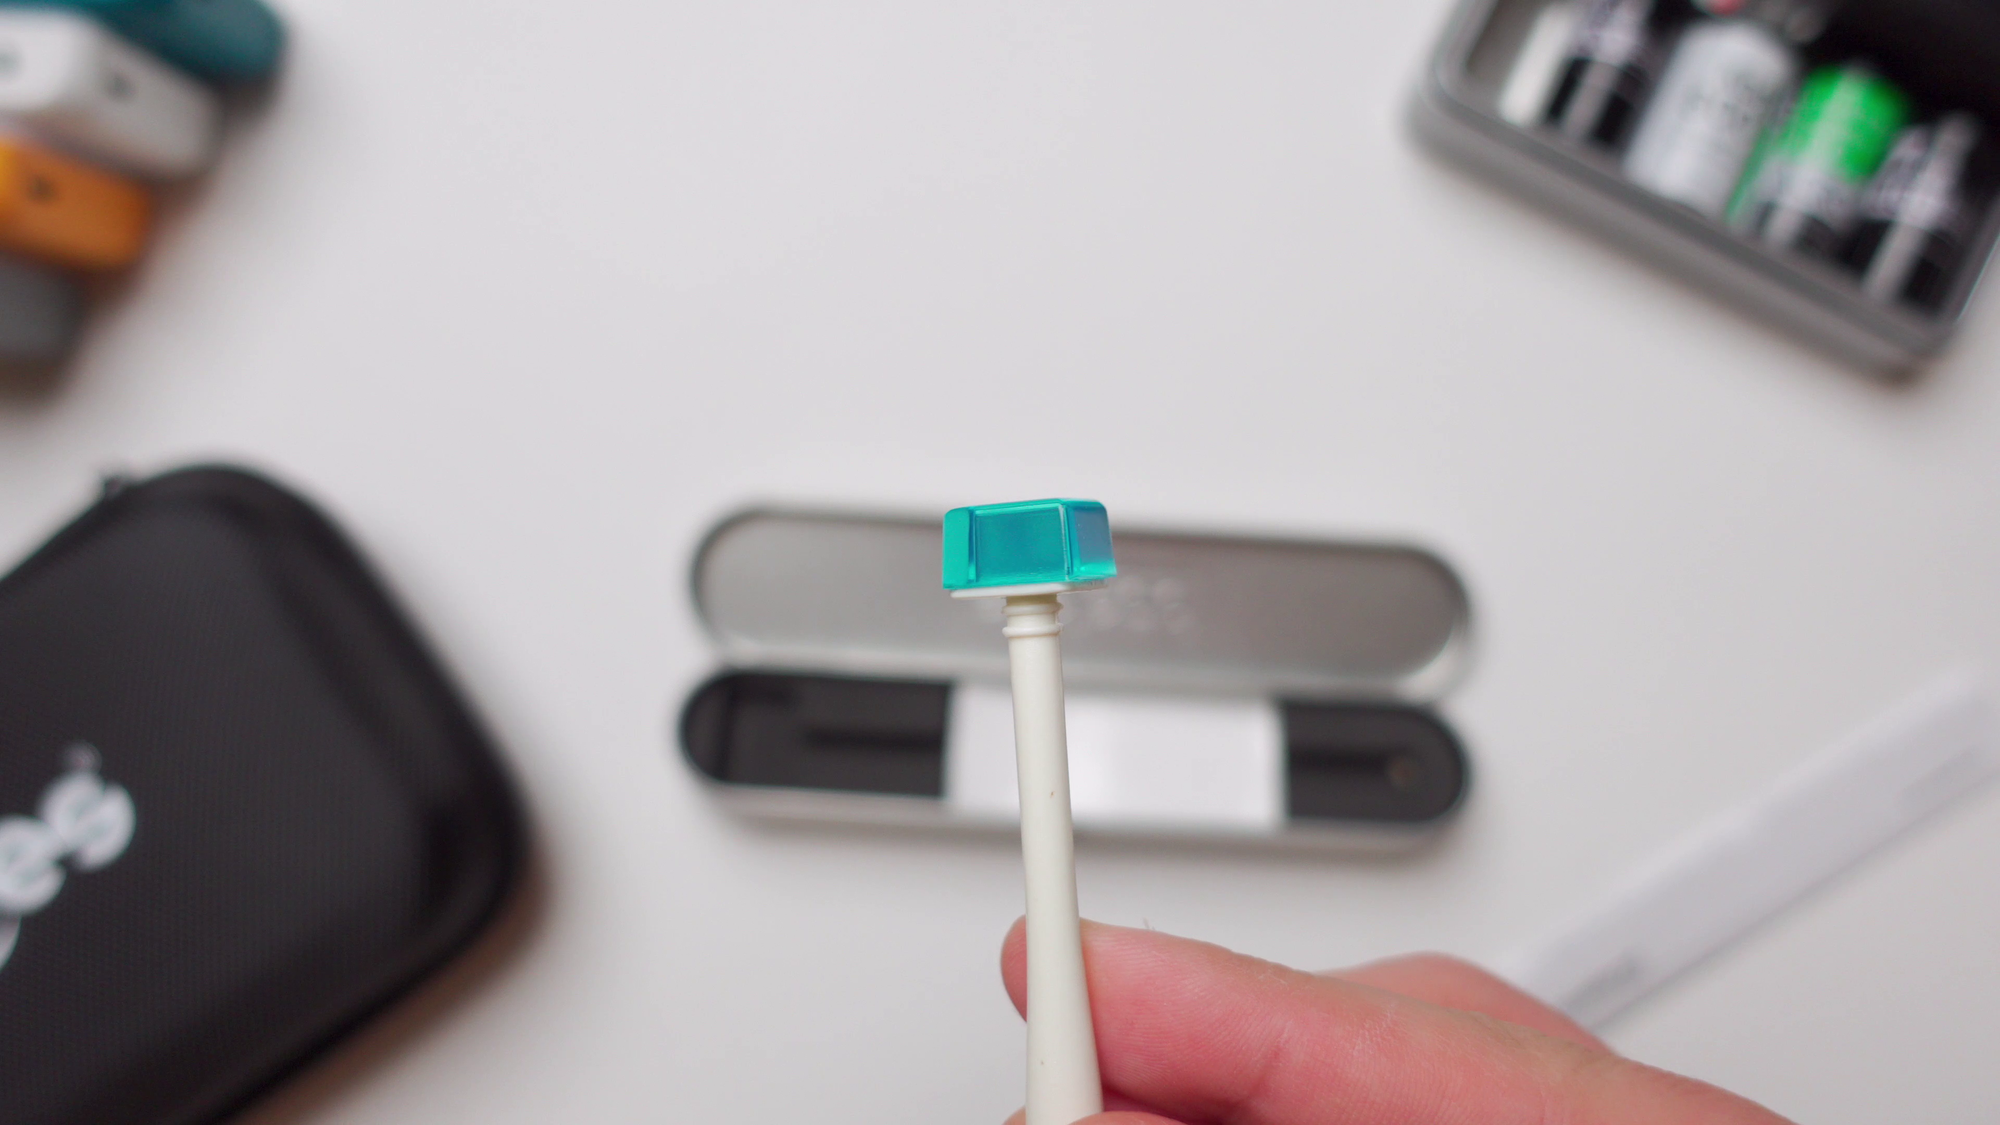
Eyelead SCK-1
The Eyelead SCK-1 comes in a handy aluminum case and some cleaning swabs for cleaning and maintaining the actual gel stick itself.
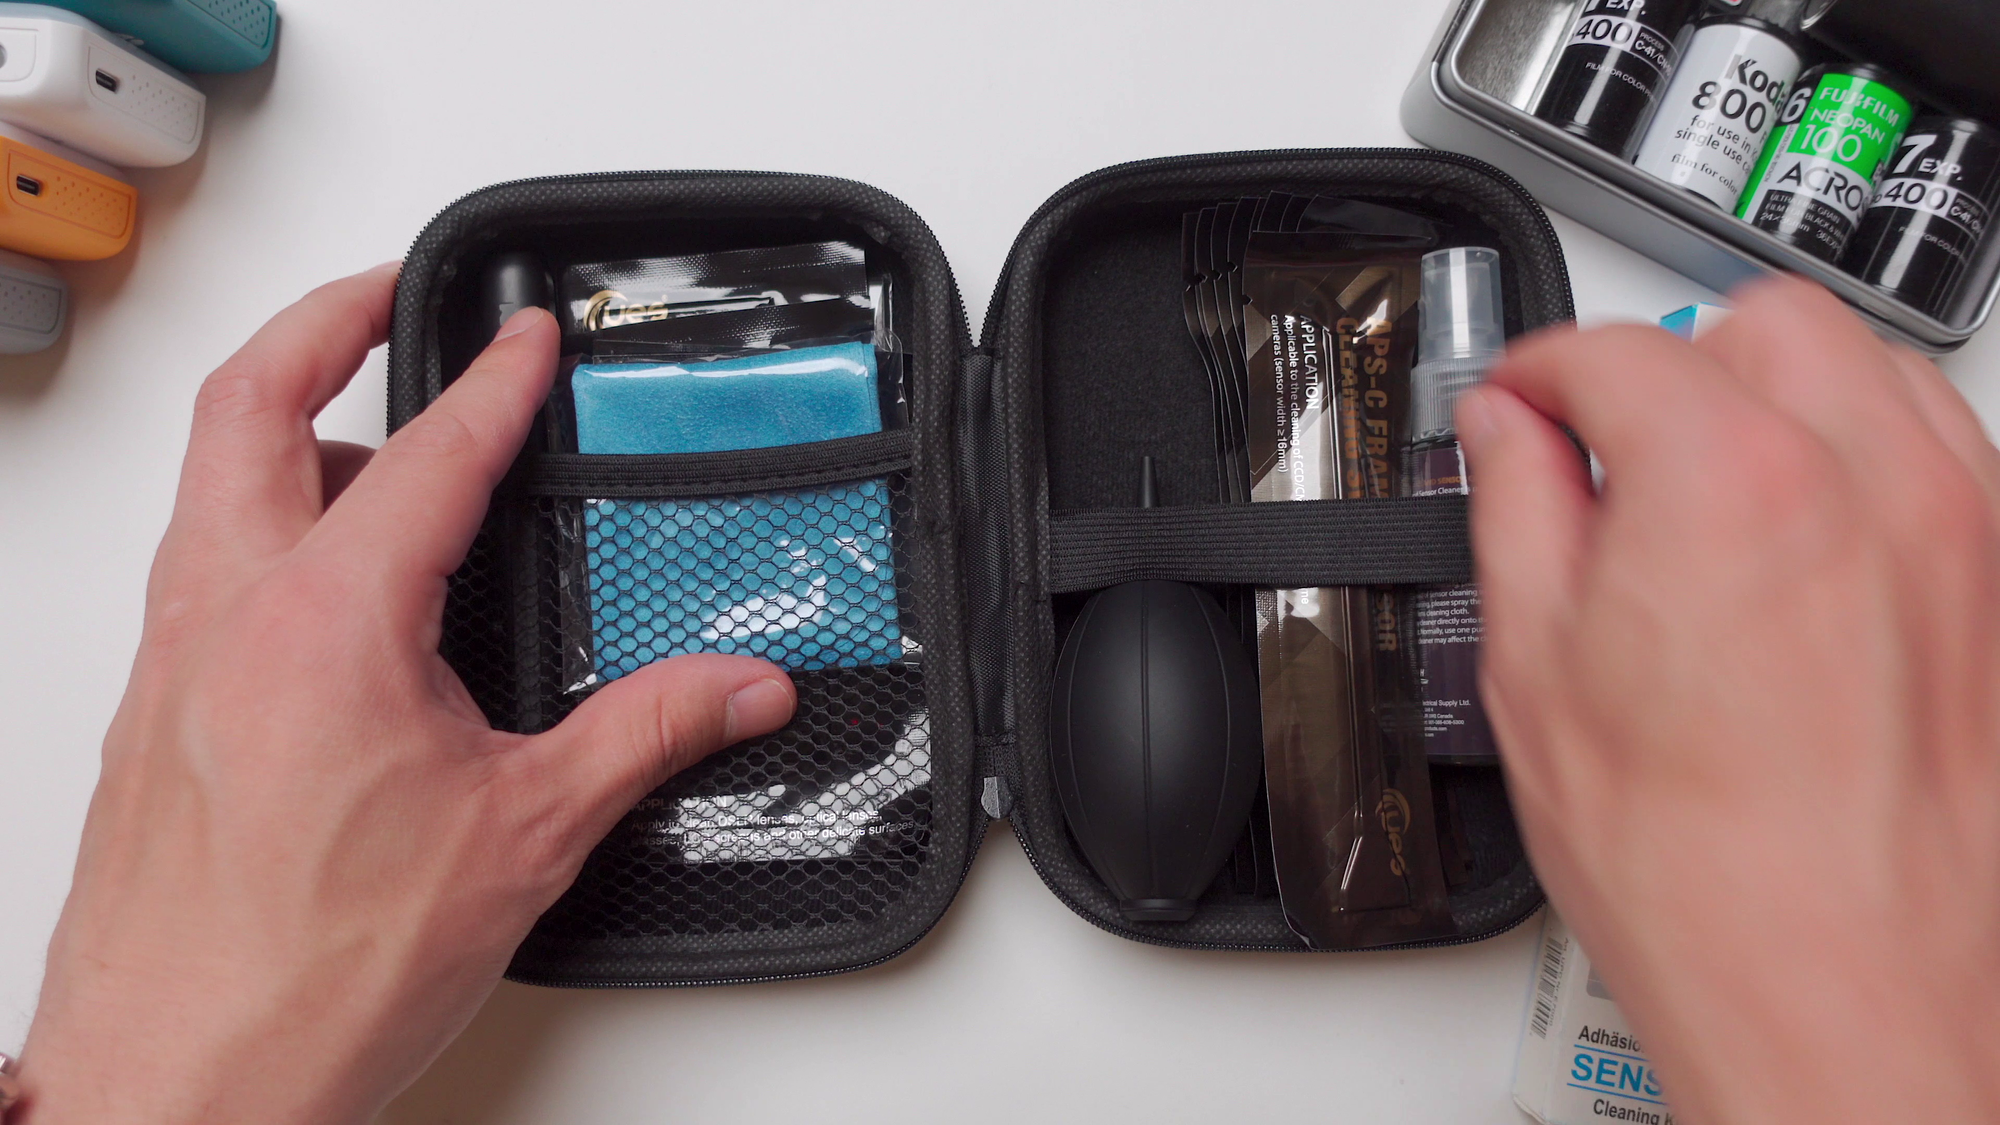
UES cleaning kit
The UES cleaning kit comes with a dust blower, APSC-sensor cleaning swabs, a microfiber cleaning cloth, a Lens cleaning pen and a cleaning solution as well. I like the fact that everything is sealed and pristine, ready to go.
Very important to note that this kit is specifically made for APC-S sensors, there are other kits made for full-frame sensors as well, so please make sure you buy the correct one.
These tools are very affordable, and a no-brainer in my opinion, especially if you’re going to be cycling through used equipment, camera and lenses like I do here on the channel. More info on my gear page:
 Jorge Perez
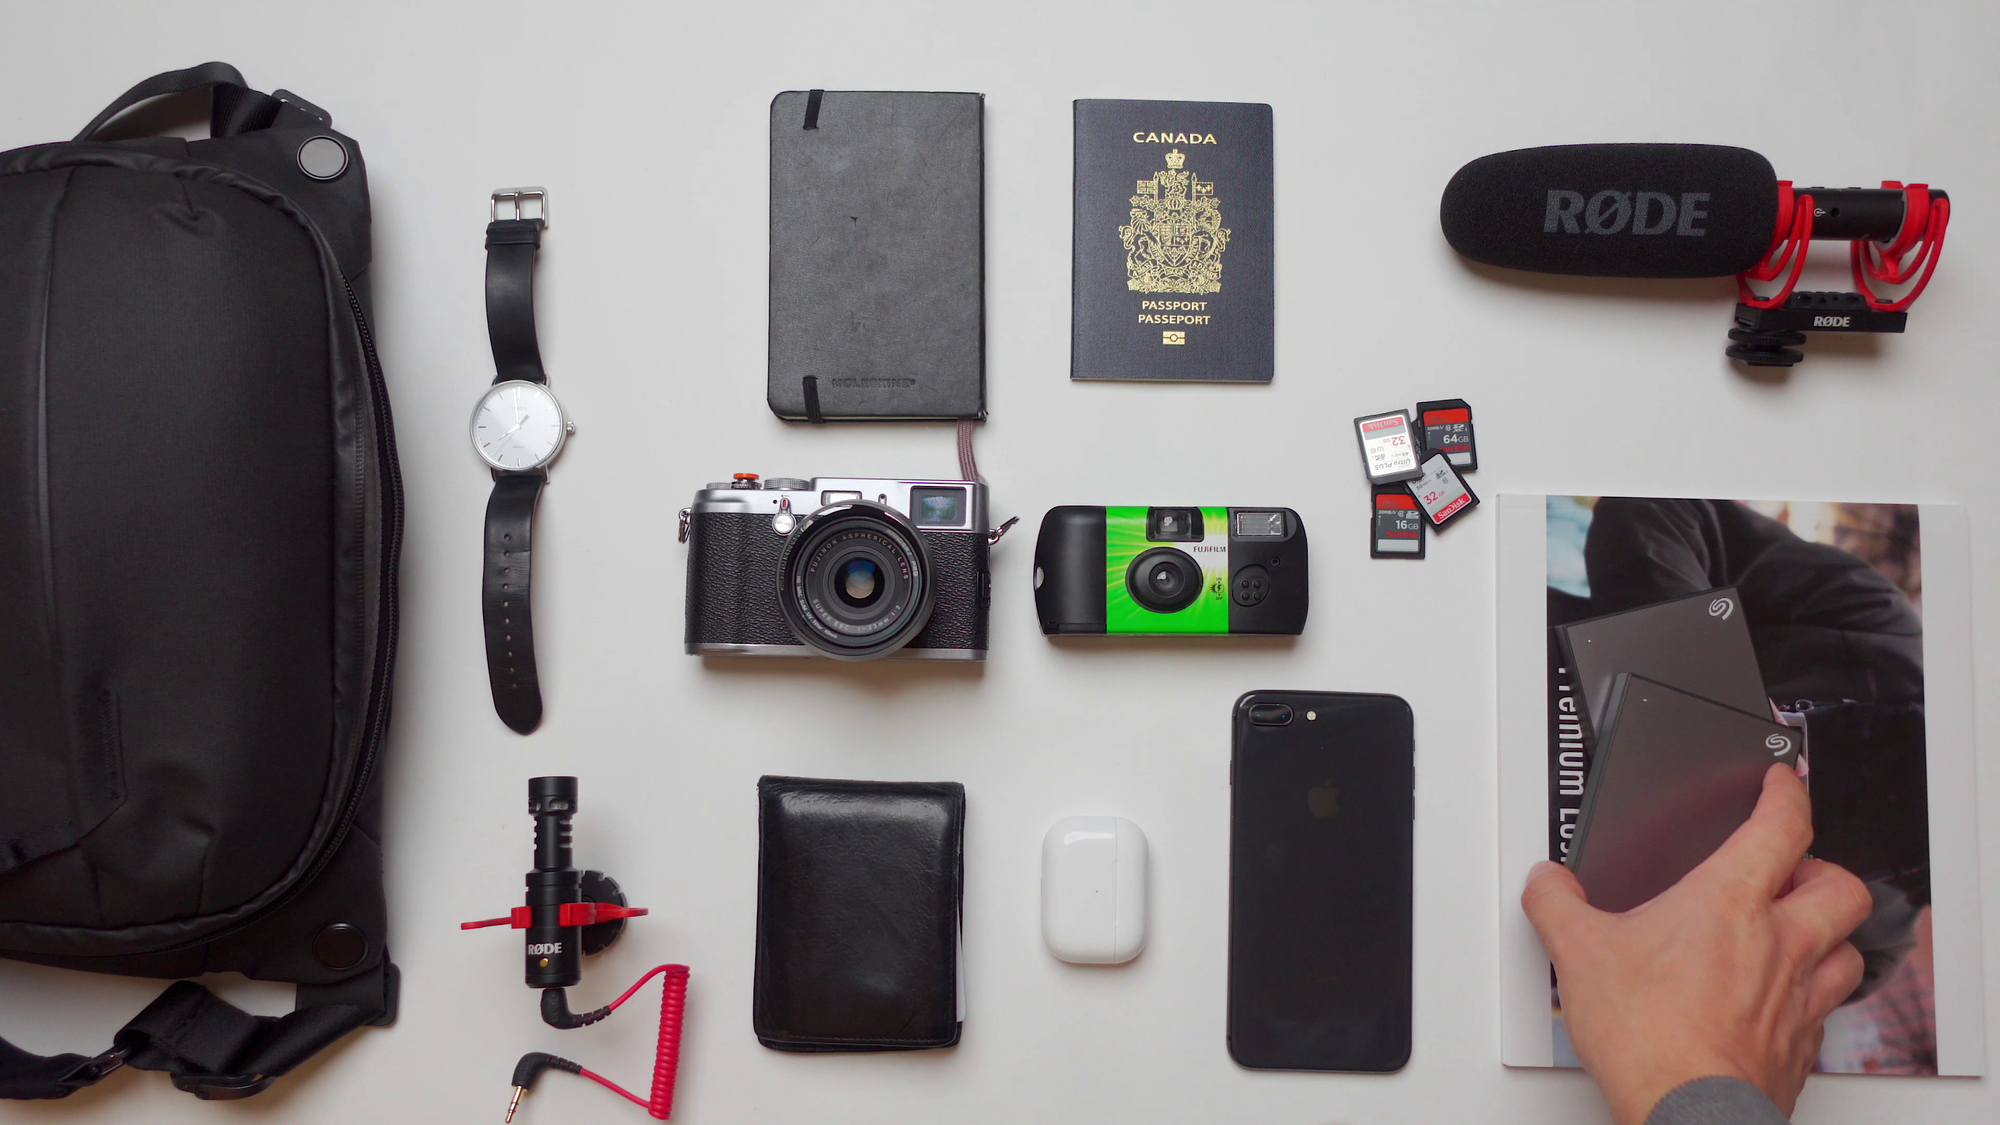
Before We Start The Cleaning Process
First, this gel stick SCK-1 is not made to be used with any Sony mirrorless cameras. They have a warning on their product page, going into detail about the coating technology on Sony cameras, so keep that in mind.
Second, some cameras will have cleaning options in the menu to either enable cleaning mode or disable/enable sensor stabilization. Most of the cameras that I review are older and don’t have any sort of stabilization, so I don’t have to worry about it, but do your research and check your camera and your models before you start.
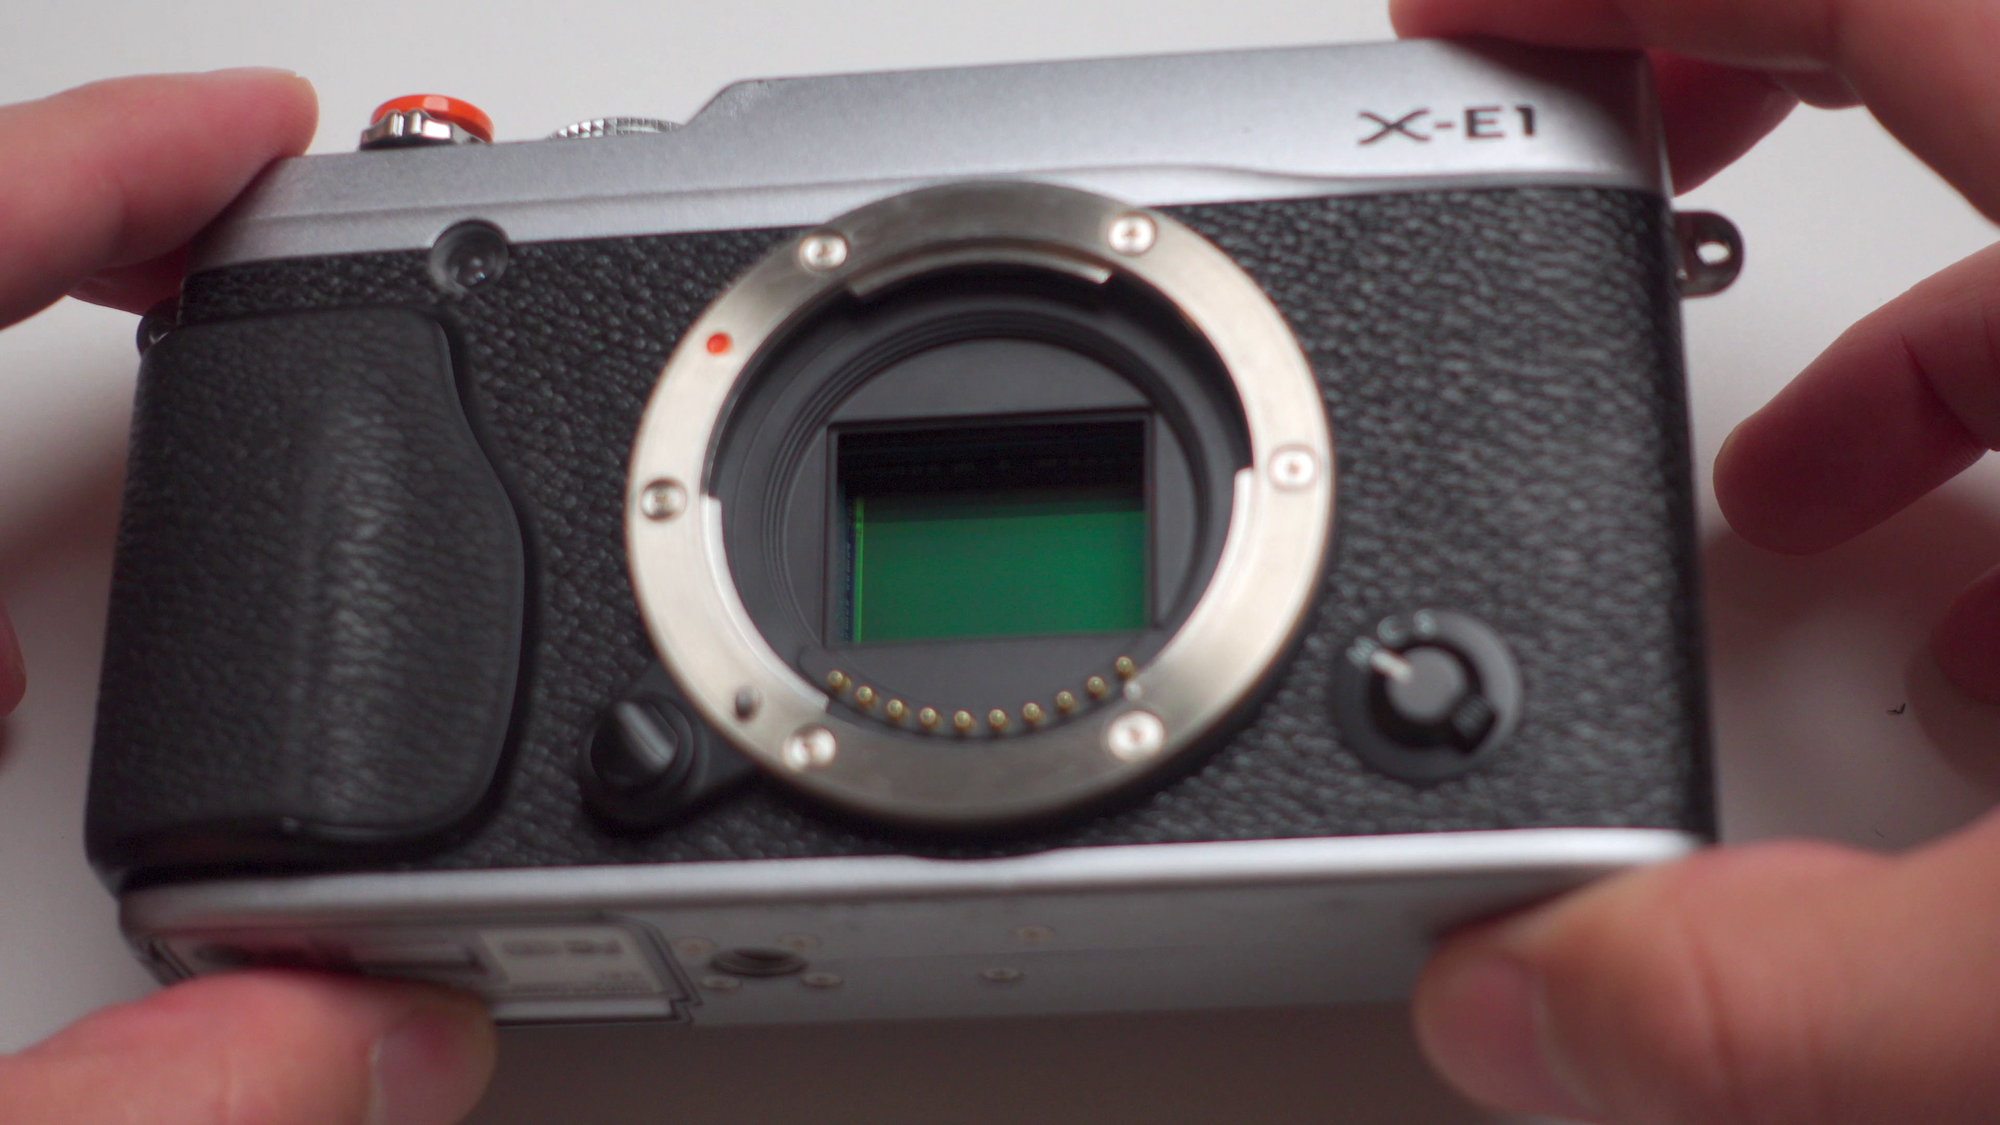
What we are cleaning is a layer of glass on top of the sensor, be gentle with it, but at the same time don’t be scared the press against it to properly clean it.
Last but not least, make sure you’re in a controlled environment, where it’s not super dirty or dusty everywhere, otherwise, it defeats the purpose of trying to clean the sensor.
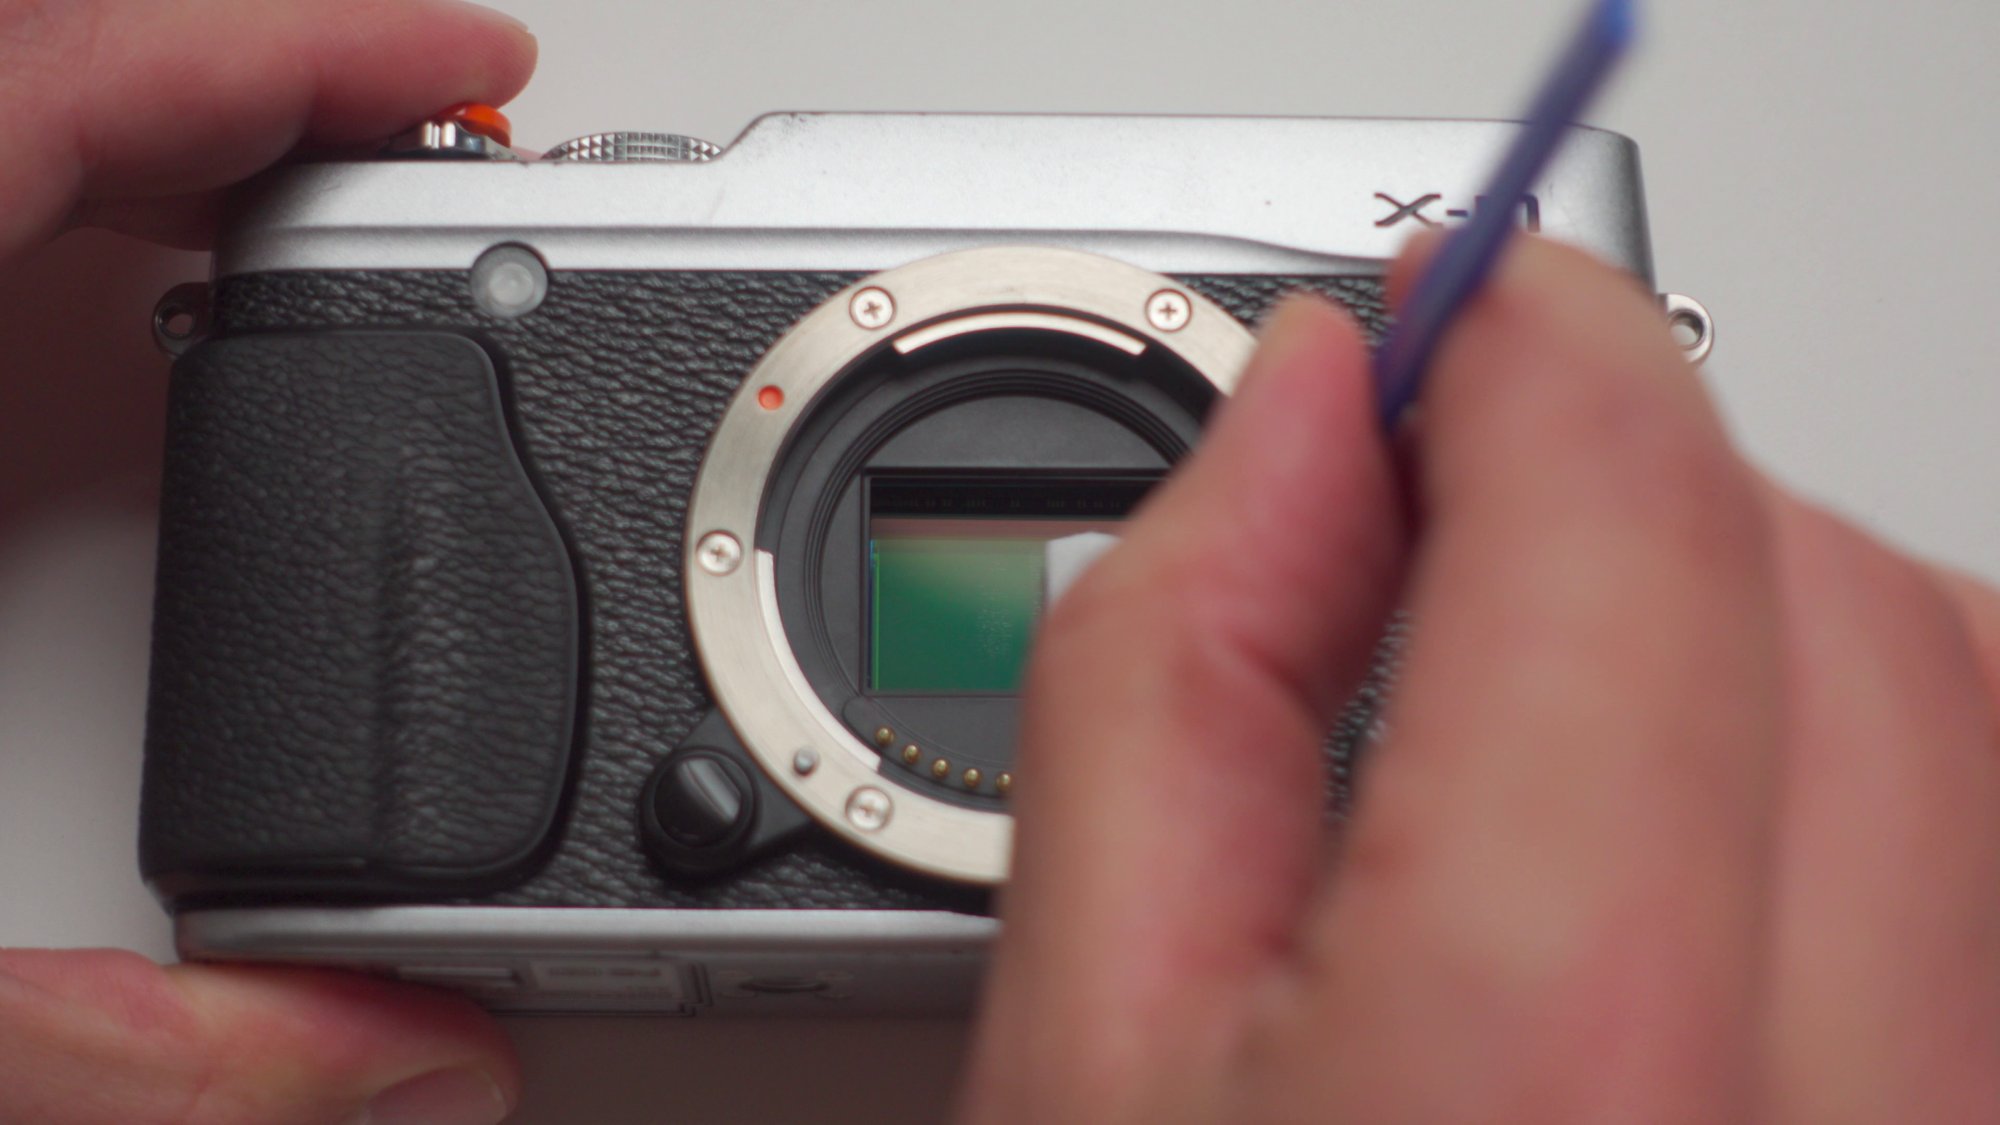
Method #1: Gel Stick
This method is very simple, it works well with light dust particles, but not so much with deep dust spots, smudges, skin oil, etc.
It’s a quick way to clean up what you can, especially if you’re travelling and don’t really have access to a desk or don’t have time to sit down and properly clean the sensor with swabs and cleaning solutions.

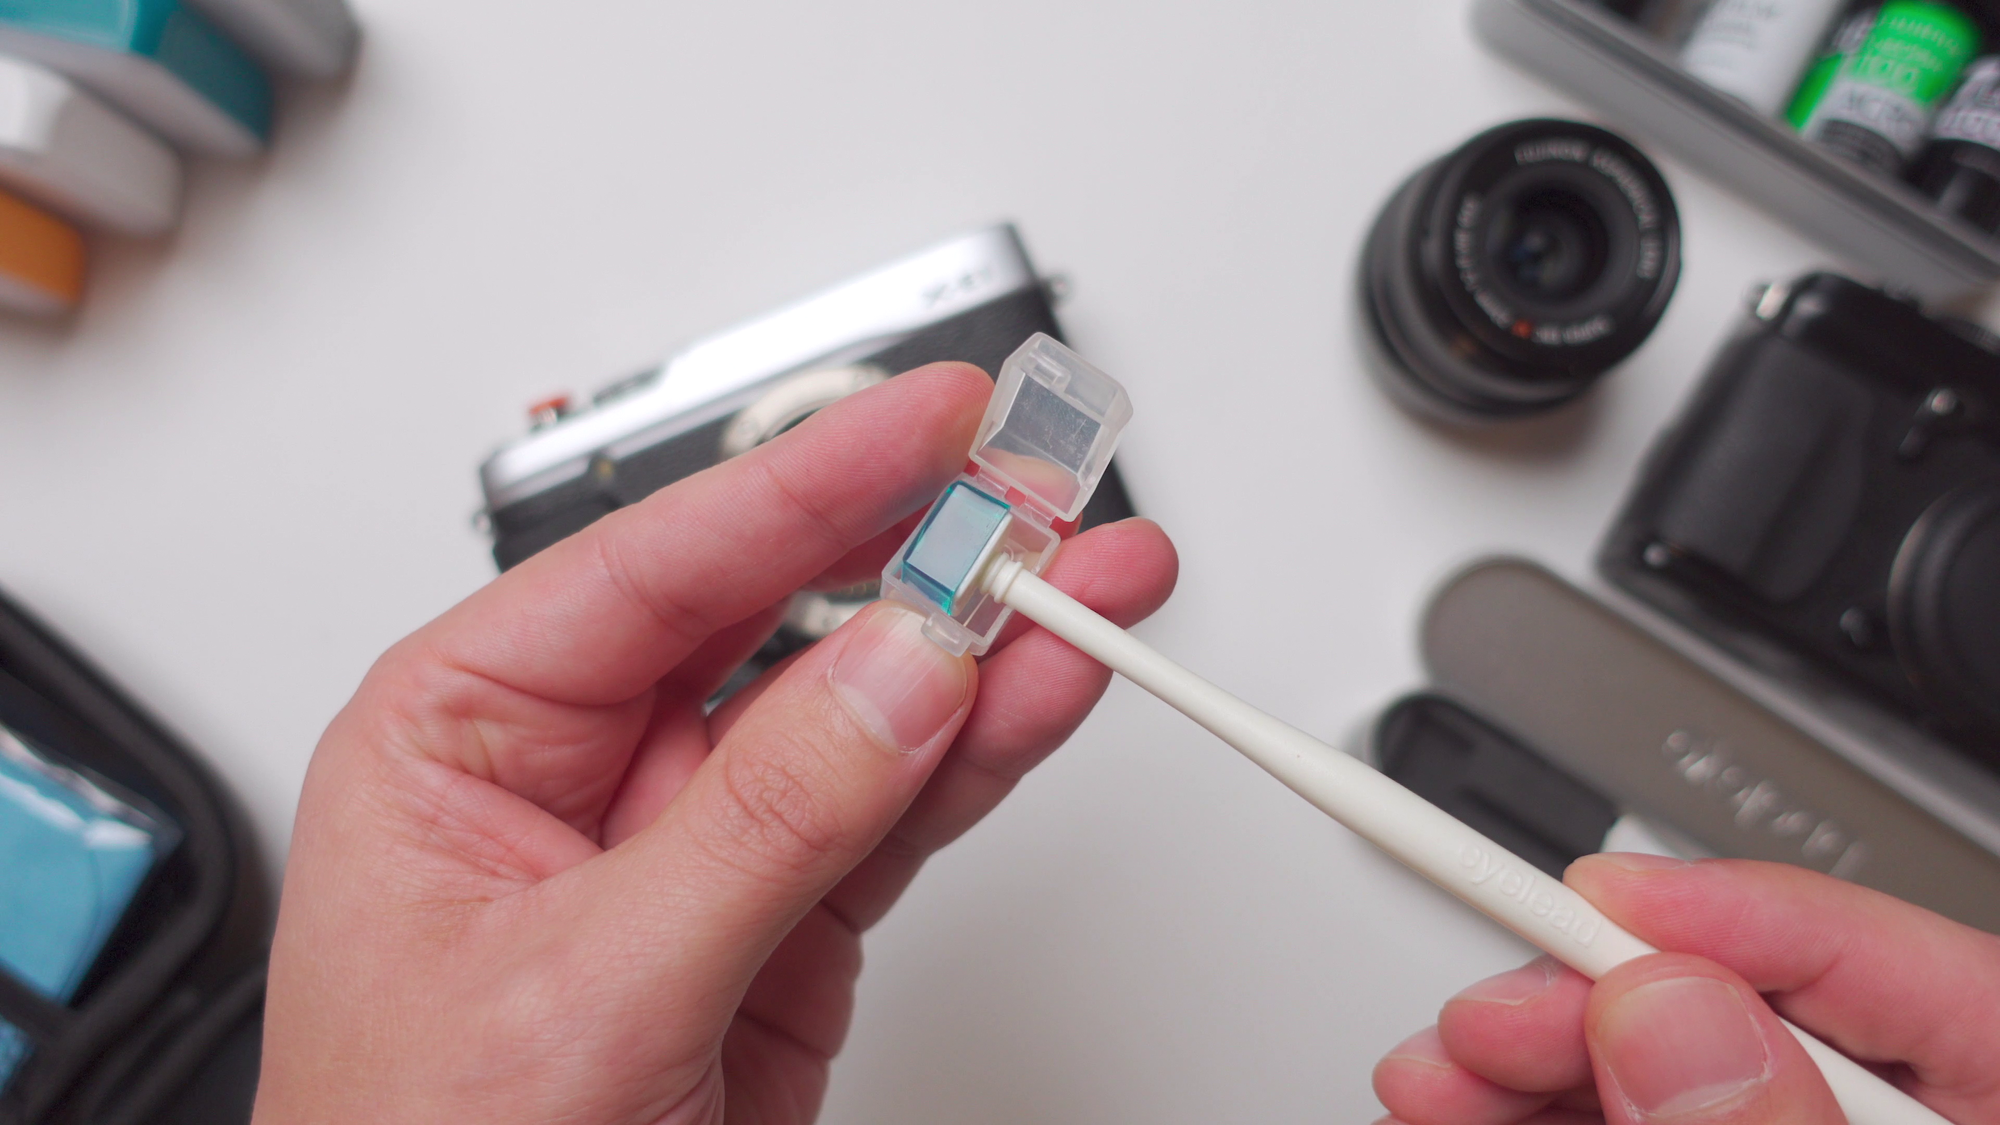
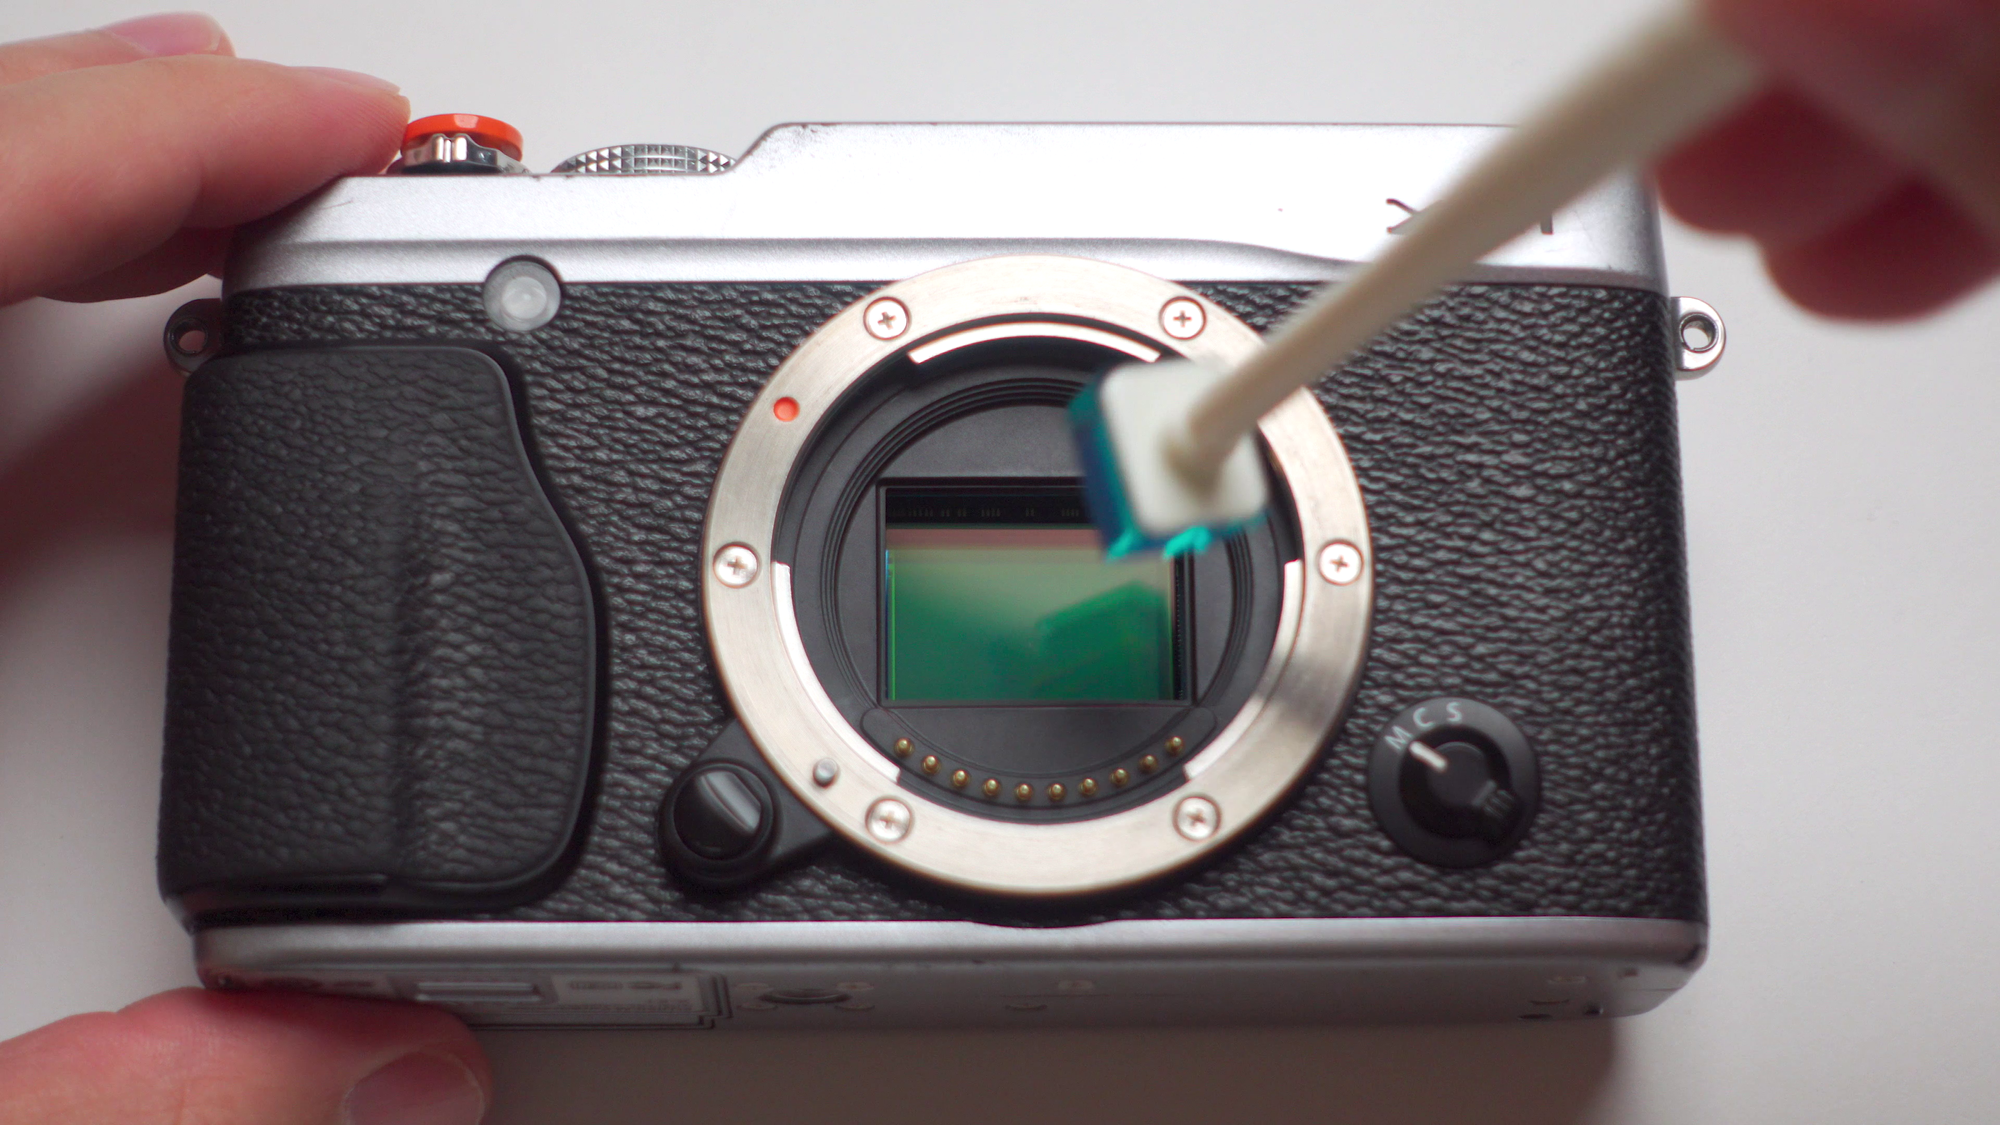
Remove the lens cap and the gel stick cap. Take your gel stick and press it gently against the sensor, the gel tip will absorb any sort of light dust particles and light spots.
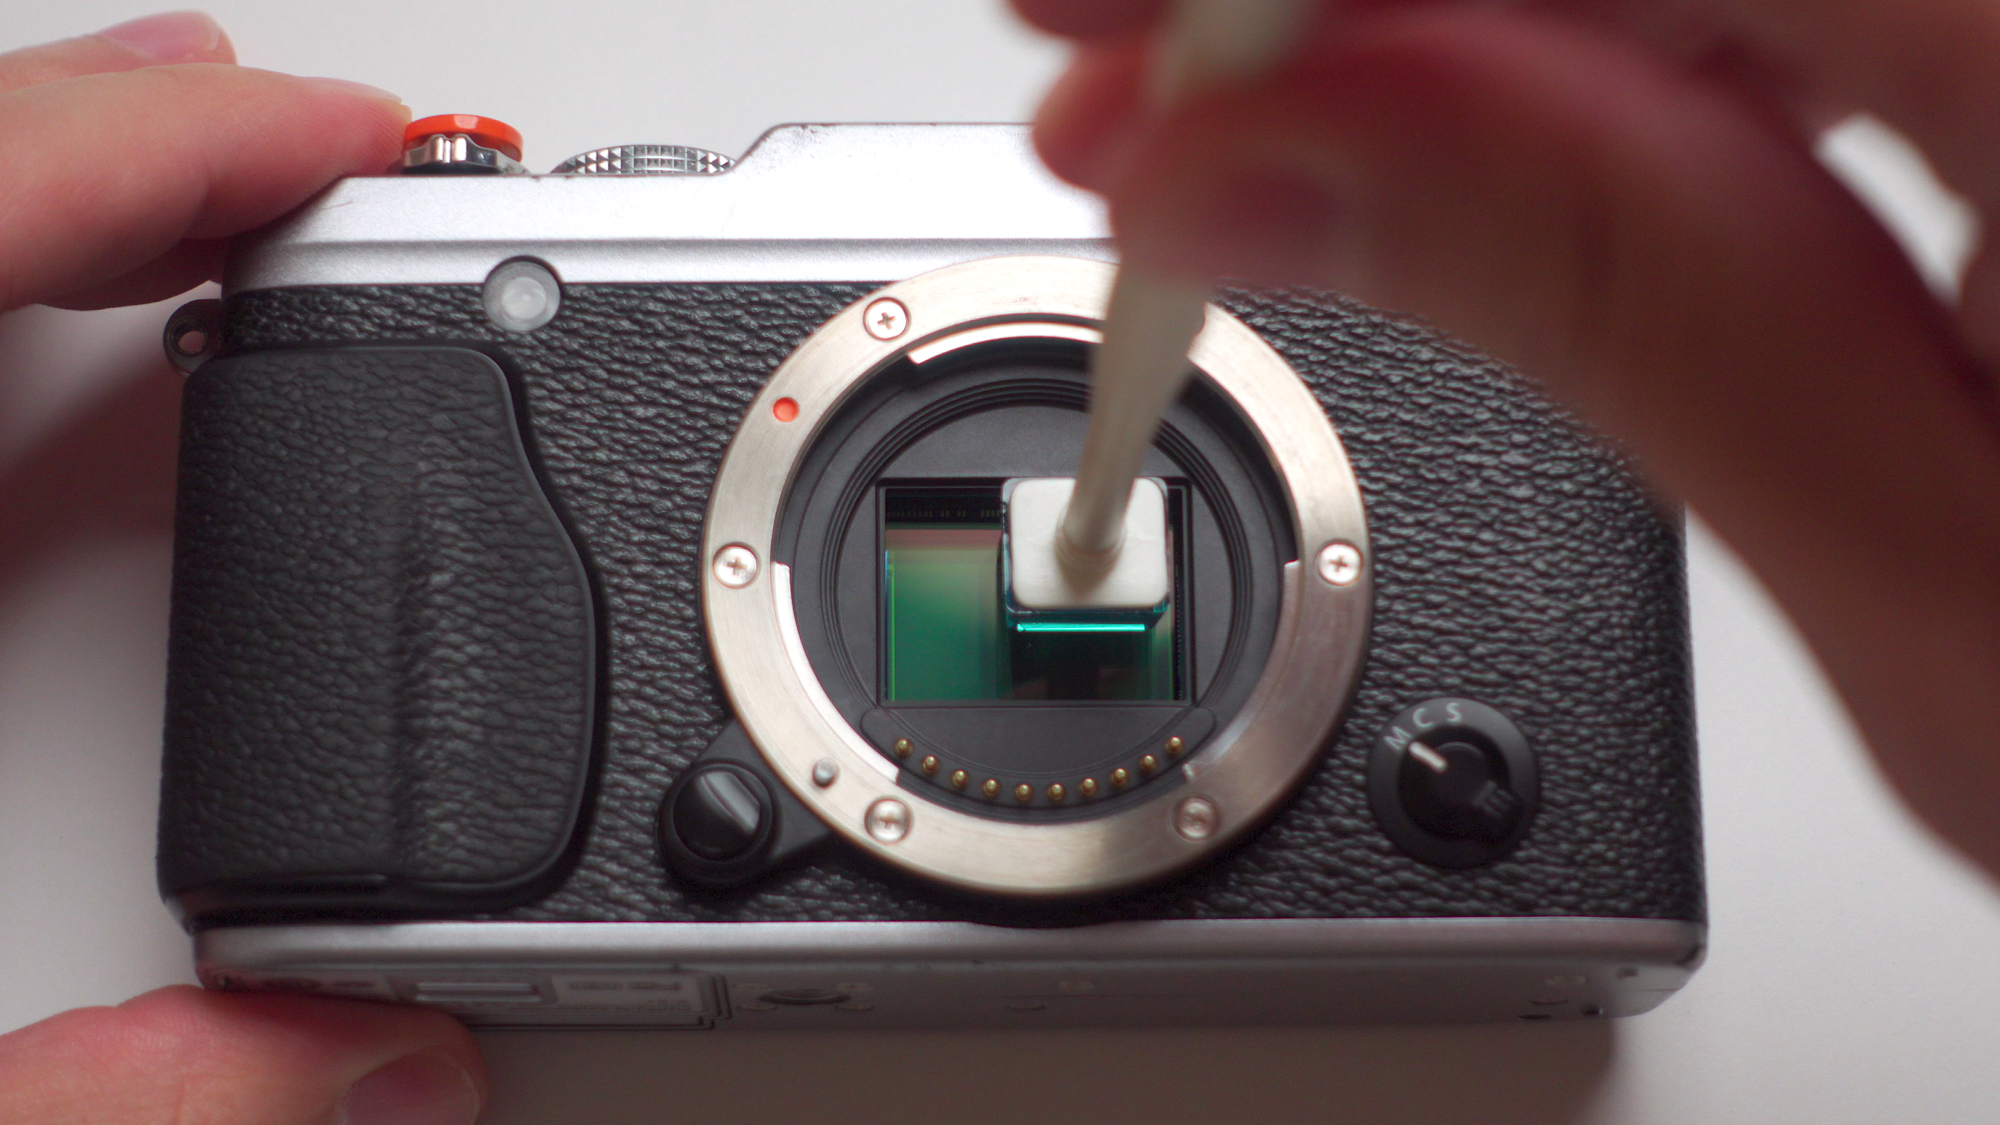


Gel stick cleaning process
Keep going until you cover all of the sensor's surface area. When you’re done, make sure you use the provided cleaning paper to clean the actual gel tip before you store it.
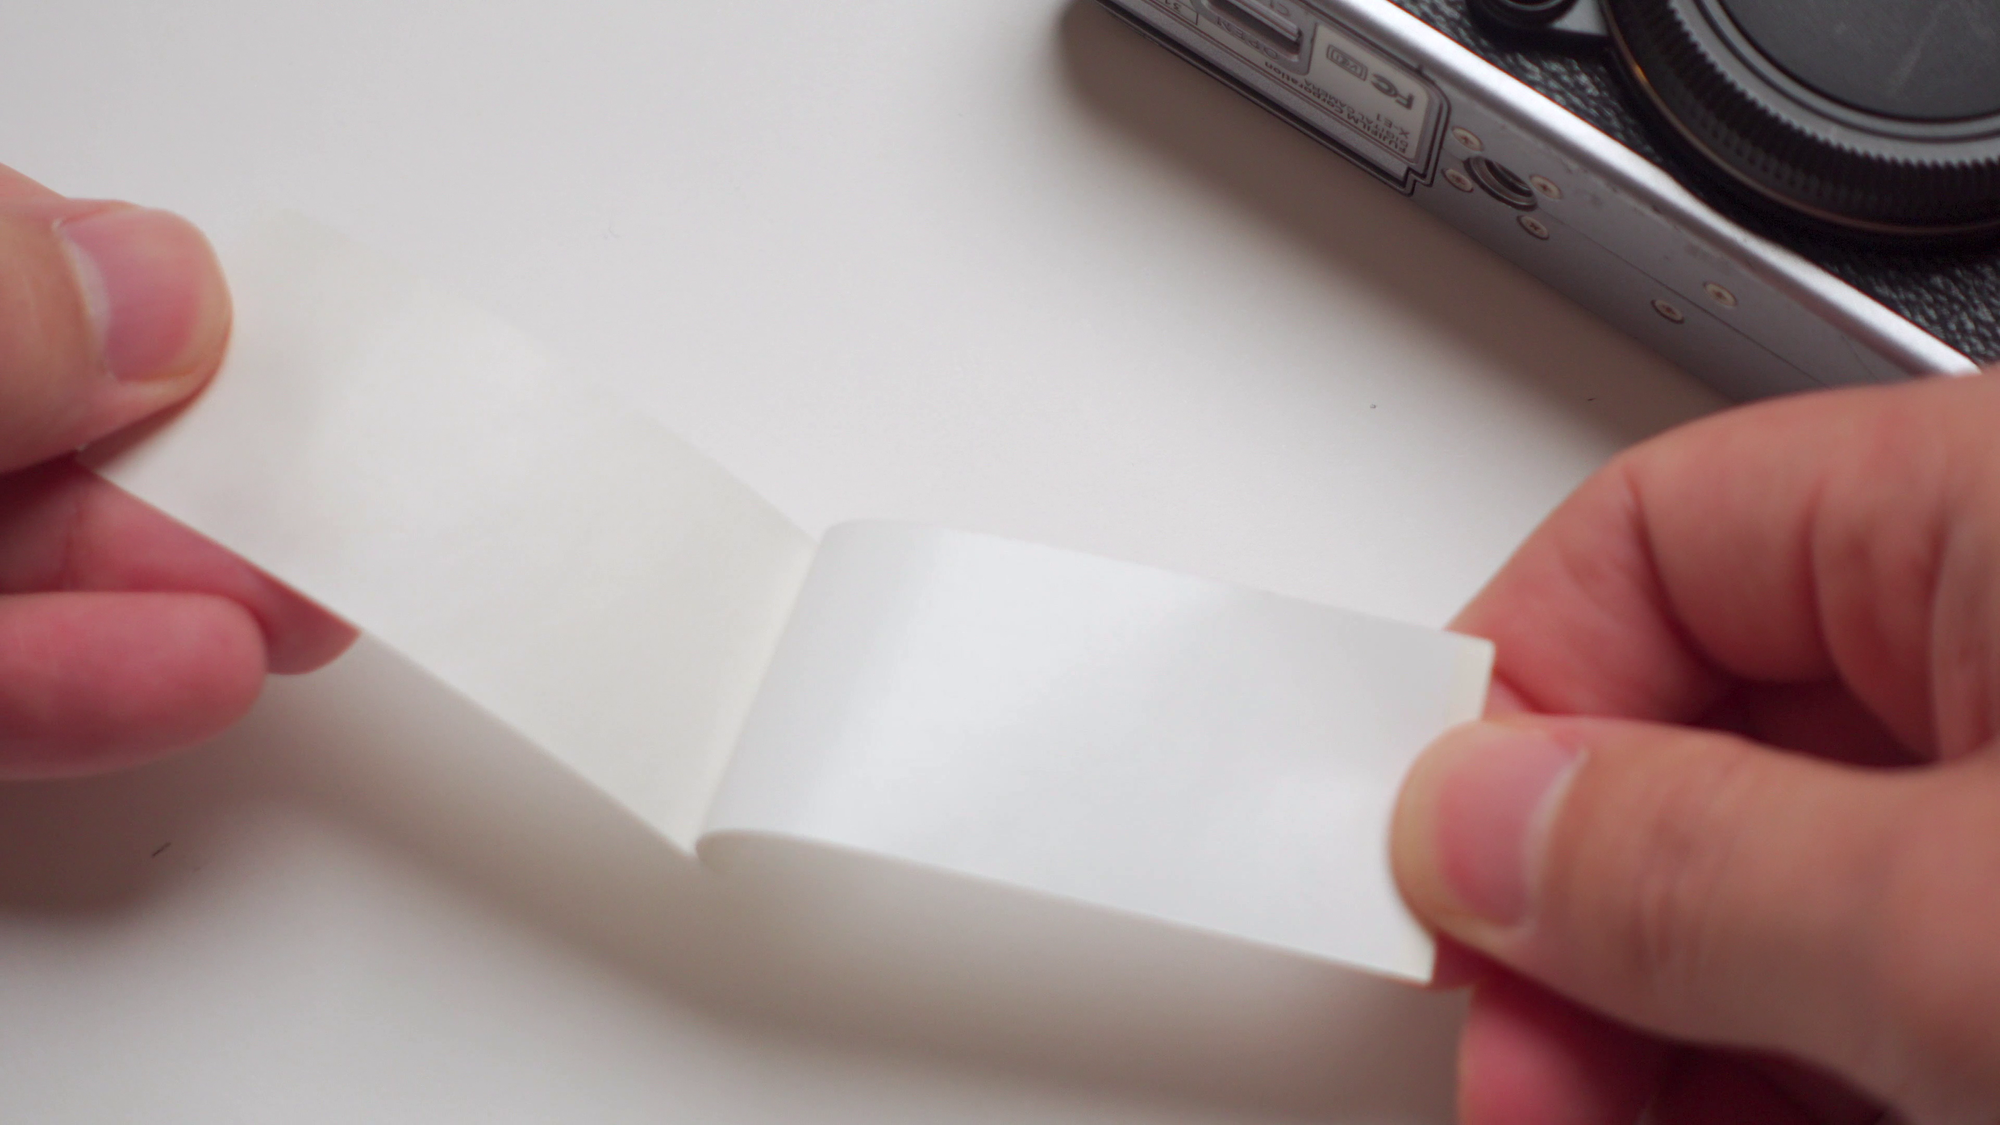

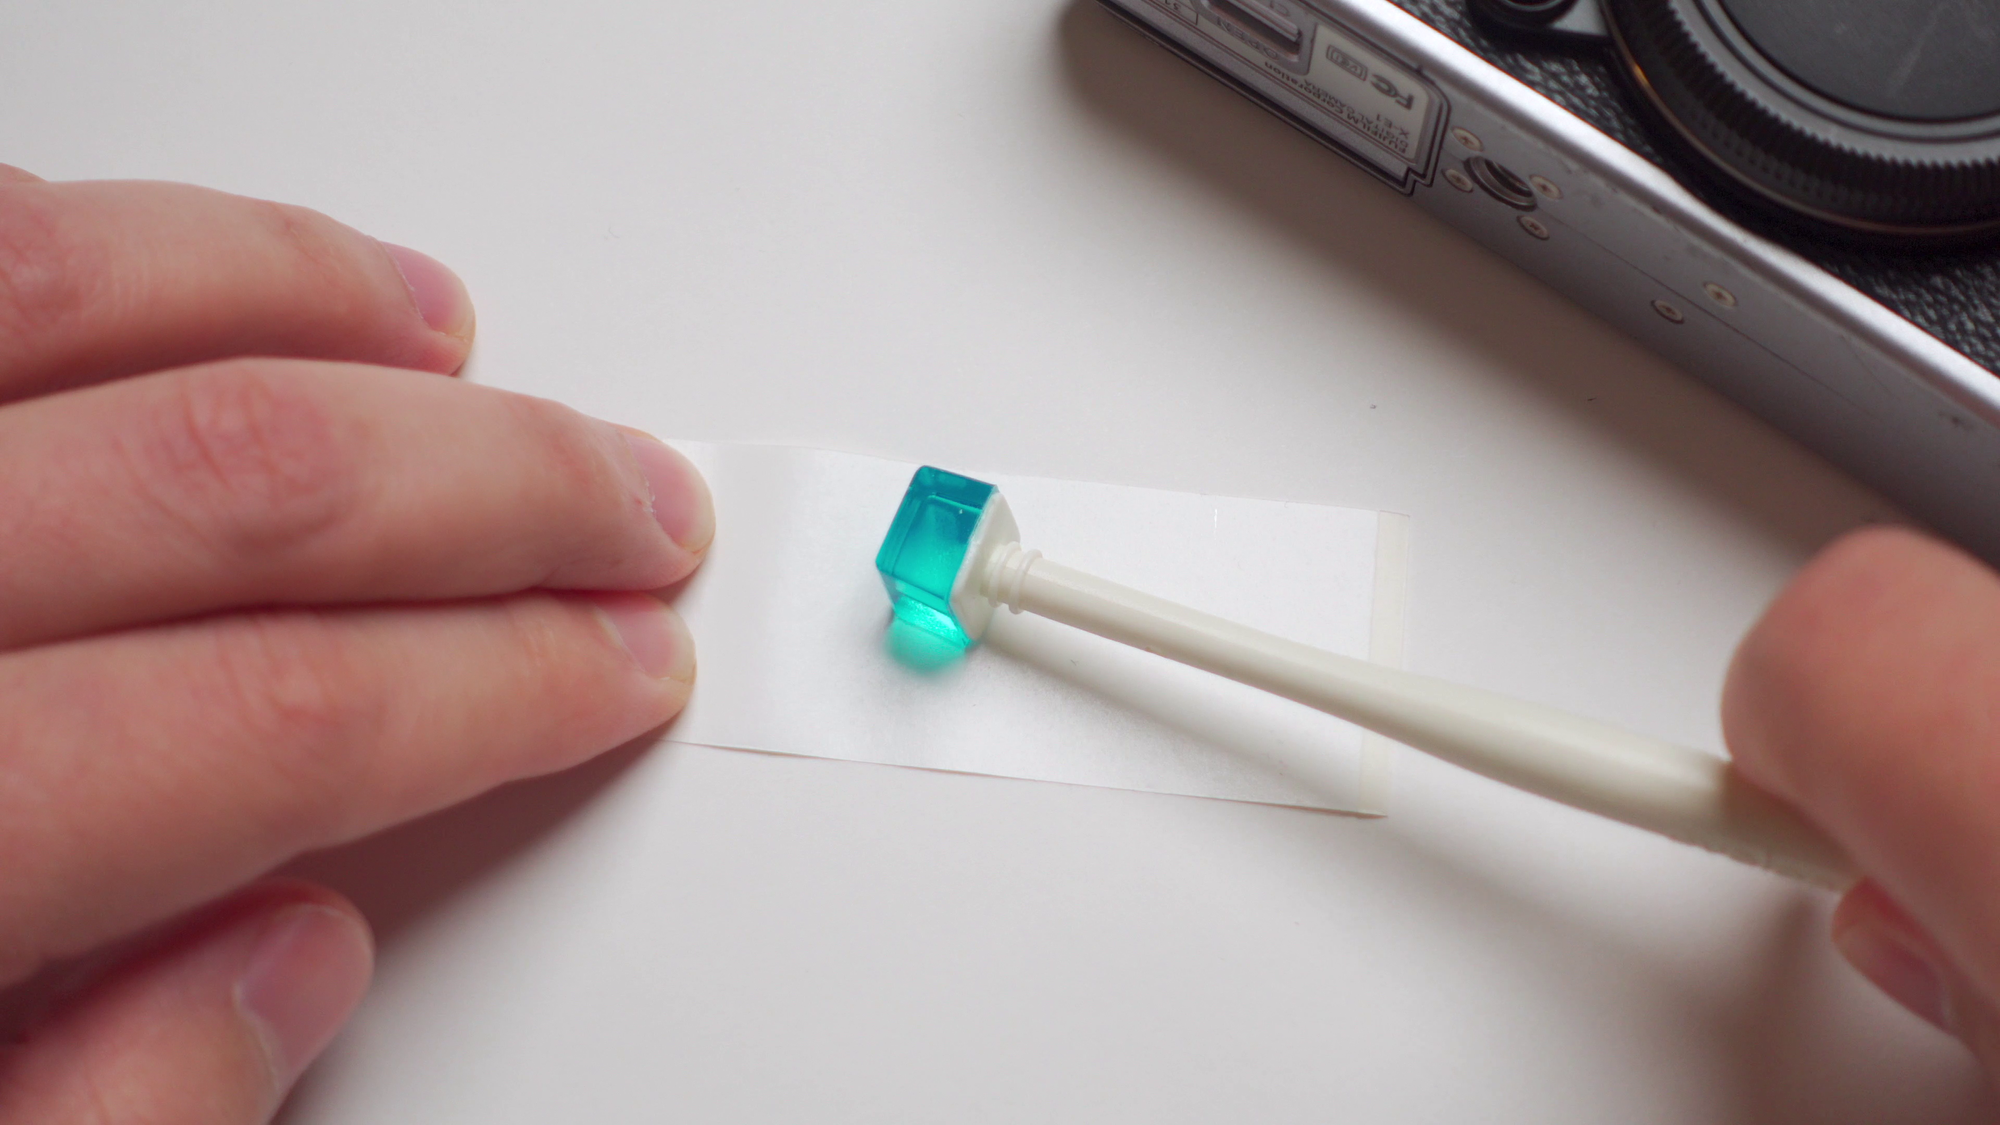
Gel tip cleaning process before storing
Take the photograph after that process is done and check your results. It will help quite a bit, but more often than not, it will not completely clean your sensor. Let's move to method #2.
Method #2: Sensor Swab
This method can be nerve-racking for some people, but it’s the best way to clean the sensor. It involves getting the swabs wet with the included cleaning solution, and that does remove smudges, skin oil, saliva spots and things that the gel stick cannot.
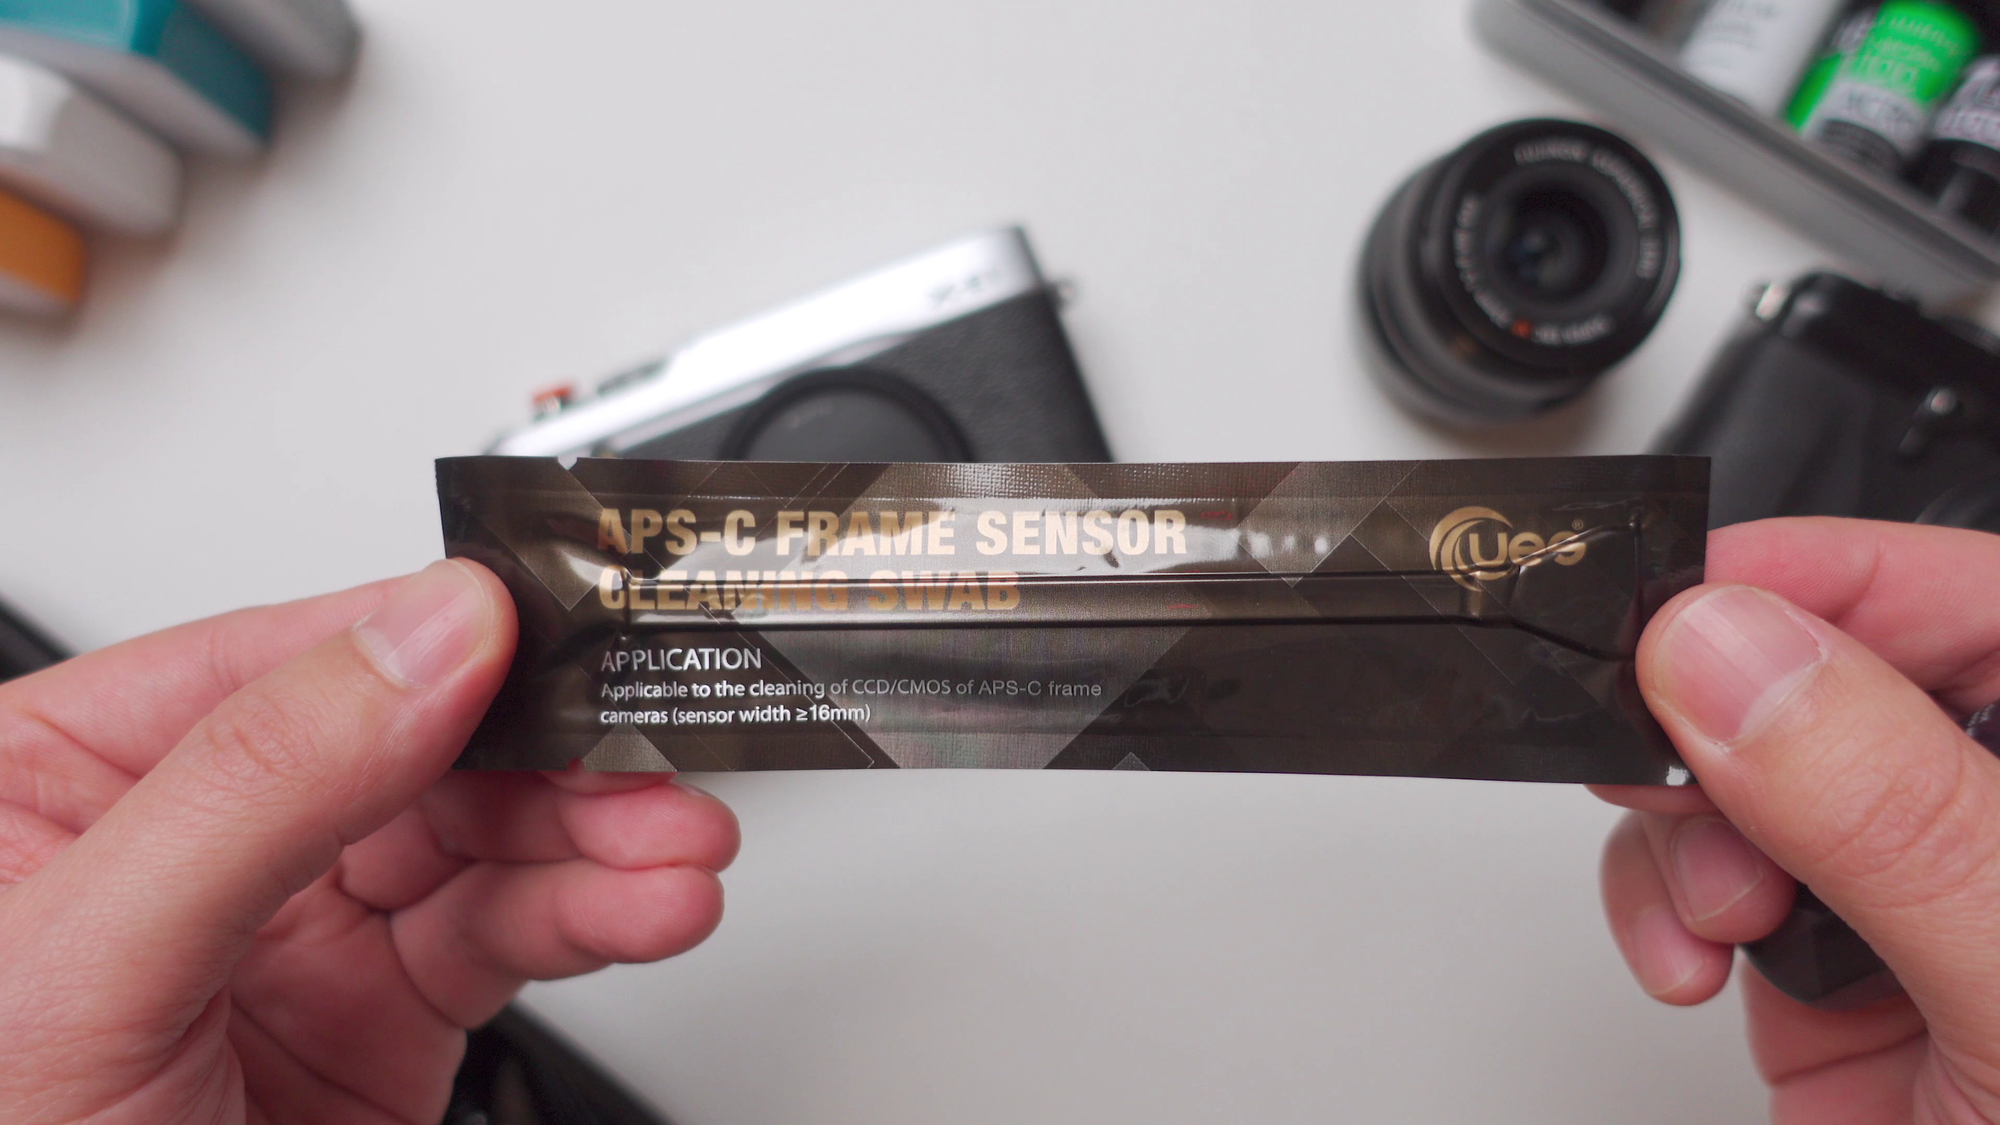
We’ll be using a cleaning swab and the sensor cleaning solution. There are instructions on the swab just in case you’d like to go over some of these before you start.
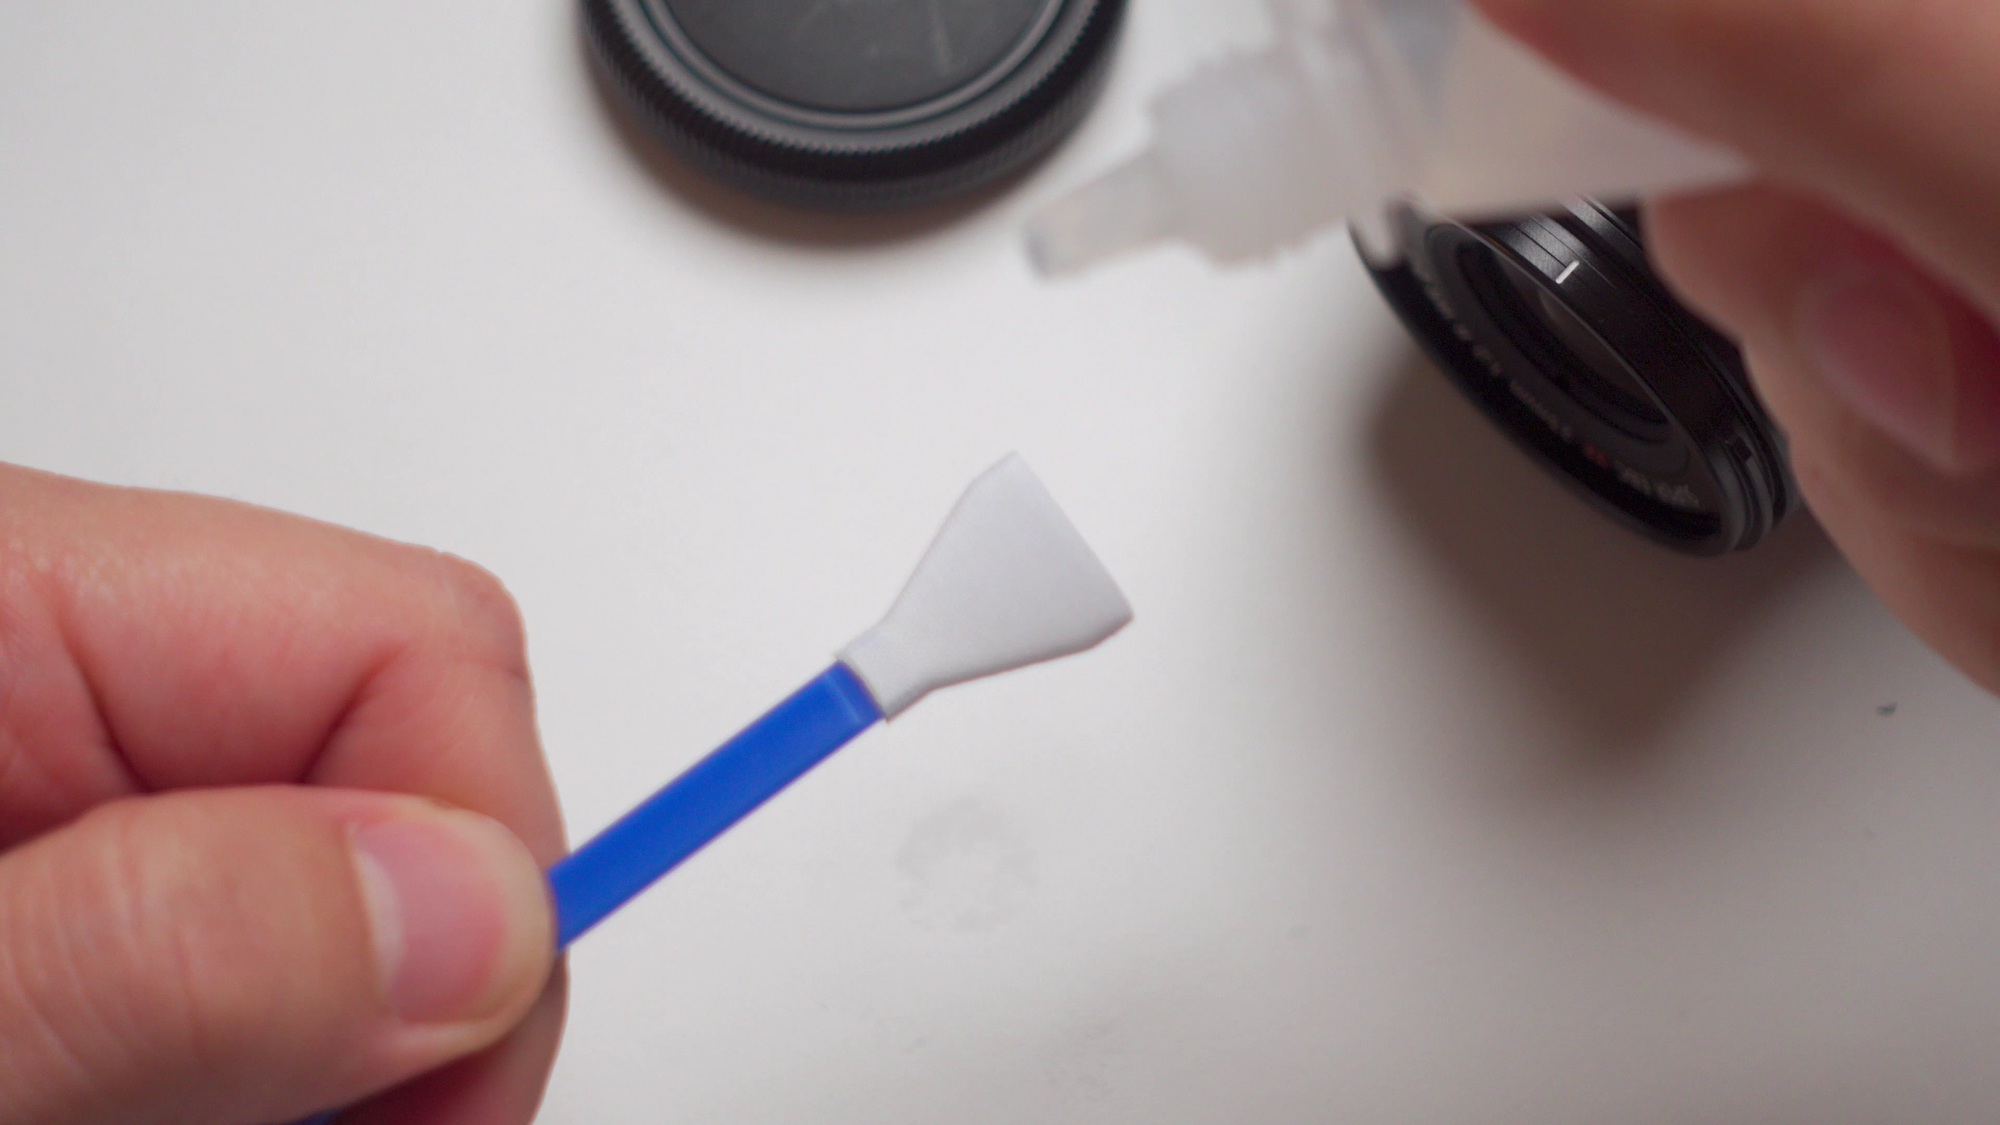
Use a maximum of 2 drops of cleaning solution on the cleaning swab. Any more than that, and the swab will leave a residue.
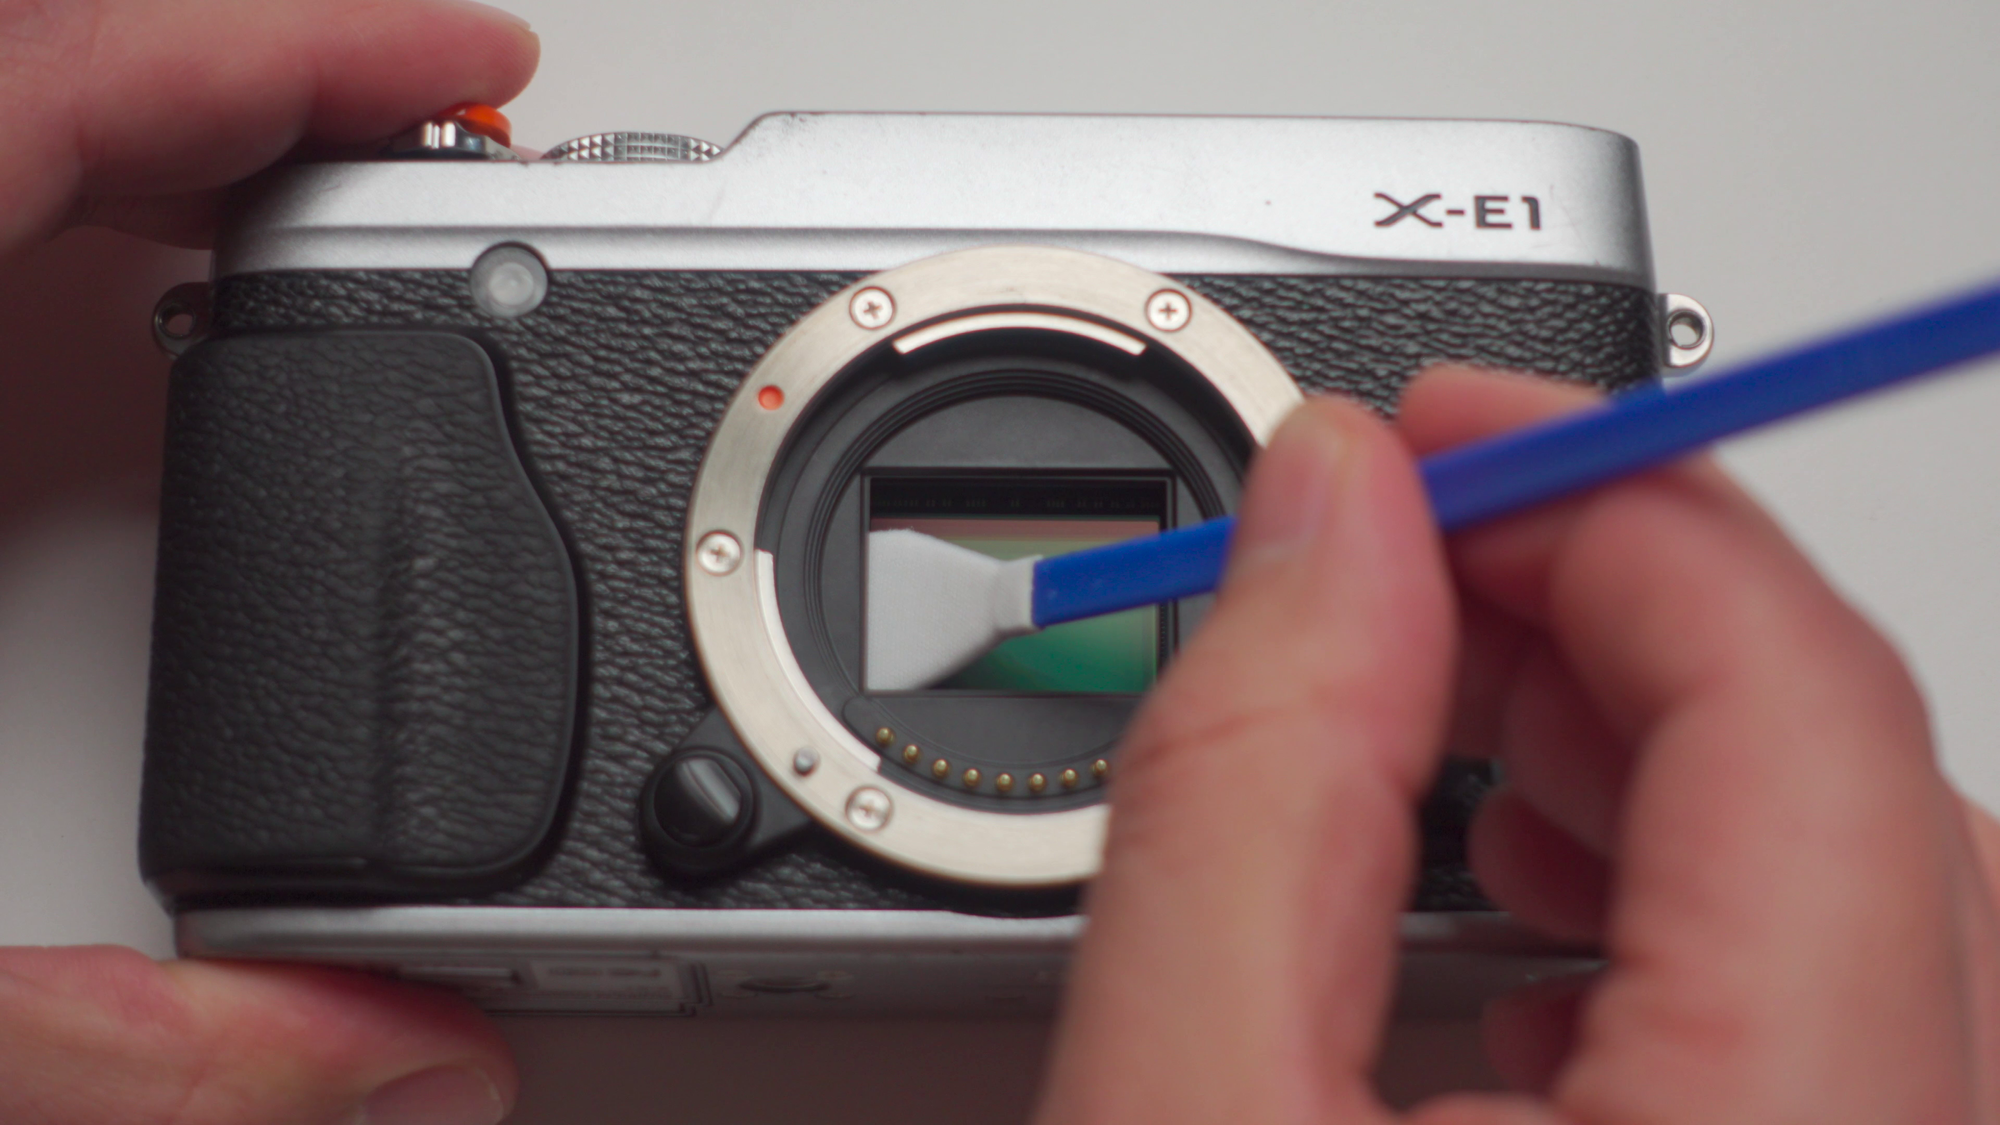
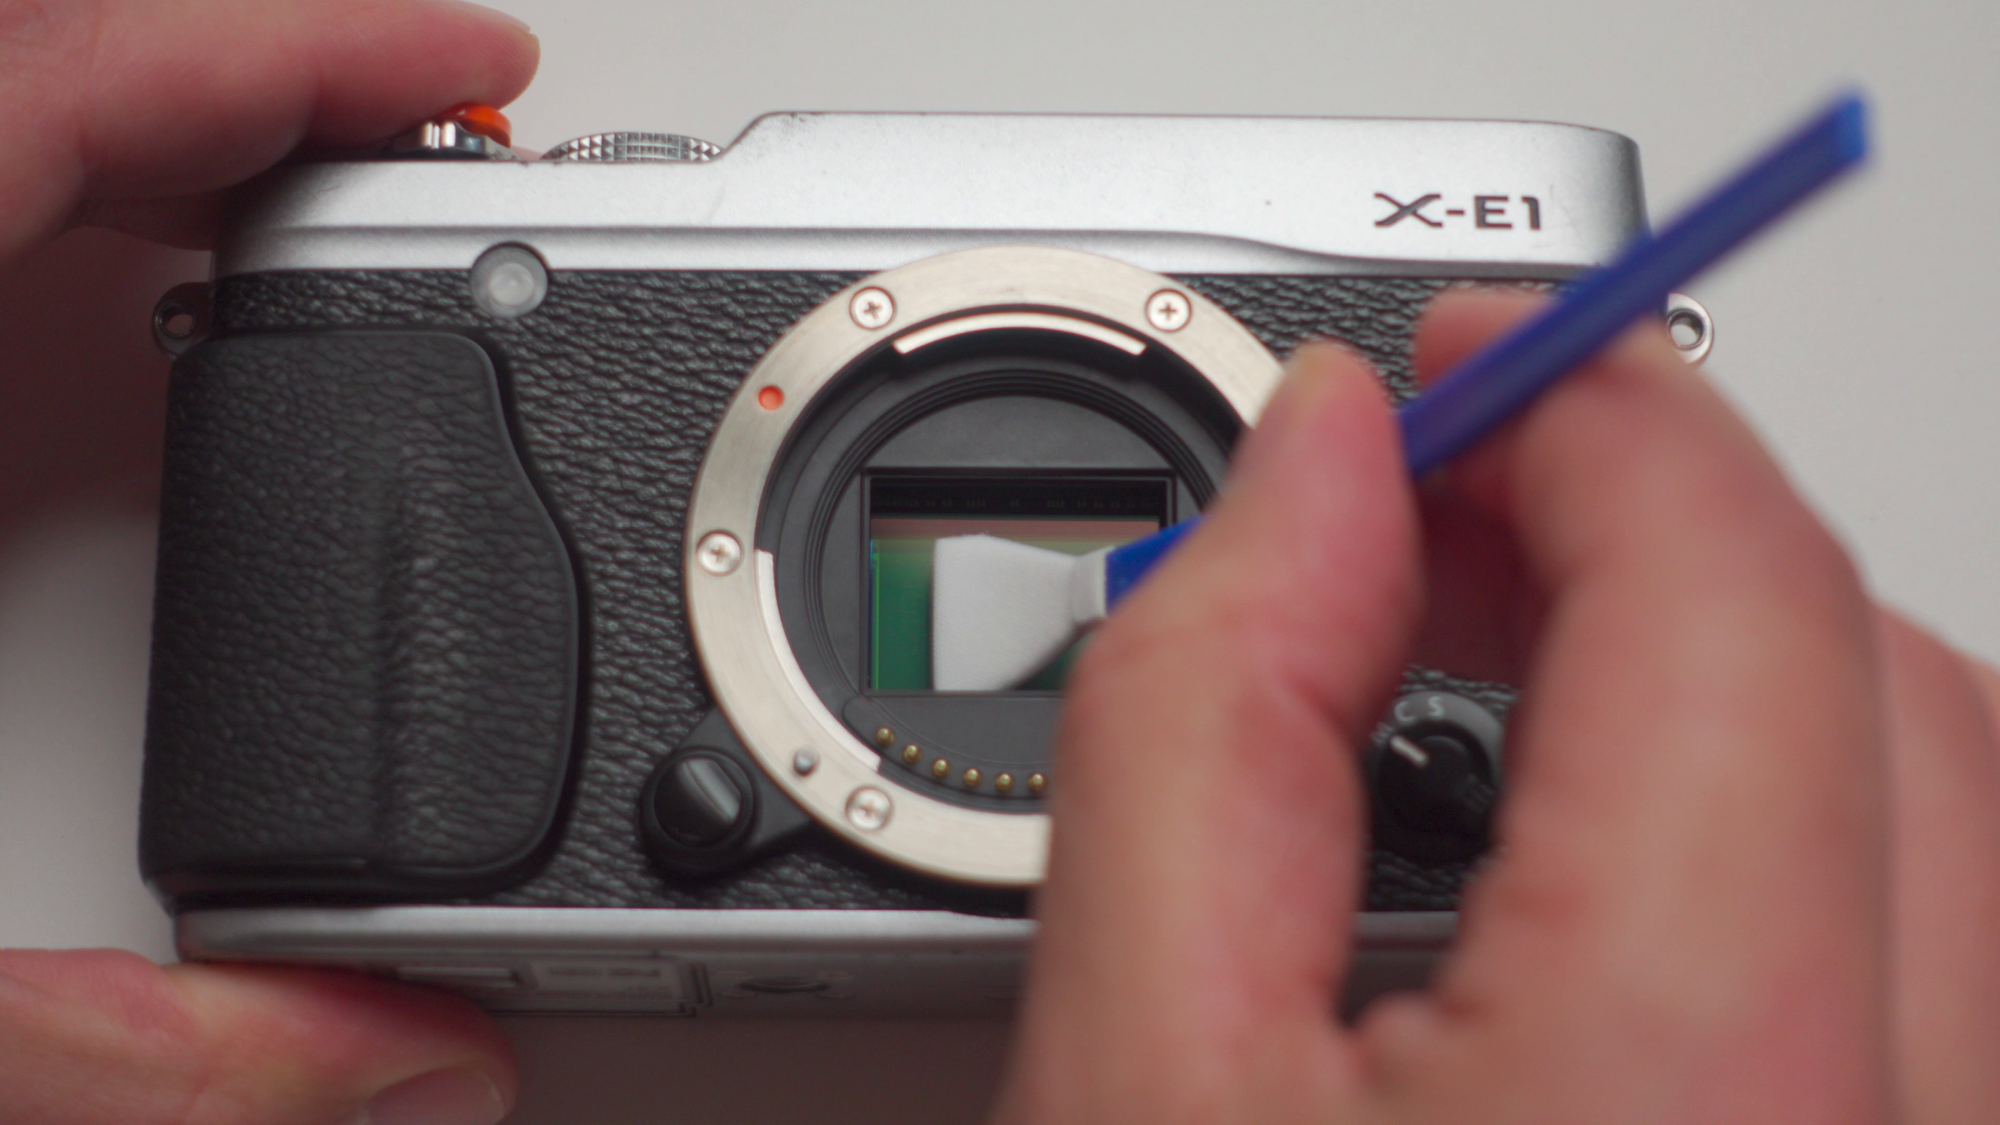
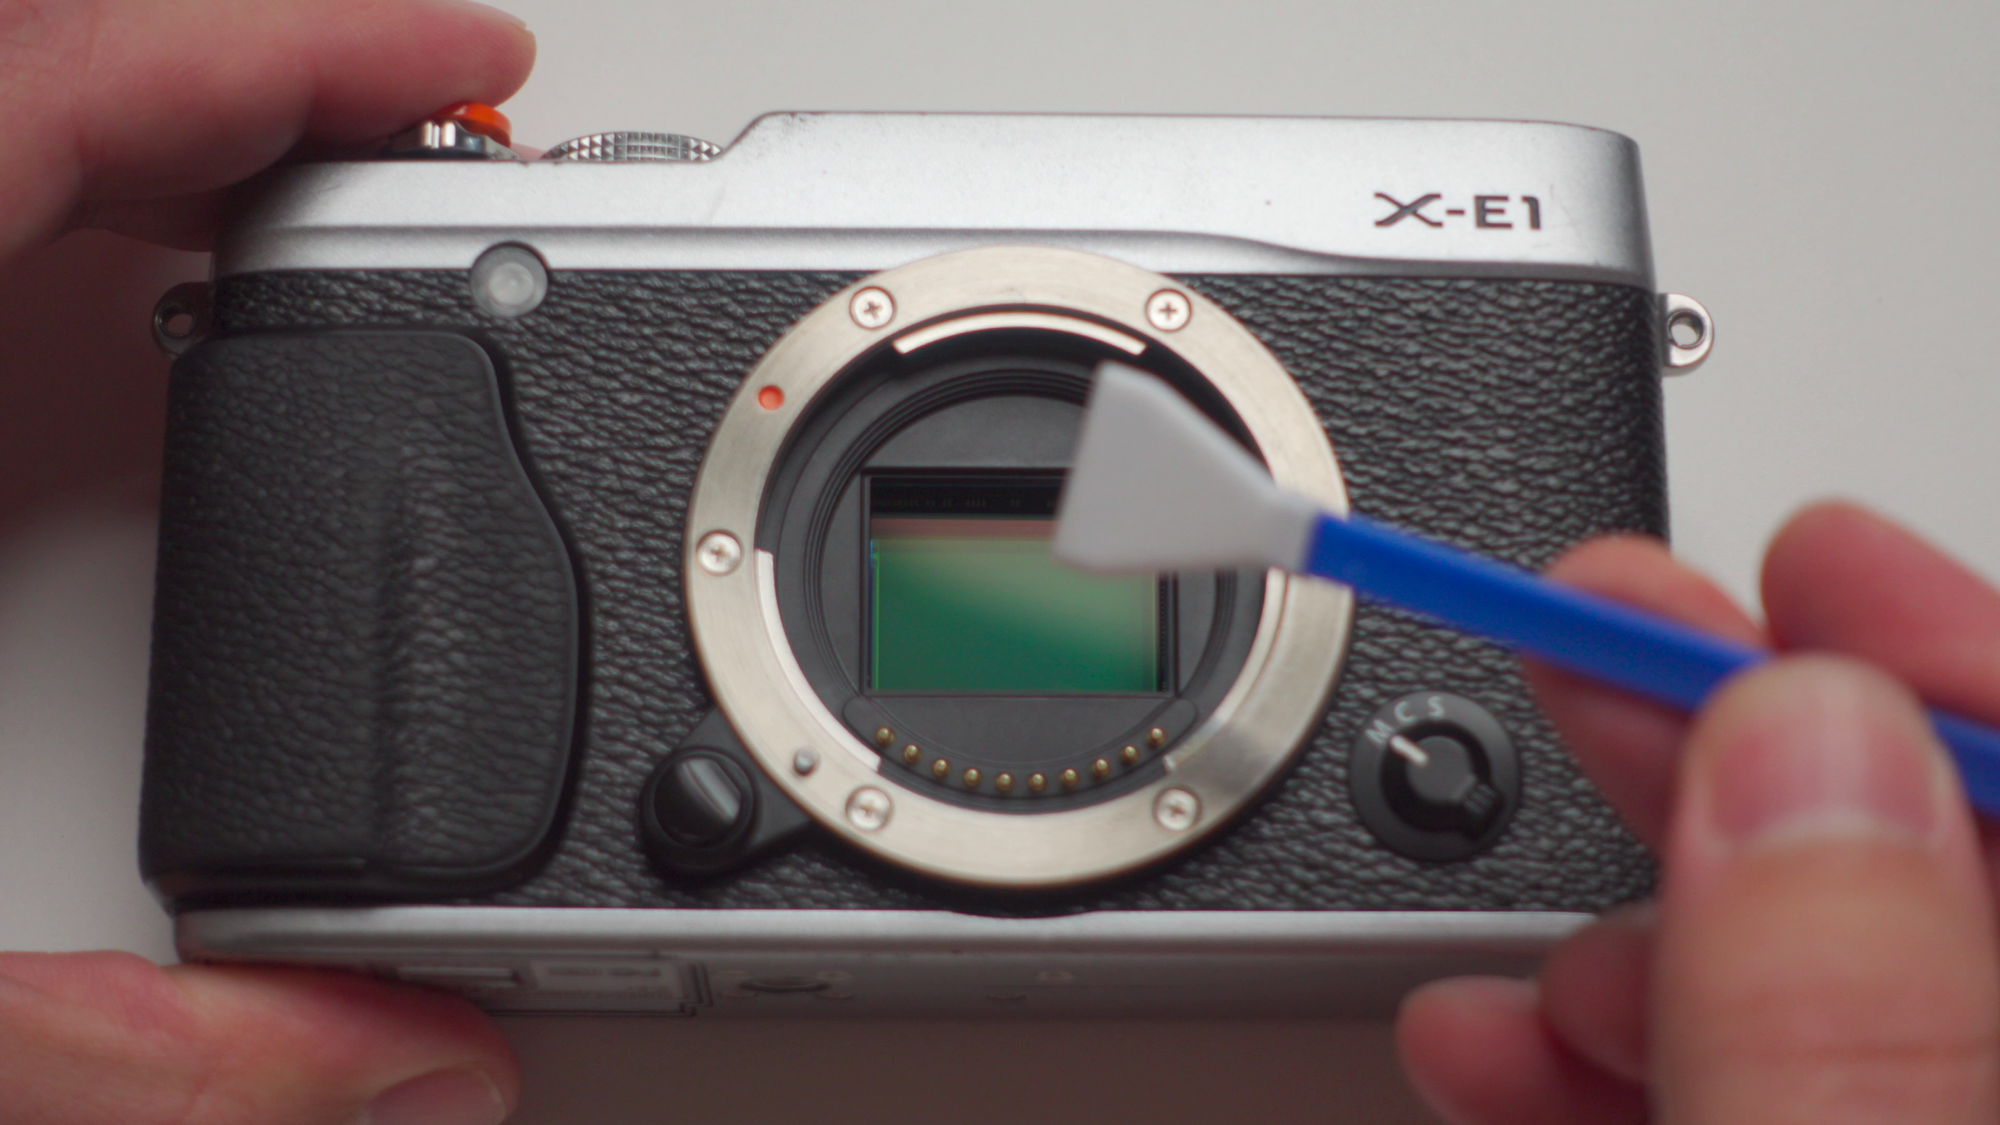
Swab sensor cleaning process
Swipe the swab from one end of the sensor to the other end, turn the swab 180 degrees and swipe once more in the same direction. And that should do the trick. Once again, take the photograph after that process is done and check your results. Repeat the process if needed.
YouTube Video Walkthrough
So those are some of the most common ways and tools to clean your camera sensor, how was it? Not too complicated I hope. As always I'm curious to know what you think, have you cleaned your sensor before? do you have a preferred way to do it? You can watch the full process here:


