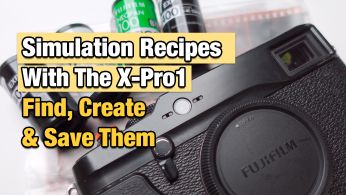
Fujifilm Simulation Recipes Guide - X-Pro1 & X-E1
Table of Contents
Simulation recipes are a fun way to try new looks and styles and give new life to your old camera. But once you find the perfect simulation recipe, then what? How do you apply it to your camera? How do you create your own simulations?
Today we are talking about simulation recipes, where to find them, how to apply them to your camera, and even create your own as well. If you’re wondering how to modify the settings in the camera including custom white balance shift, dynamic range, highlights and shadows, then this post is for you.
This is a summary of my YouTube Video, you can watch the whole piece linked at the bottom of the blog post.
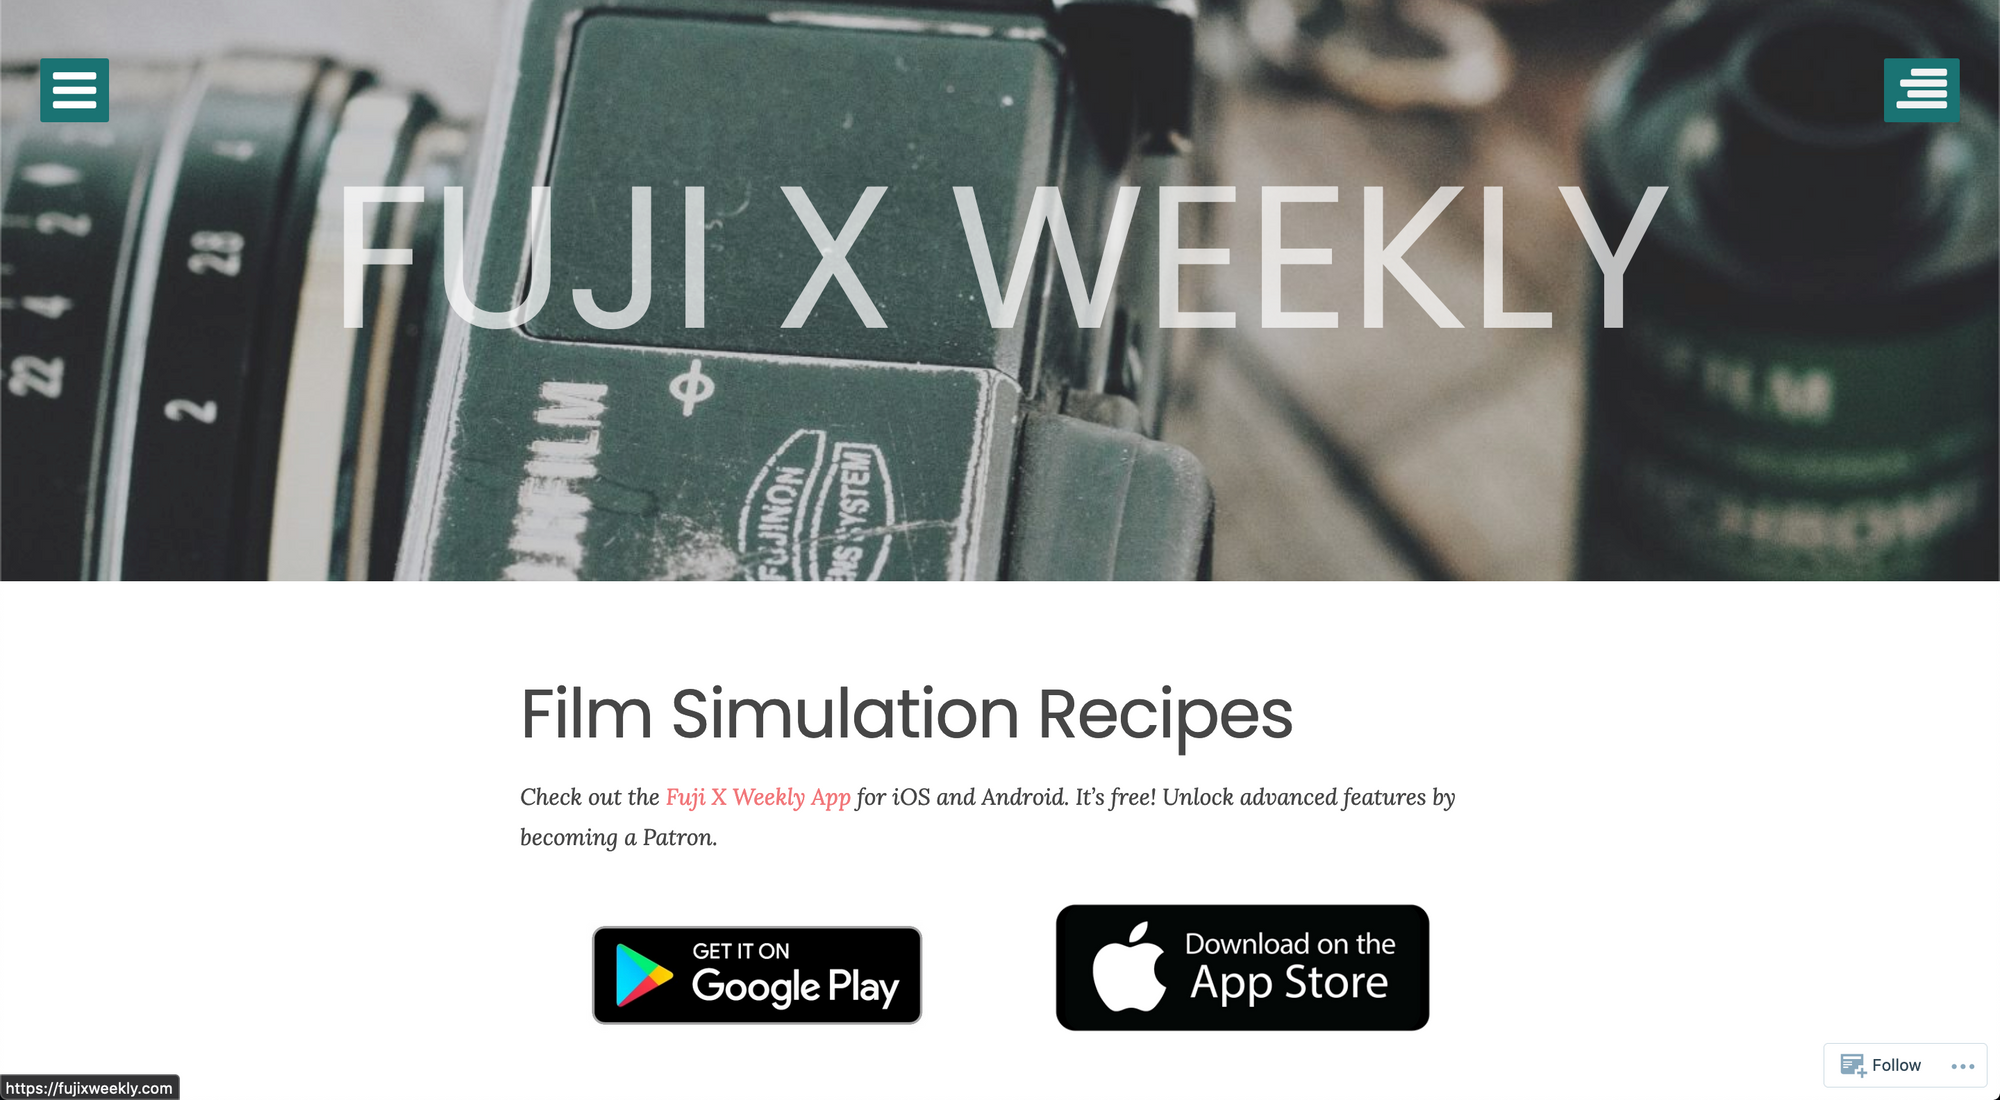

I’ve mentioned this before, but there are entire websites and forums dedicated to helping people with "Simulation Recipes" and as you can see, these recipes are classified by types of sensors. I personally use the faux classic chrome recipe with the X-Pro1 quite a bit, this one was created by the Fuji X weekly guys.
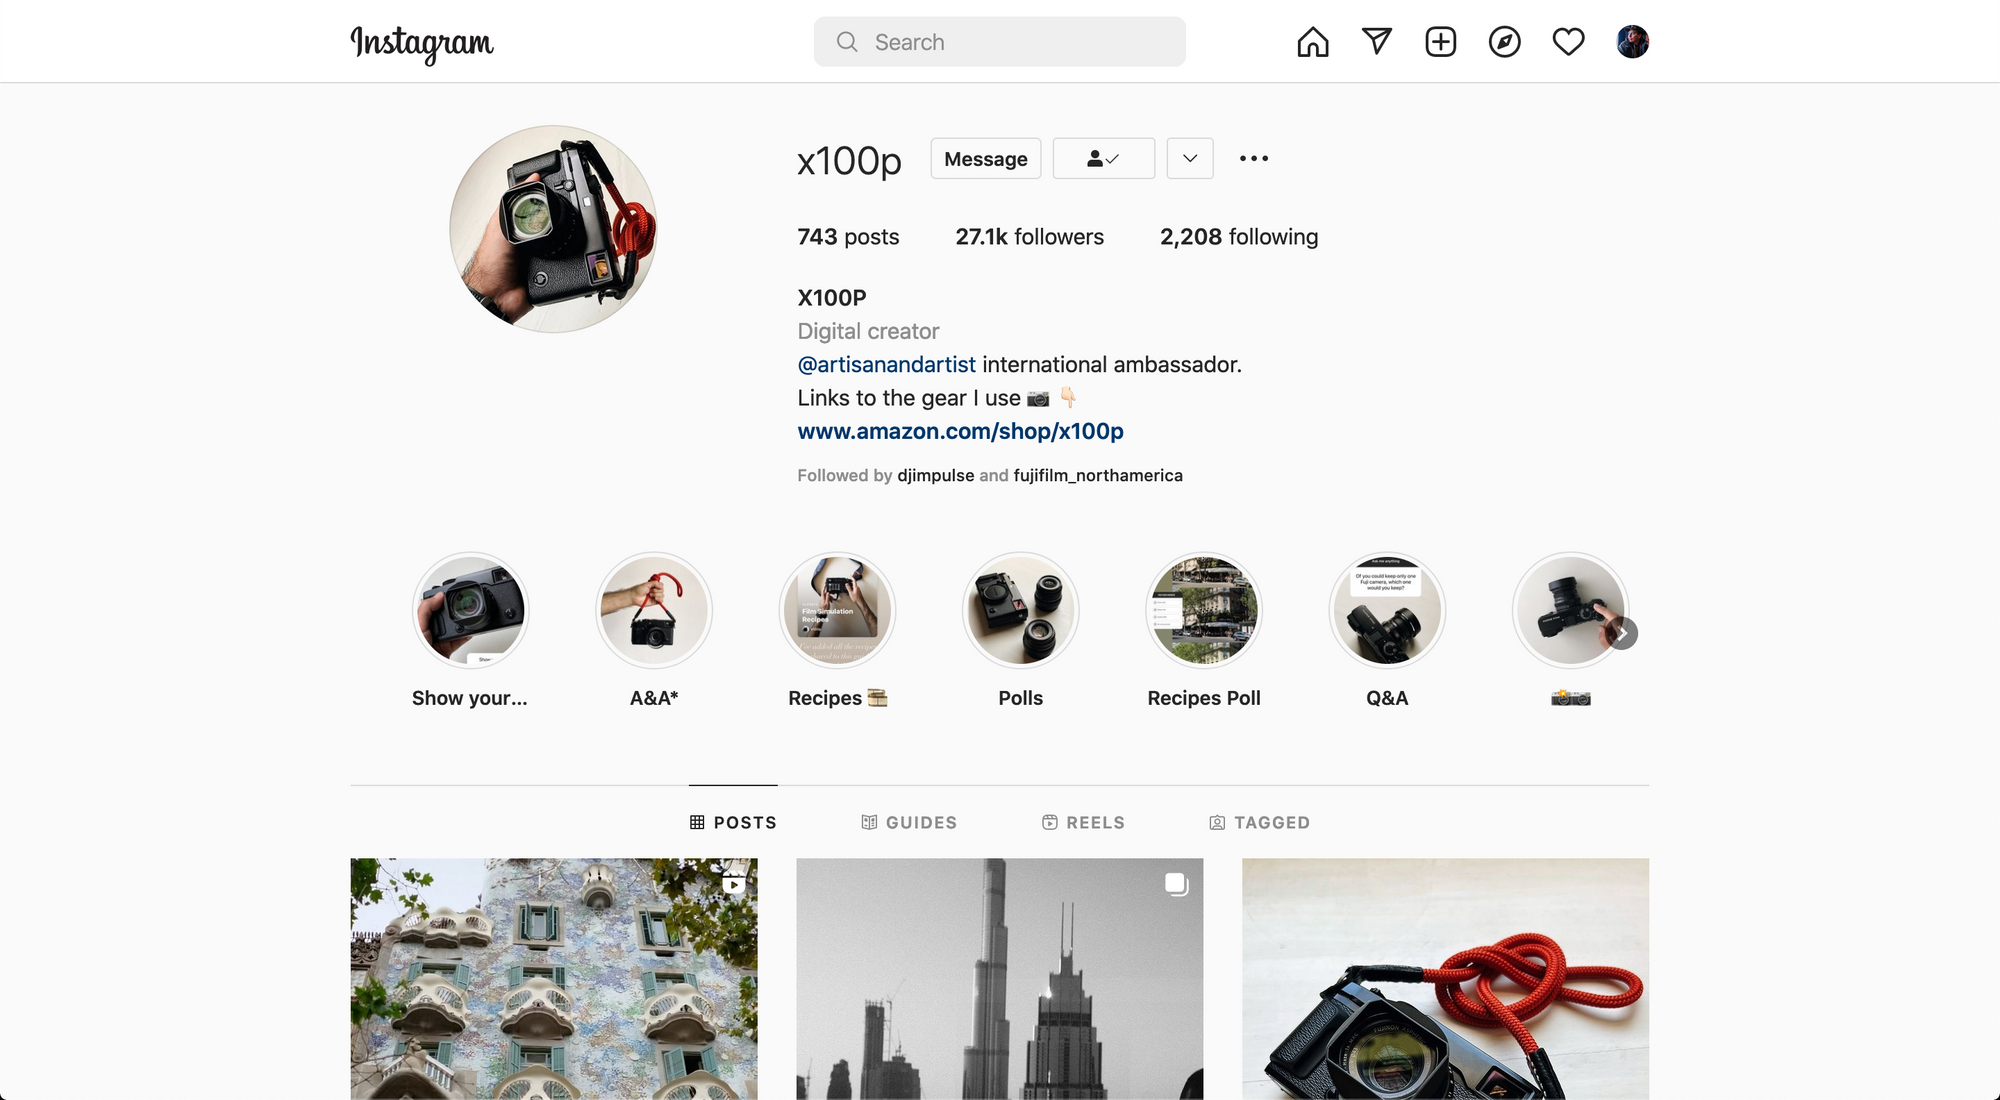
But there are many sites and options out there, including Instagram accounts that offer recipes like X100P, really cool stuff, go check it out, links down below:
 Like
Like
Simulation Recipes 101
Simulation recipes are a way to expand your experiences with your camera, test other colour profiles and tones and shoot with intentionality as well since recipes only apply to your JPEG files.
I never use the raw files, I try to get everything I can in-camera, and if you want to hear more about my photography philosophy and how I shoot, then you can watch this video, linked below:

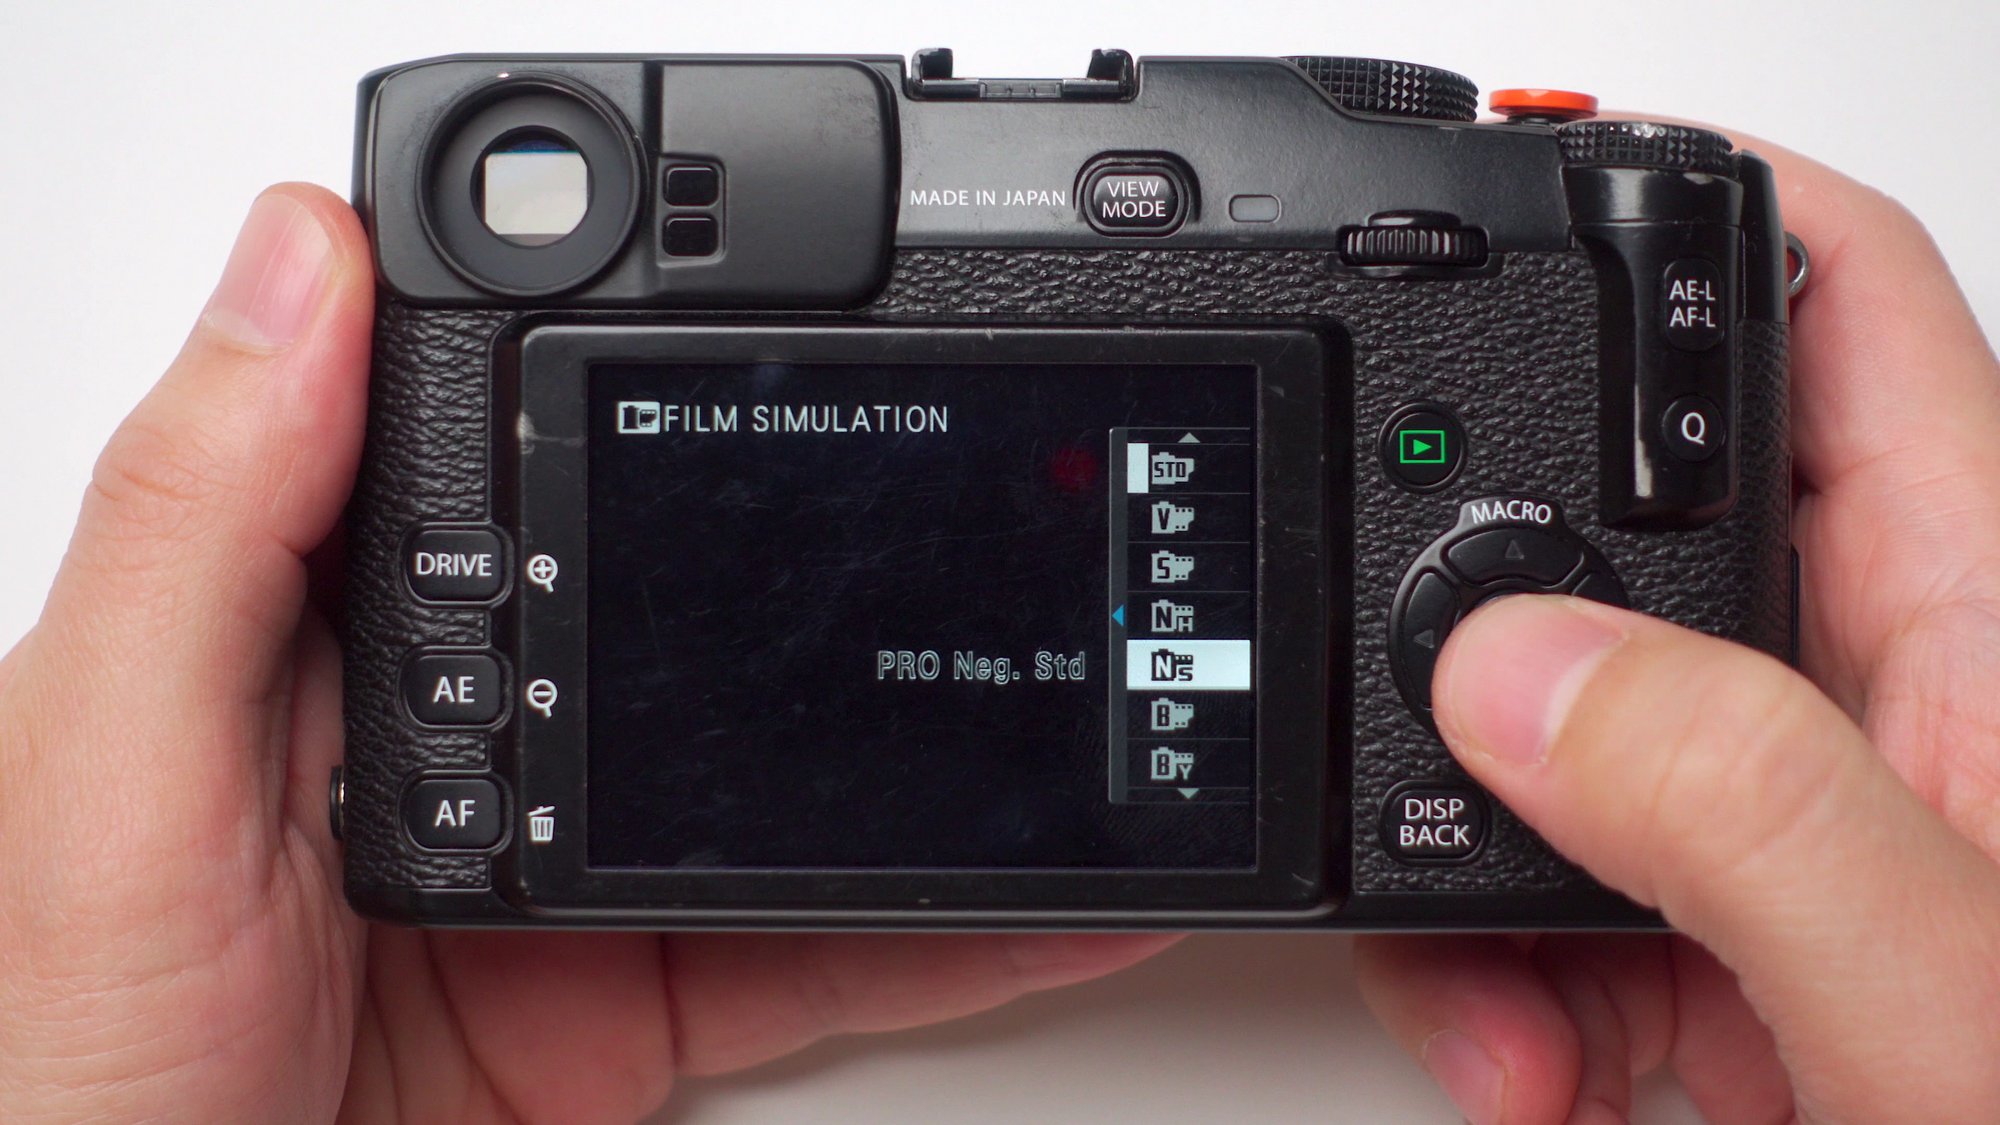
Simulation recipes look something like this. This is the faux classic chrome simulation from the Fuji Weekly site. These are generally created with a specific sensor in mind to be able to replicate colours and the range of tones. Simulation recipes start from a base simulation and then sculpt the look from there. In this case, the base simulation is Pro negative standard.
All you need to do is save these settings in a custom profile on your camera and that’s it. However, some settings are limited or not so easy to find, at least for older cameras like the Fujifilm X-Pro1, so we need to talk about them.
Before we proceed, If you don’t know how to set up your camera or create custom profiles, then I have a full guide for the xpro1, talking bout the setup, settings for street photography and the custom profiles as well. Linked down below.
The White Balance Shift Menu
The reason why we are starting with the white balance shift is that:
- It's one of the most frequently asked questions on my videos regarding settings.
- Because the white balance shift on this camera affects all the simulations, including the custom profiles as well.
This is one of those things that sounds very simple, a very simple setting to change, but it’s a bit more complicated than that. Let me show you what I mean.
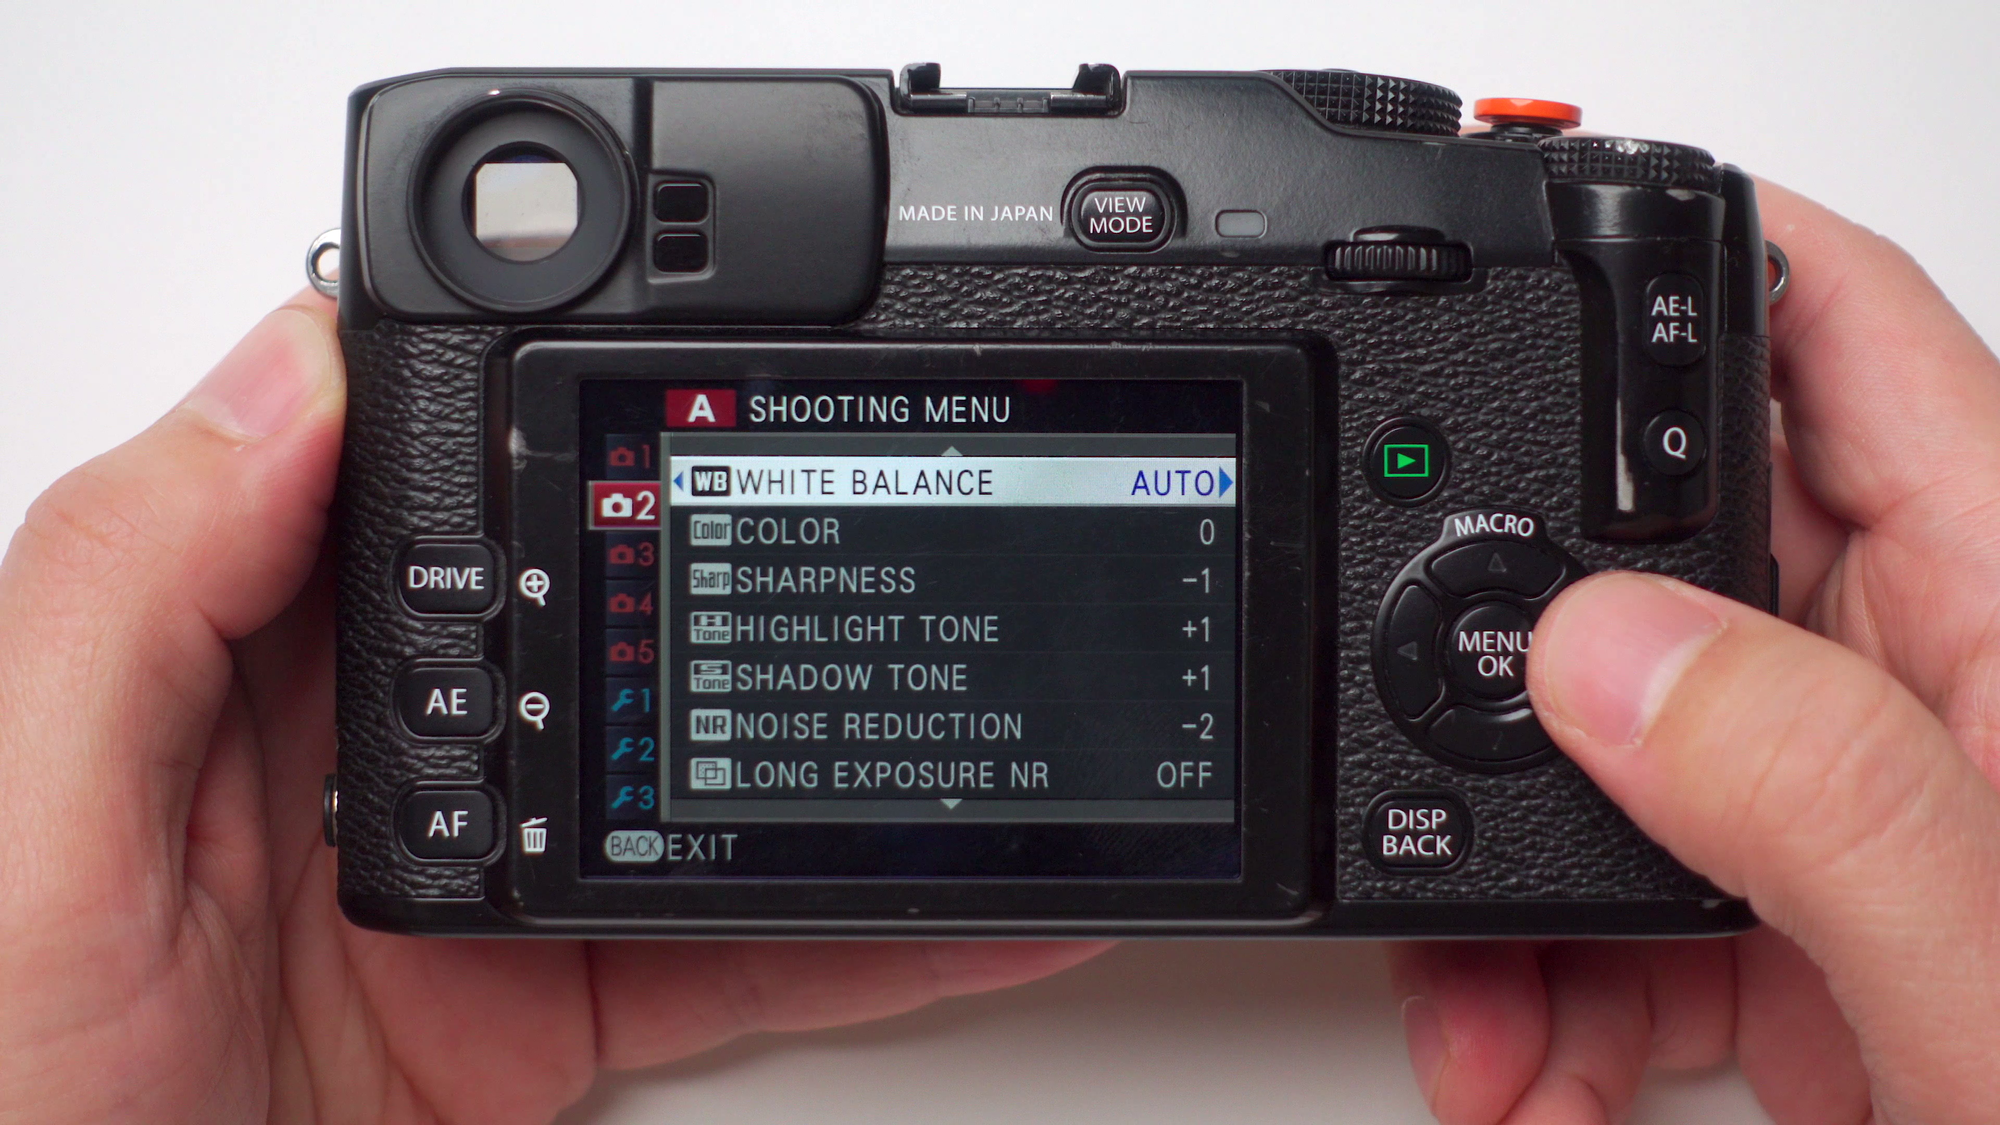

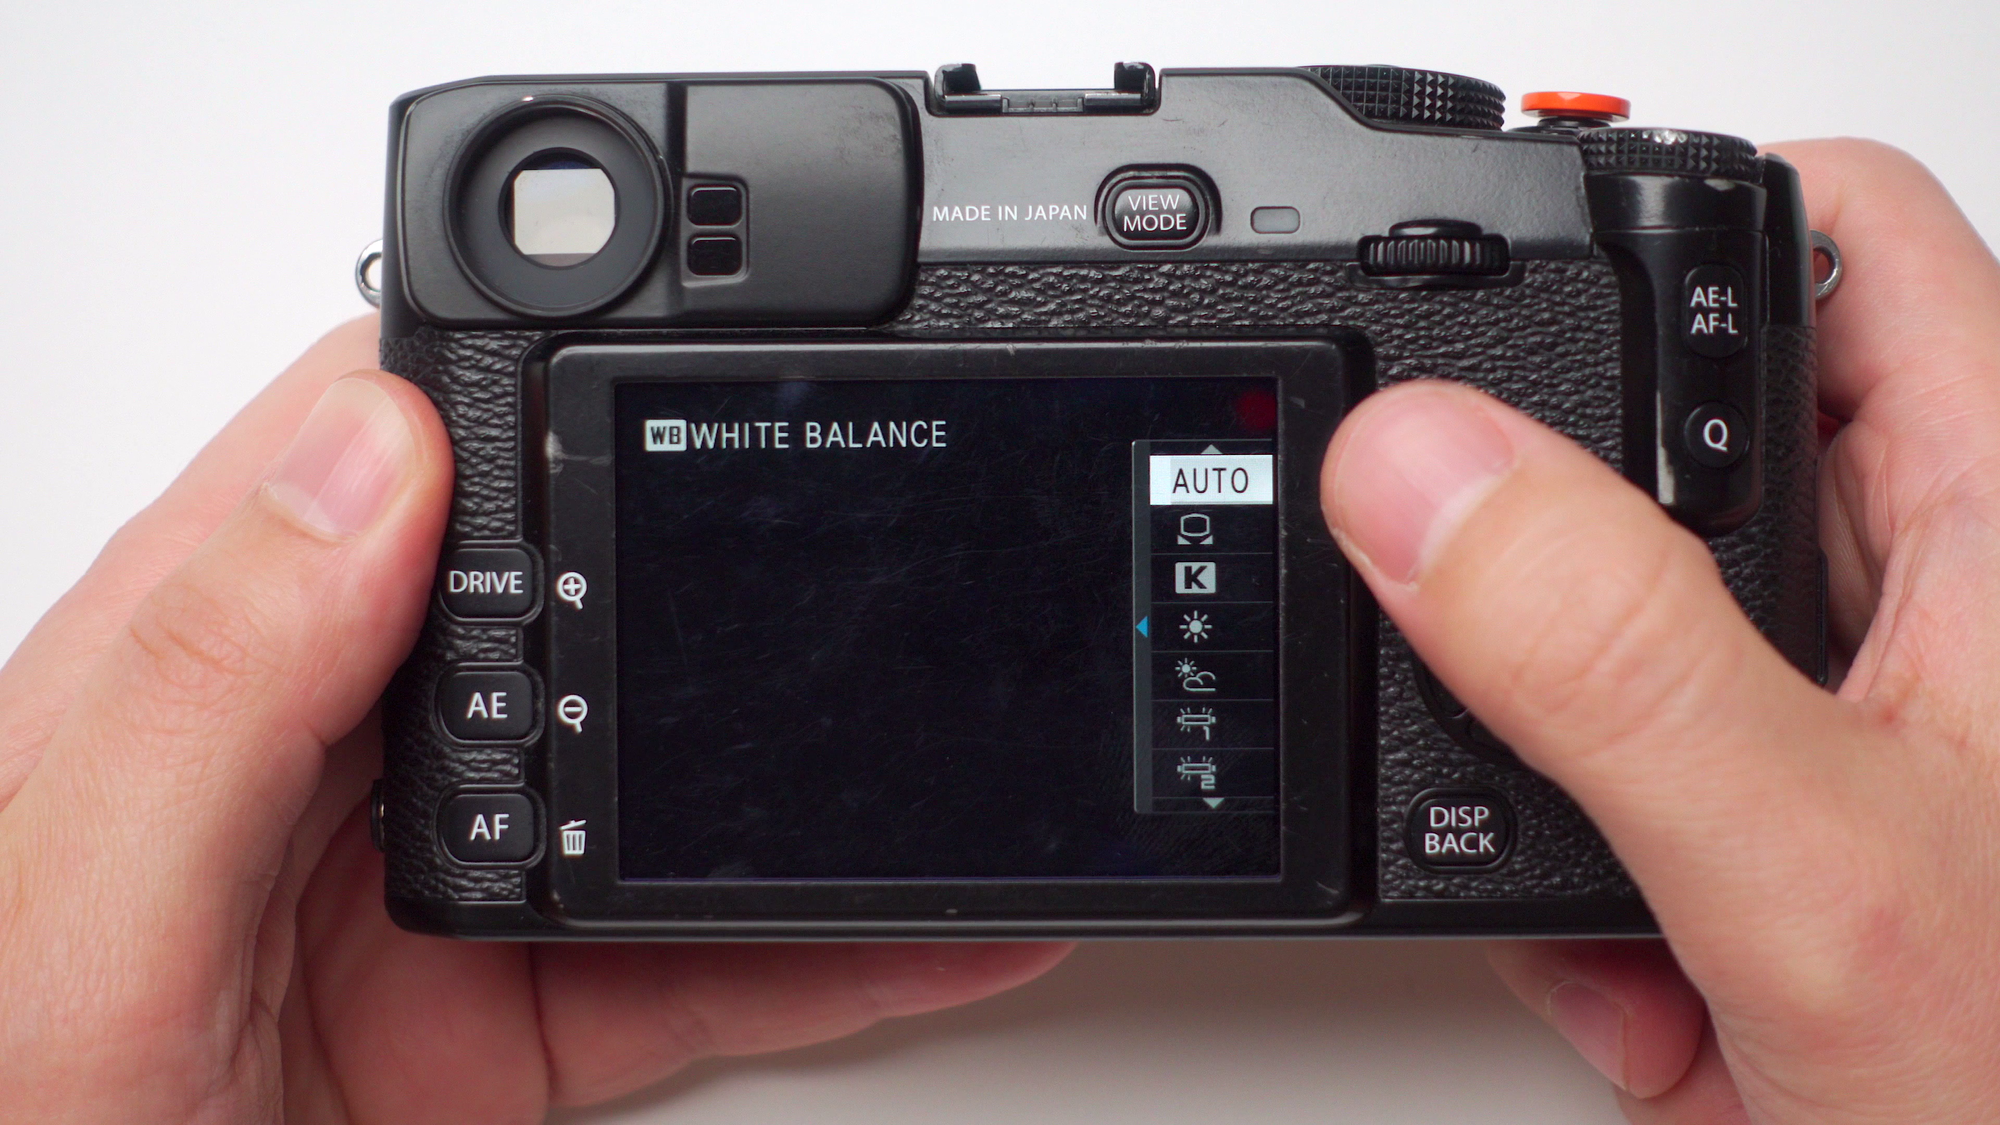
If you go to your Shooting menu, Page #2, you’ll see the white balance option. Open that and you’ll have a couple of options to choose from, auto, custom, a specific colour temp, etc. However, only one of these allows you to change the white balance shift, which is needed to completely match the simulation recipes that you’ll find online.
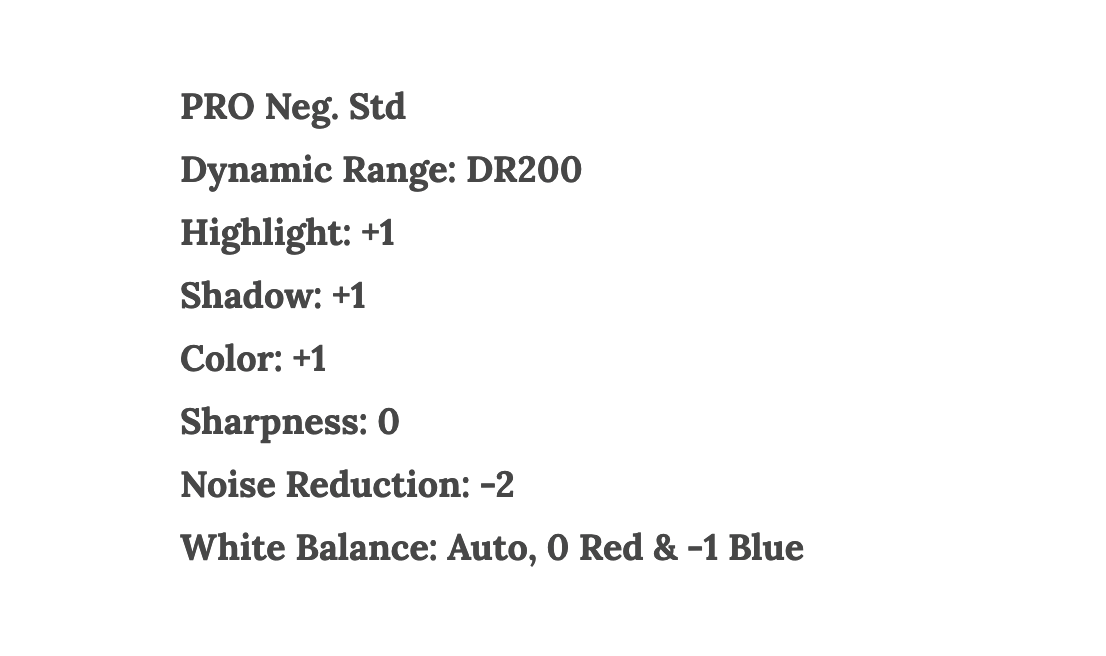
The one I'm showing you right now is the Faux Classic Chrome from Fuji x weekly, and as you can see, the white balance shift is set to 0 in the Red tones & -1 in the blue tones.
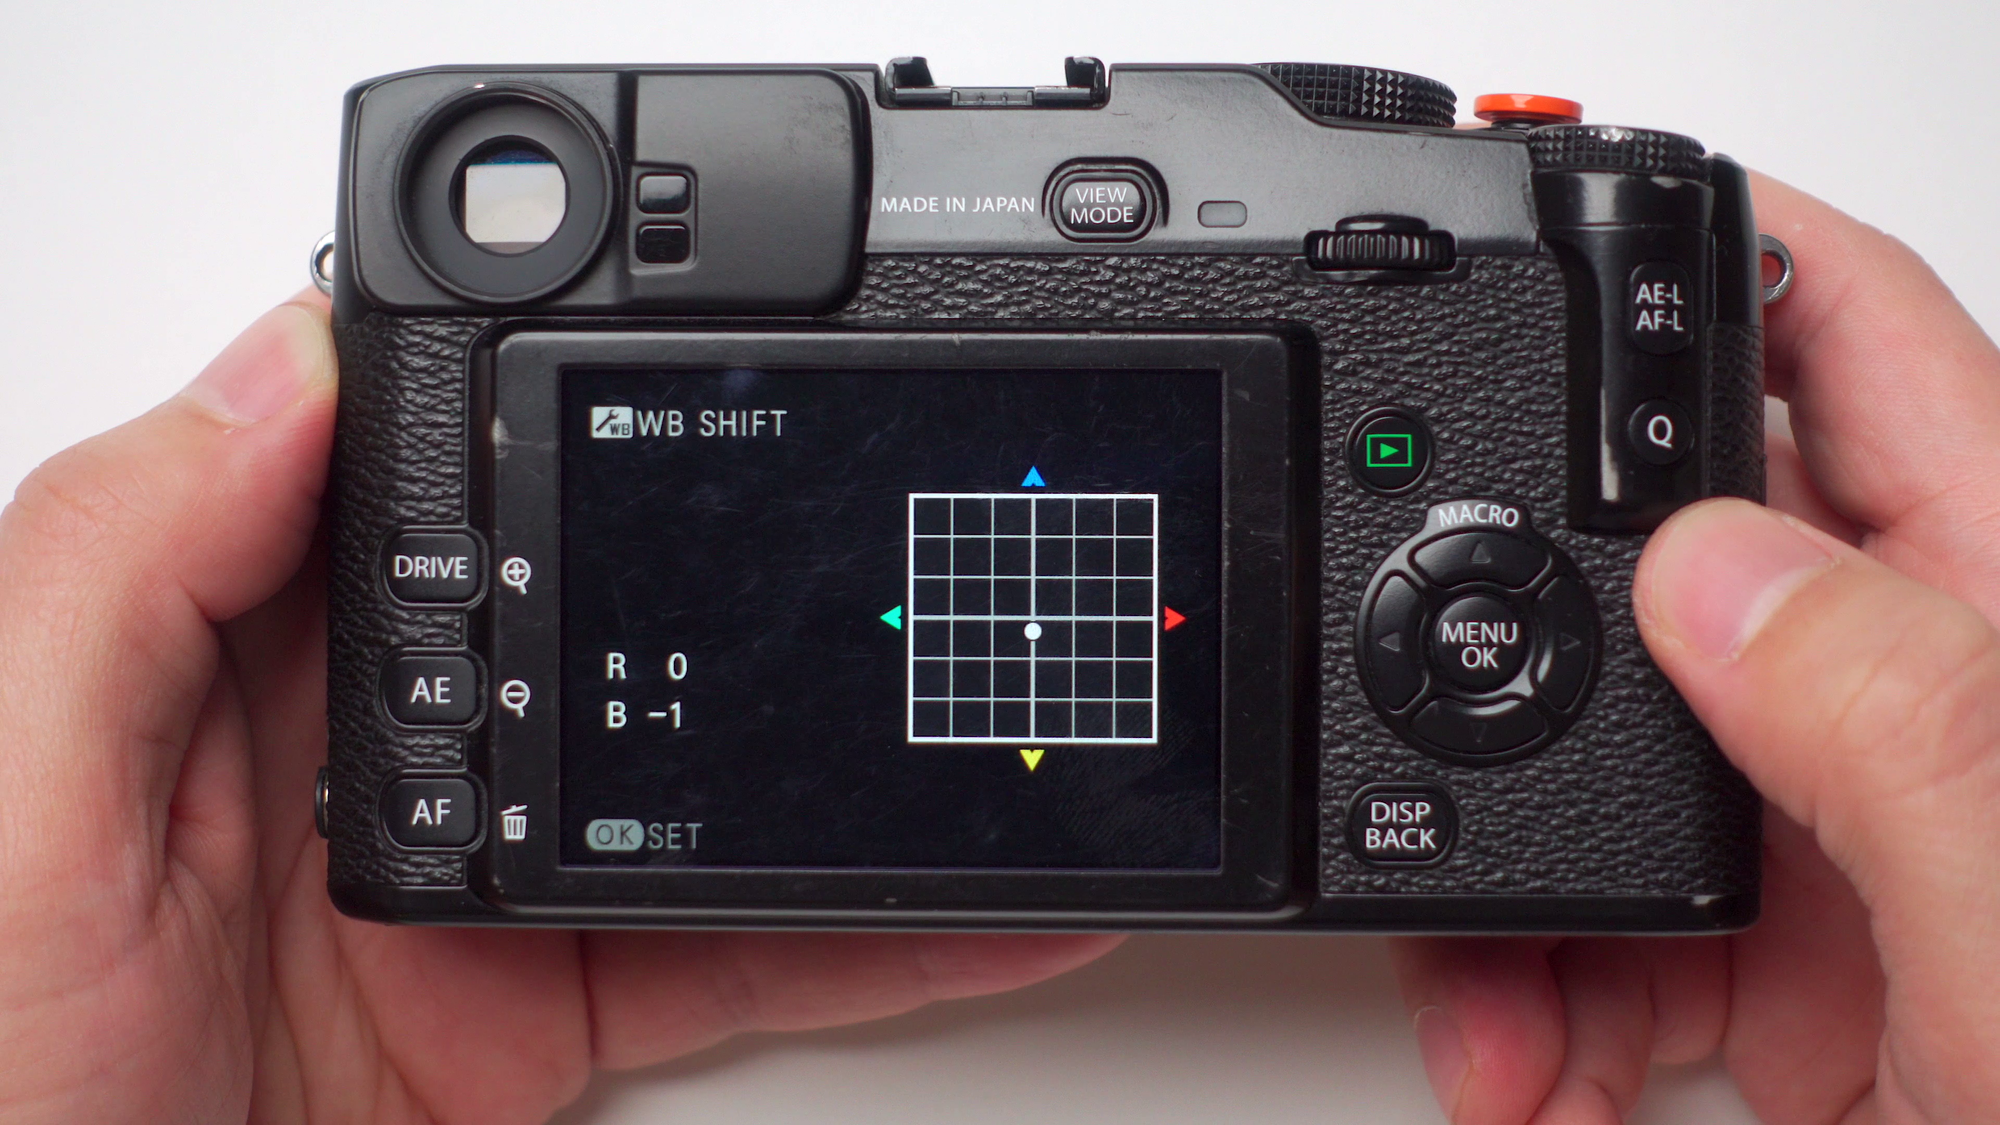
Back to the white balance setting inside the camera, make sure you hover on top of the auto setting and then press the right d-pad, and that will open the white balance shift menu. From here use the d-pad to match the RED & BLUE tones to your recipe. In this case, red: 0 and blue: -1. Hit OK to set it and that’s it.
These are general changes, meaning these apply to all the simulations, including the custom ones. So if you have 3, 5 or 7 custom profiles saved and they all have specific white balances, then you have to manually change the white balance shift when you change the simulation or custom profile. Let me show you what I mean.
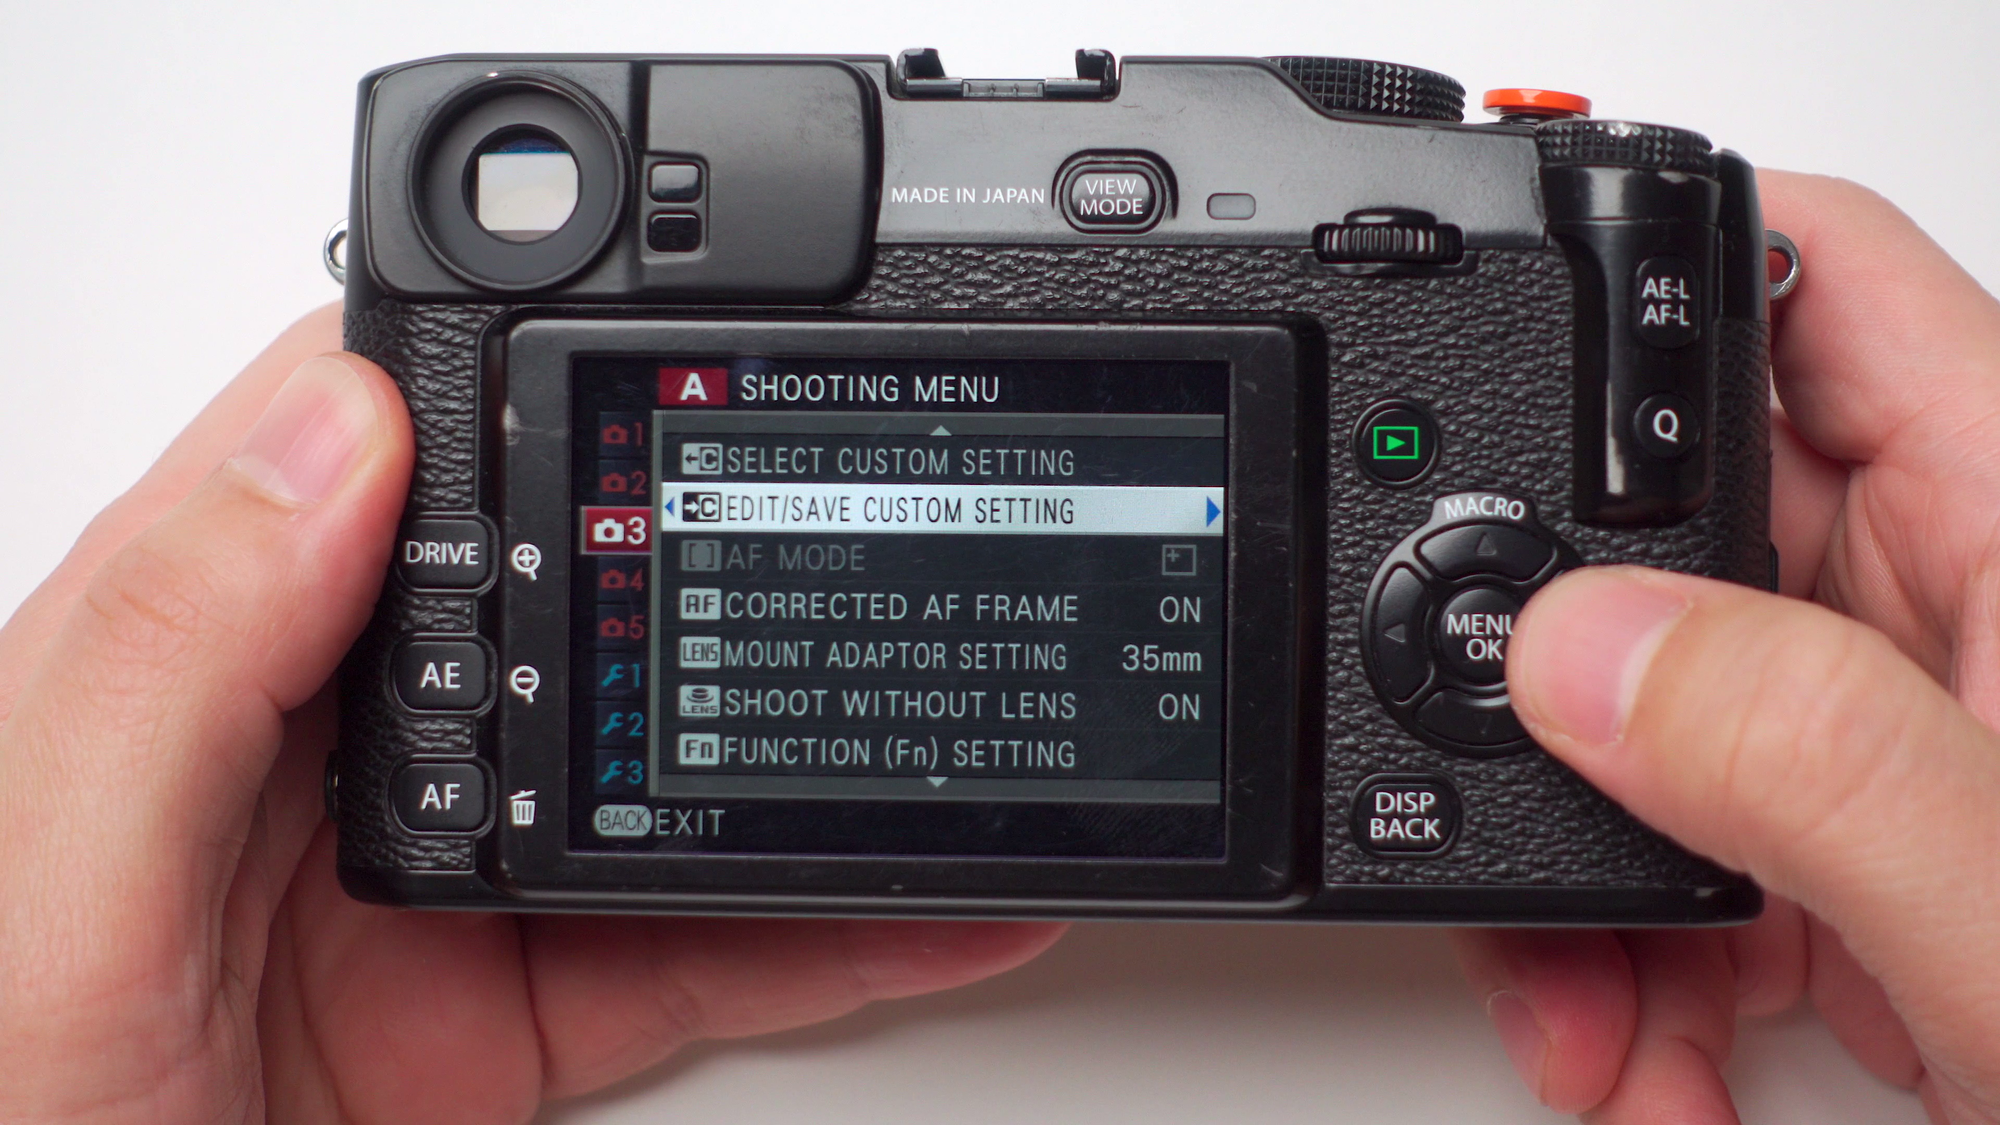
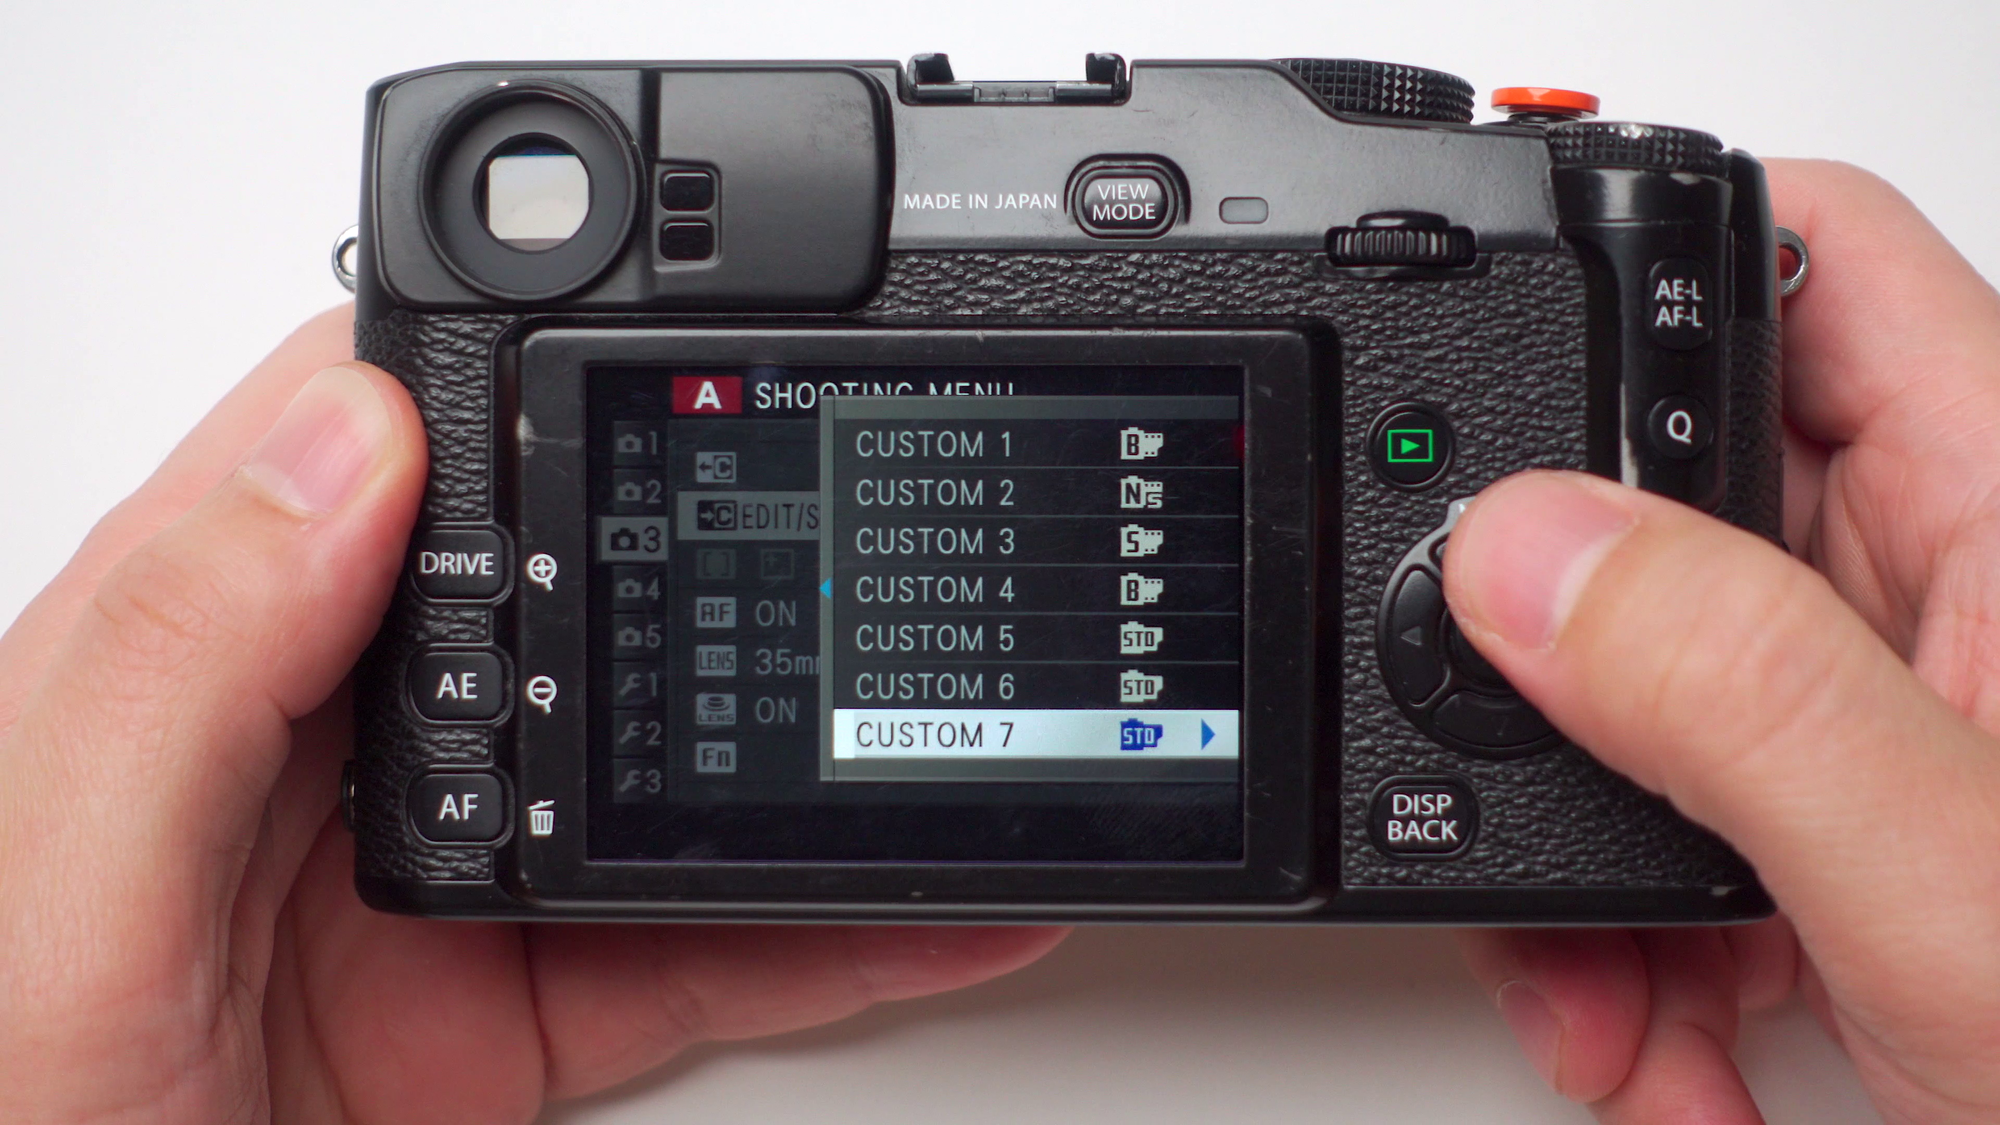
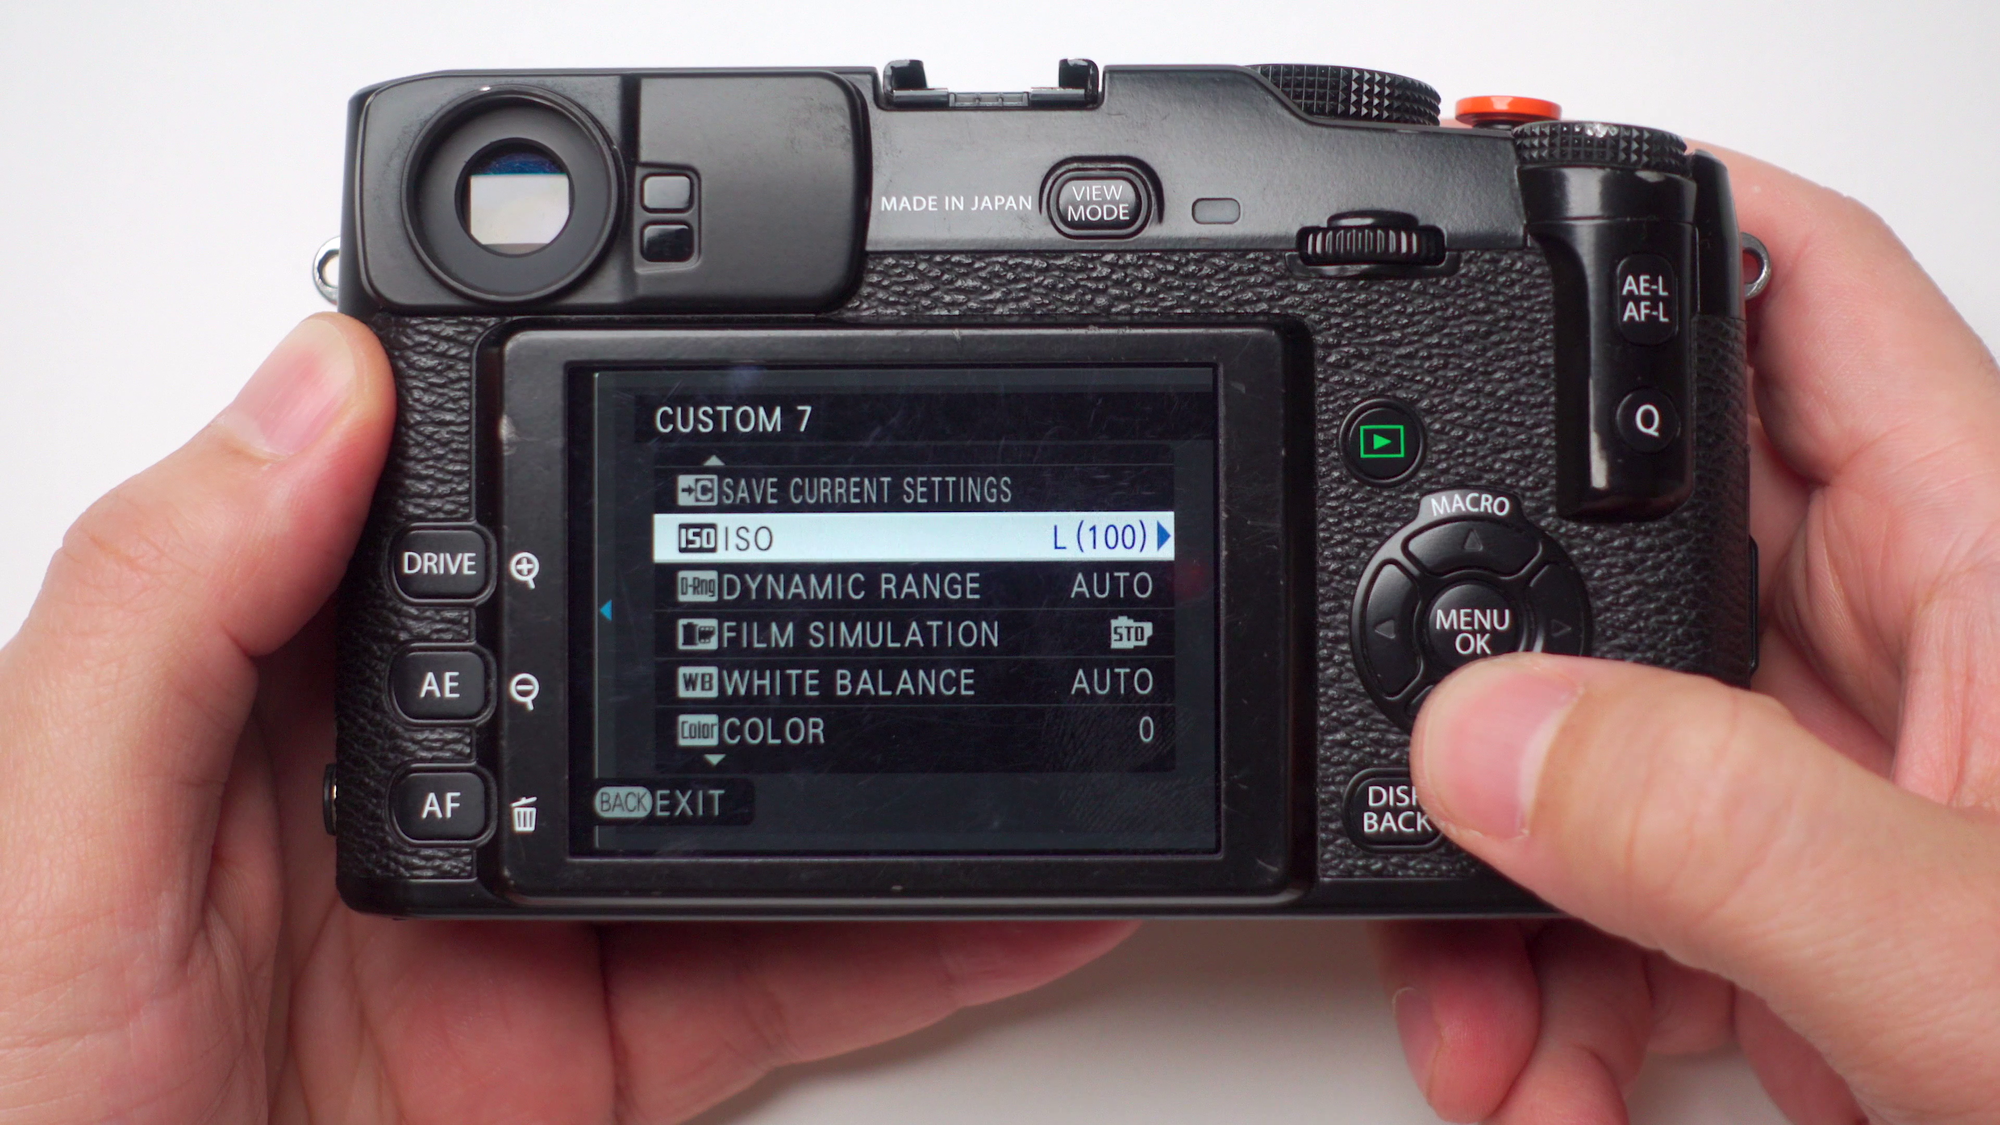
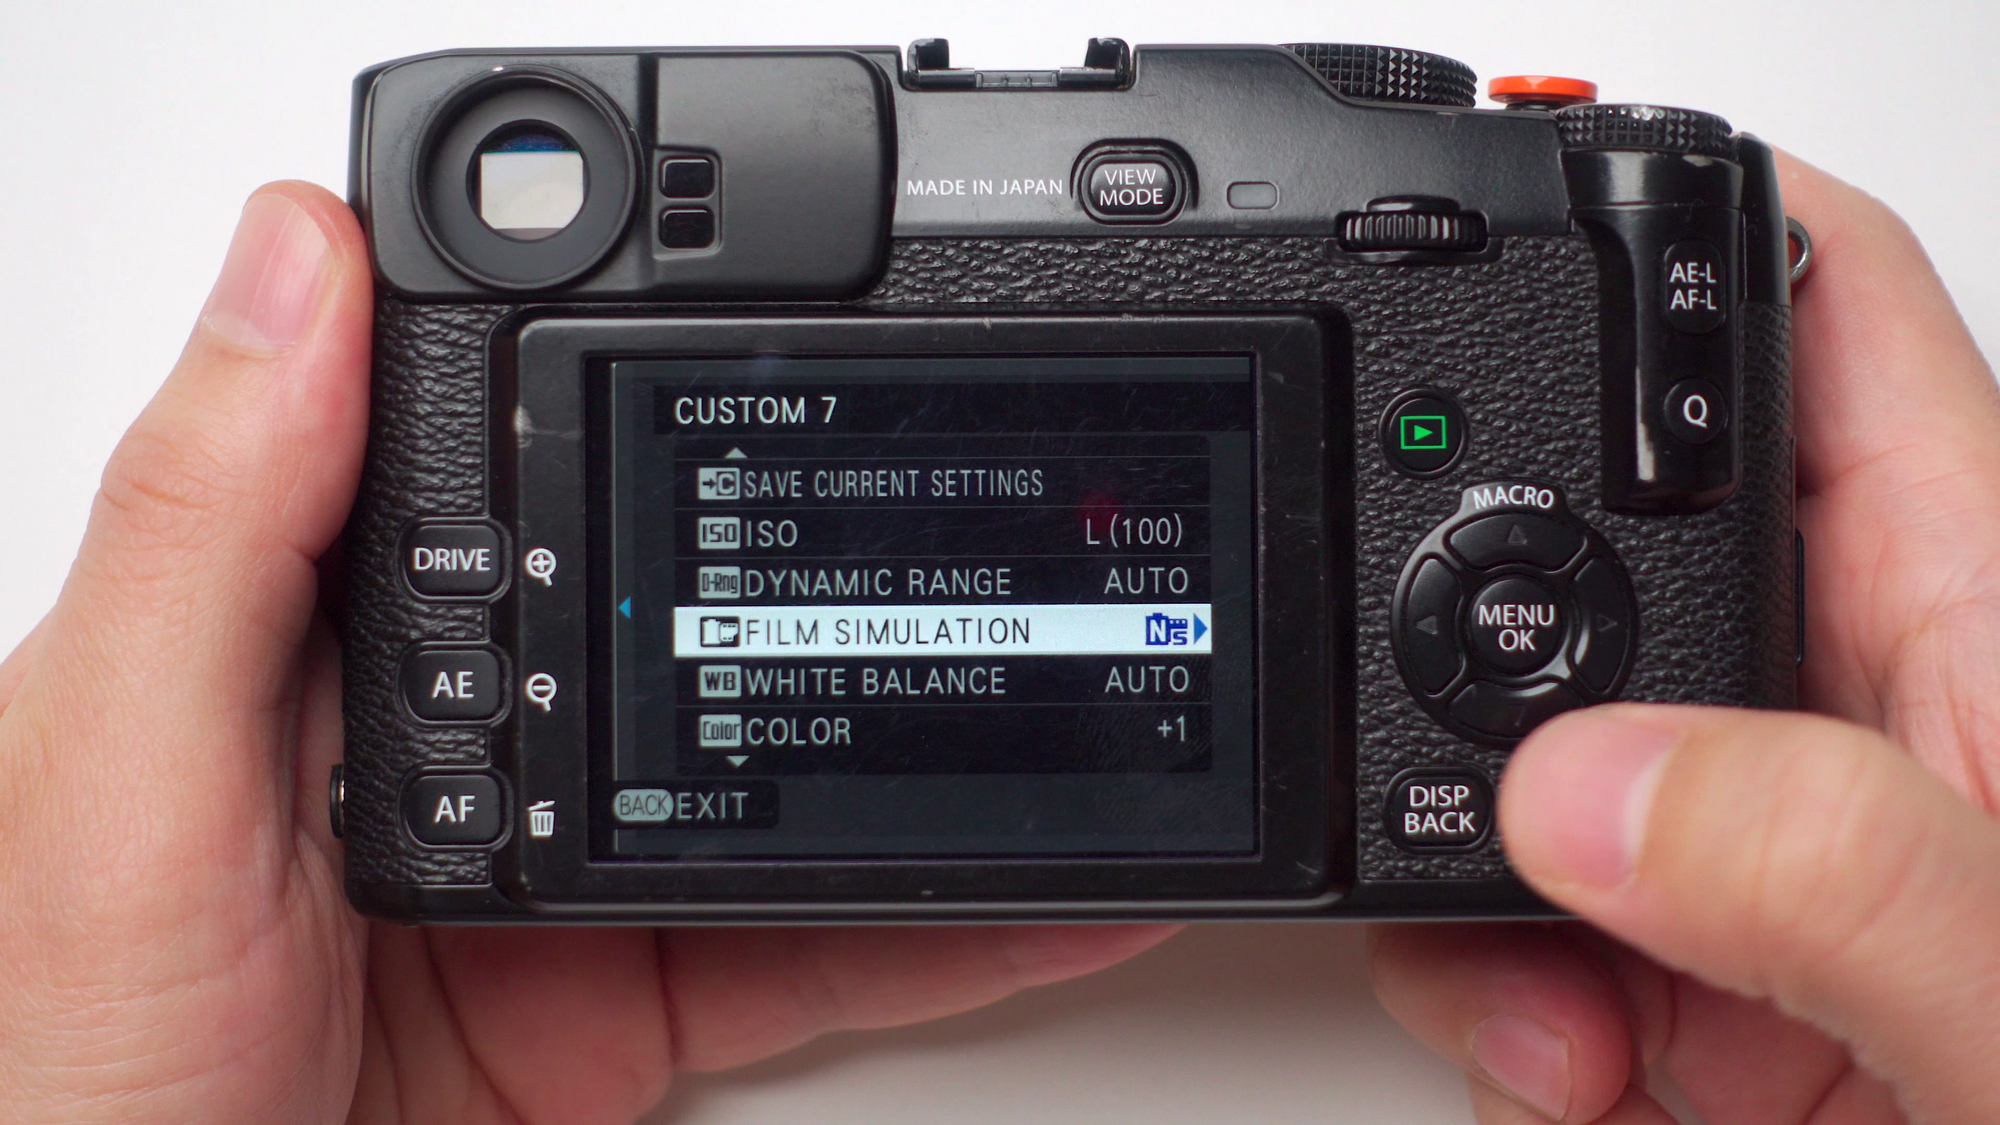
Go to your Shooting menu, Page #3, where you can edit and save your custom settings or custom profiles. I’m gonna choose an empty one, custom profile #7 for example.
Here we have a variety of options that can be changed and saved for that particular profile. More info on my X-Pro1 full guide video
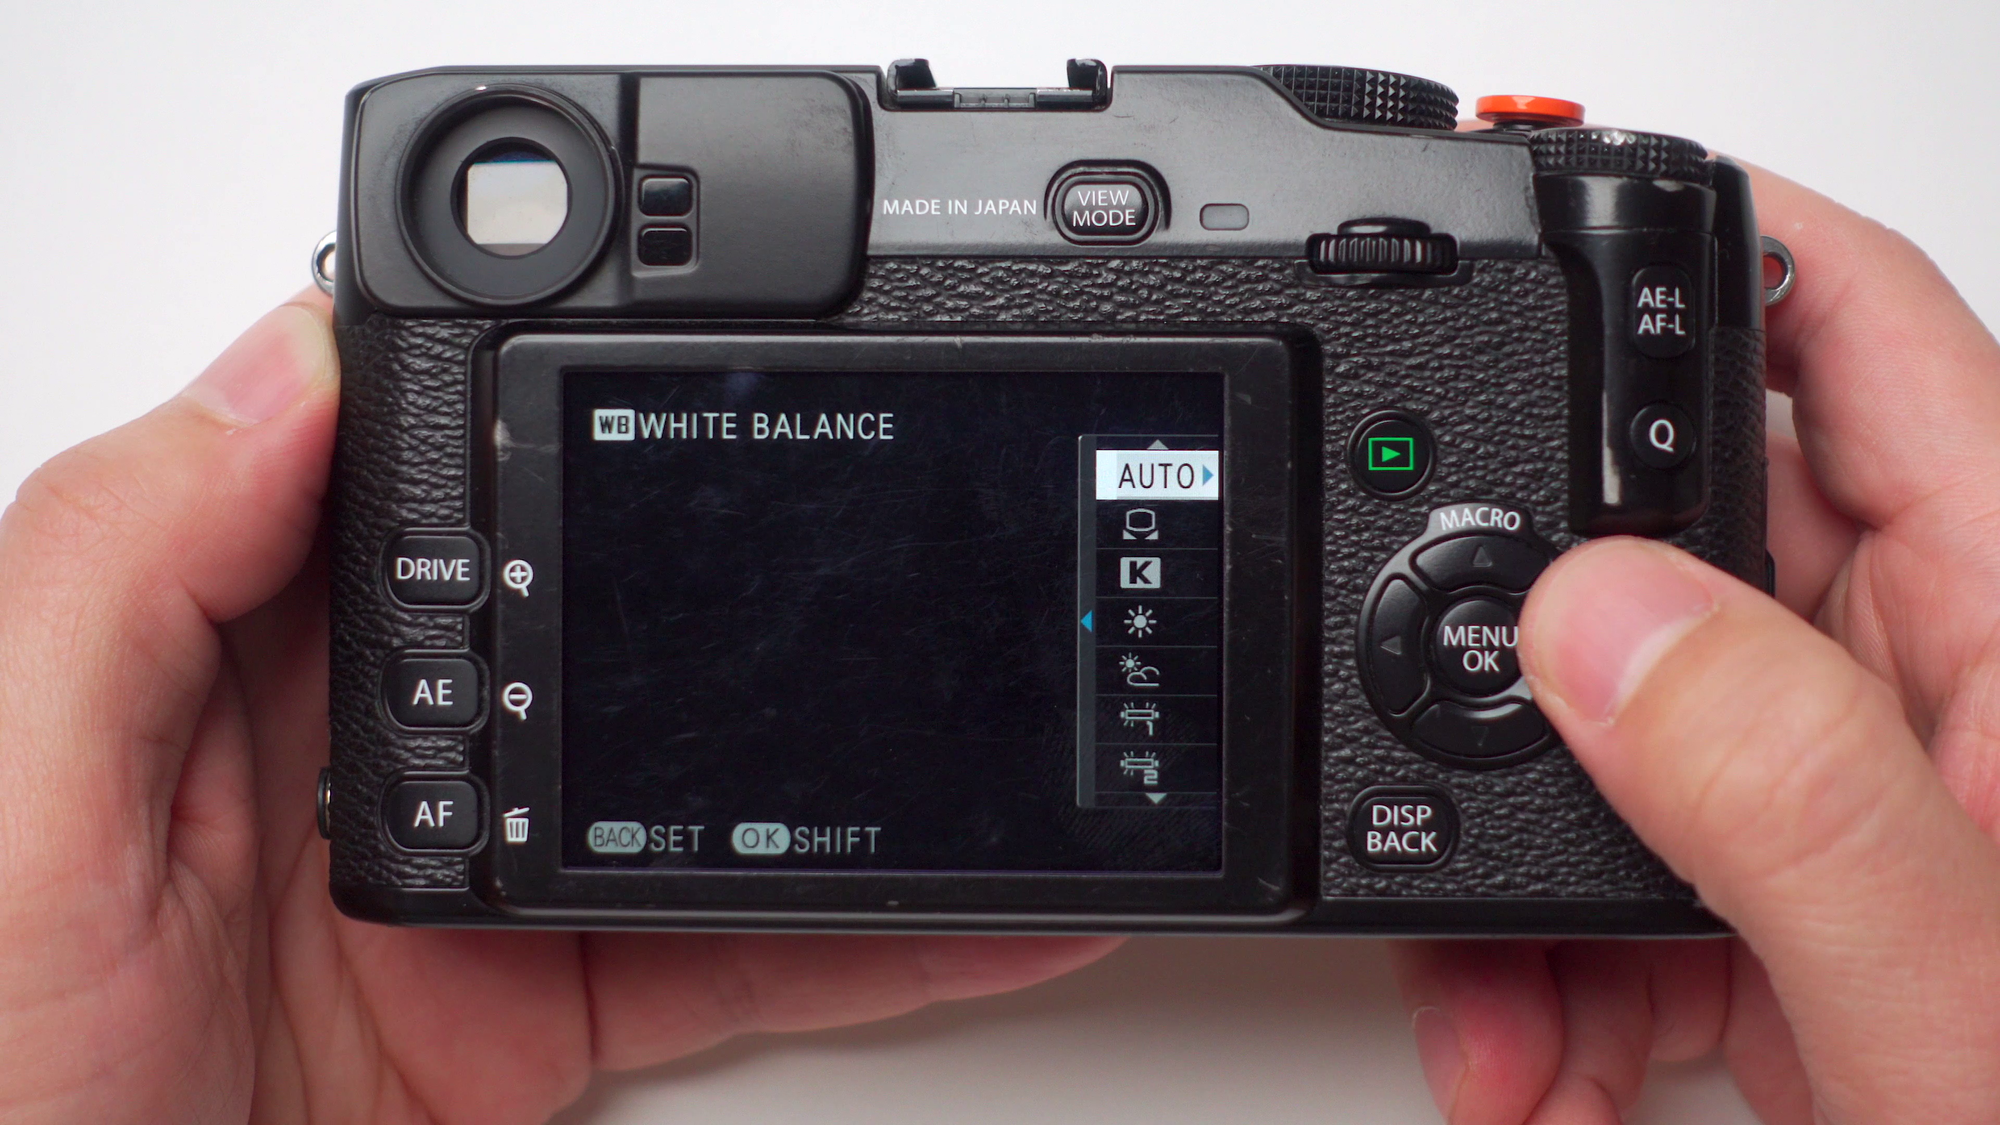
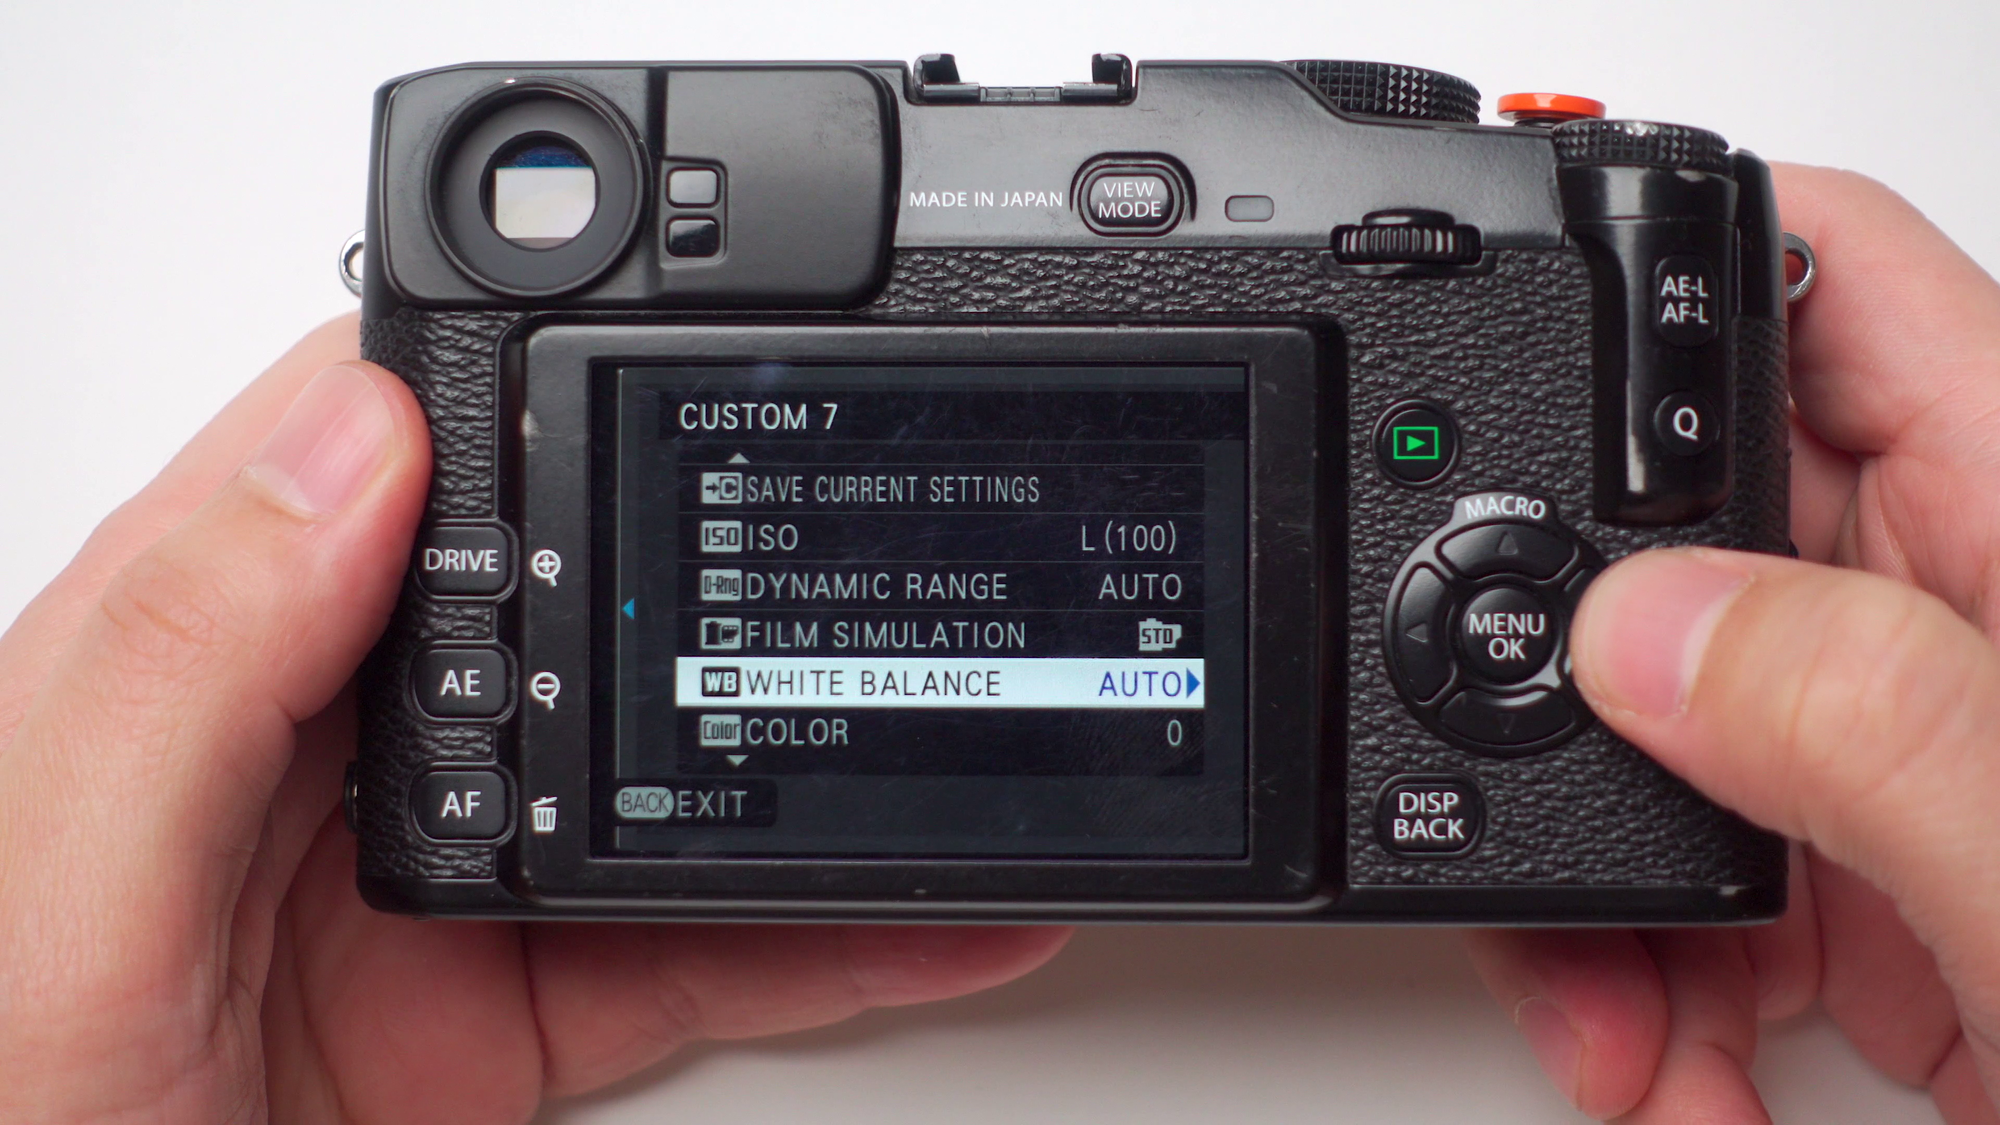
Inside the custom profile we do a have balance menu, however as you can see, the auto option does not let you adjust the white balance shift, there’s no indicator to the right side of the auto option and pressing the right d-pad does nothing at all.
So whatever white balance shift you have set on the general shooting menu, will affect all the built-in camera profiles, even the custom ones as well, so just leave that setting at auto.
The Fujifilm X-Pro1 is a decade old, so it’s just limitations that we have to work around, I’m sure newer fuji cameras are better in this regard. But this is very important to discuss, and now you know. Moving on.
The Dynamic Range & Its Limitations
Another key setting that we have to work around besides the white balance is the dynamic range. This might be specific to the X-Pro1, I don’t have the X-Pro2 or X-Pro3 to confirm it, so please let me know if you do own any of those cameras.
Going back to our recipe, it wants us to set our dynamic range to 200%. In this camera, the dynamic range is linked to the ISO values.
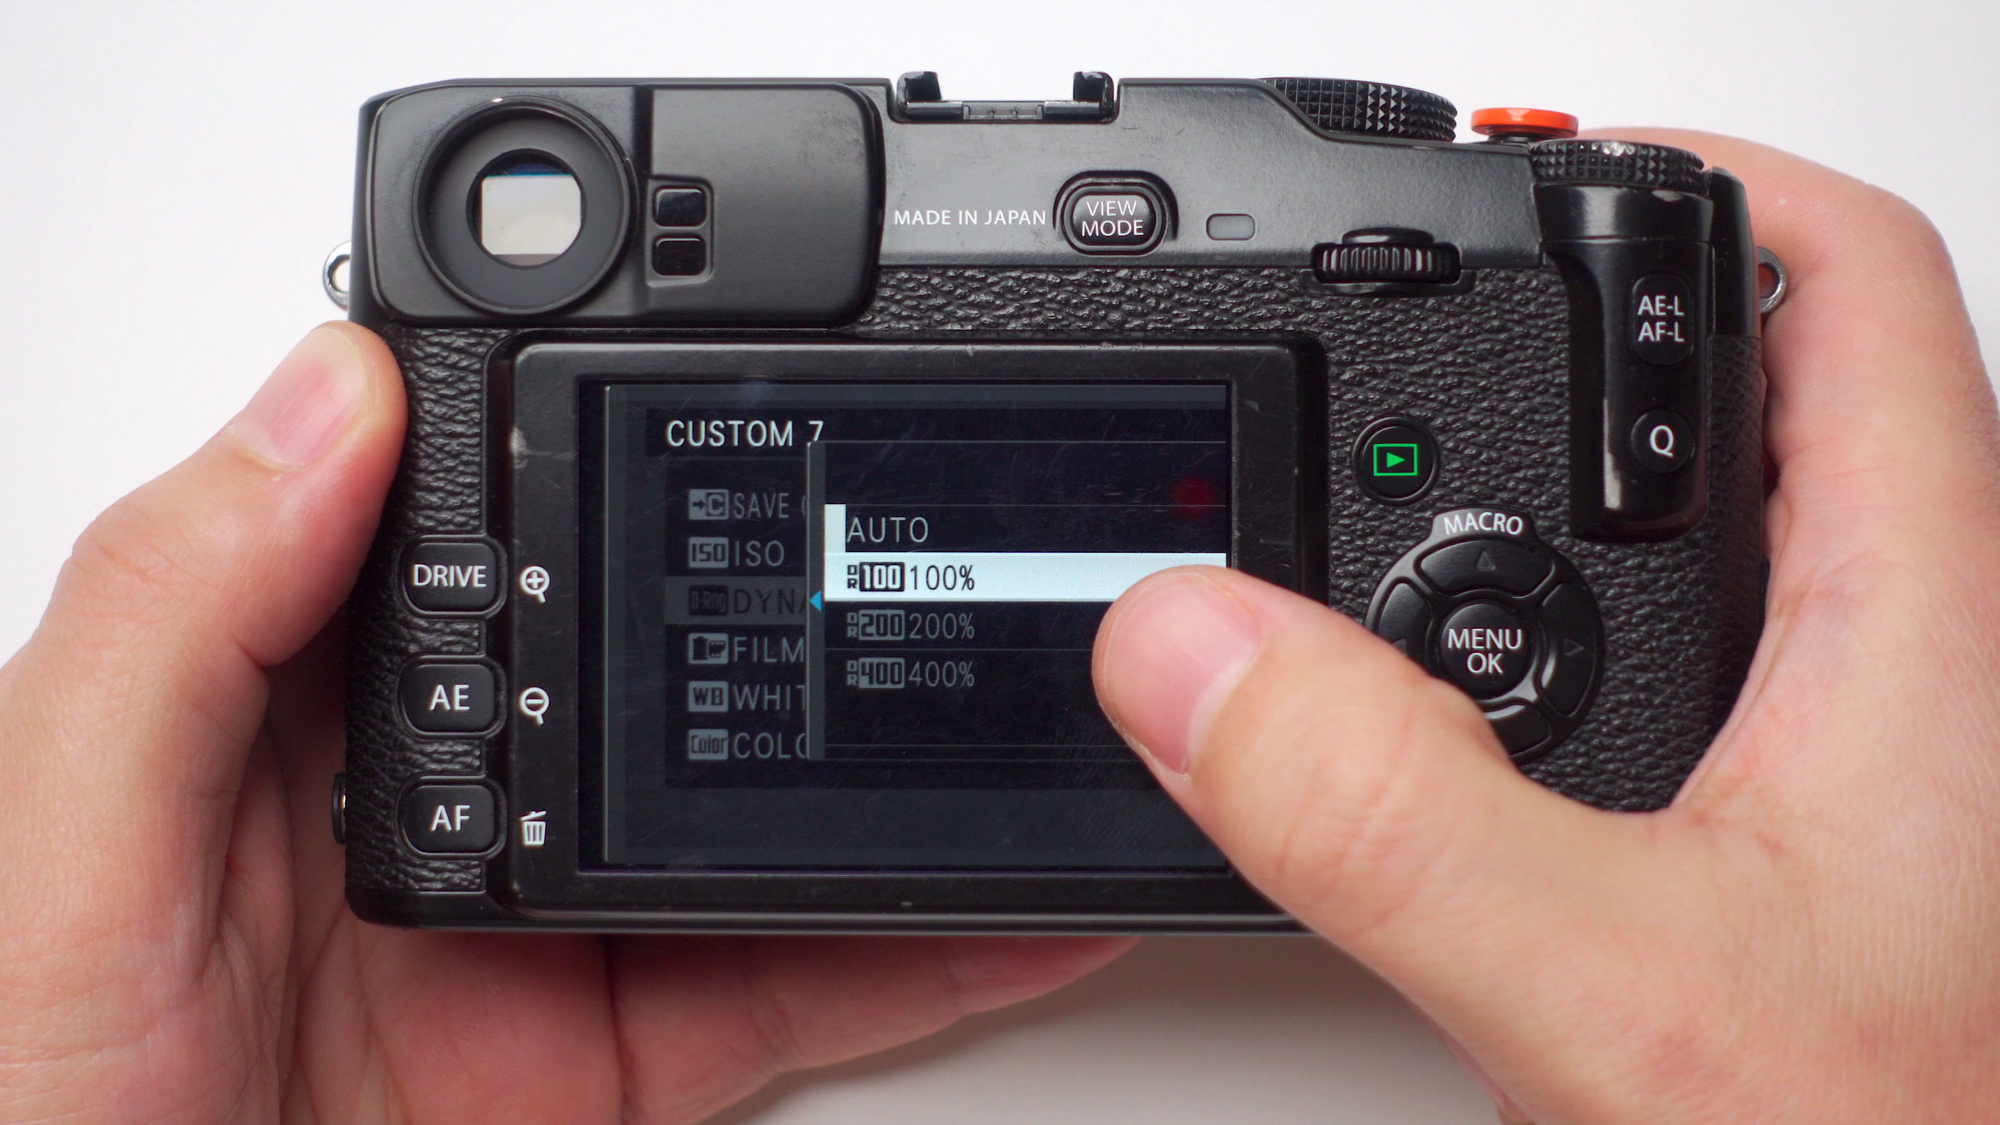
Back in our custom profile #7, our ISO is at the lowest possible setting, 100 ISO. If we scroll down to the dynamic range option, we can see that the 200% & 400% settings are greyed out, and unavailable. So let’s play with the settings here to figure out what’s going on.
- At 200 ISO, 100% dynamic change is the only option available.
- At 250 ISO, the same thing happens.
- At 320 ISO, the same thing happens.
- At 400 ISO, now we have the option to select 200% dynamic range, but not 400%.
- At 800 ISO, the 400% dynamic range is now available.
And again, just like the white balance shift option, this sounds very simple but has implications that we have to think about.
Let's say you’re shooting on a very sunny day, and let's say that you normally set your ISO to 100 on a sunny day, well now you have to bump your ISO to 400 to be able to match the 200% dynamic range setting of this specific simulation recipe.
That might affect how you shoot, how much you stop down on your lens and if you need an ND filter or not. Especially when your shutter speeds max out at 1/4000th sec, I know the X-Pro2 and X-Pro3 have higher shutter speeds, but I’m shooting with this camera. So keep that in mind.
Fortunately, both the dynamic range and ISO can be set inside the Custom profile menu and unlike the white balance, it can be saved individually as well. Now that we got those 2 major settings out of the way, we can keep progressing and adding the rest of the settings from the simulation recipe to our custom profile.
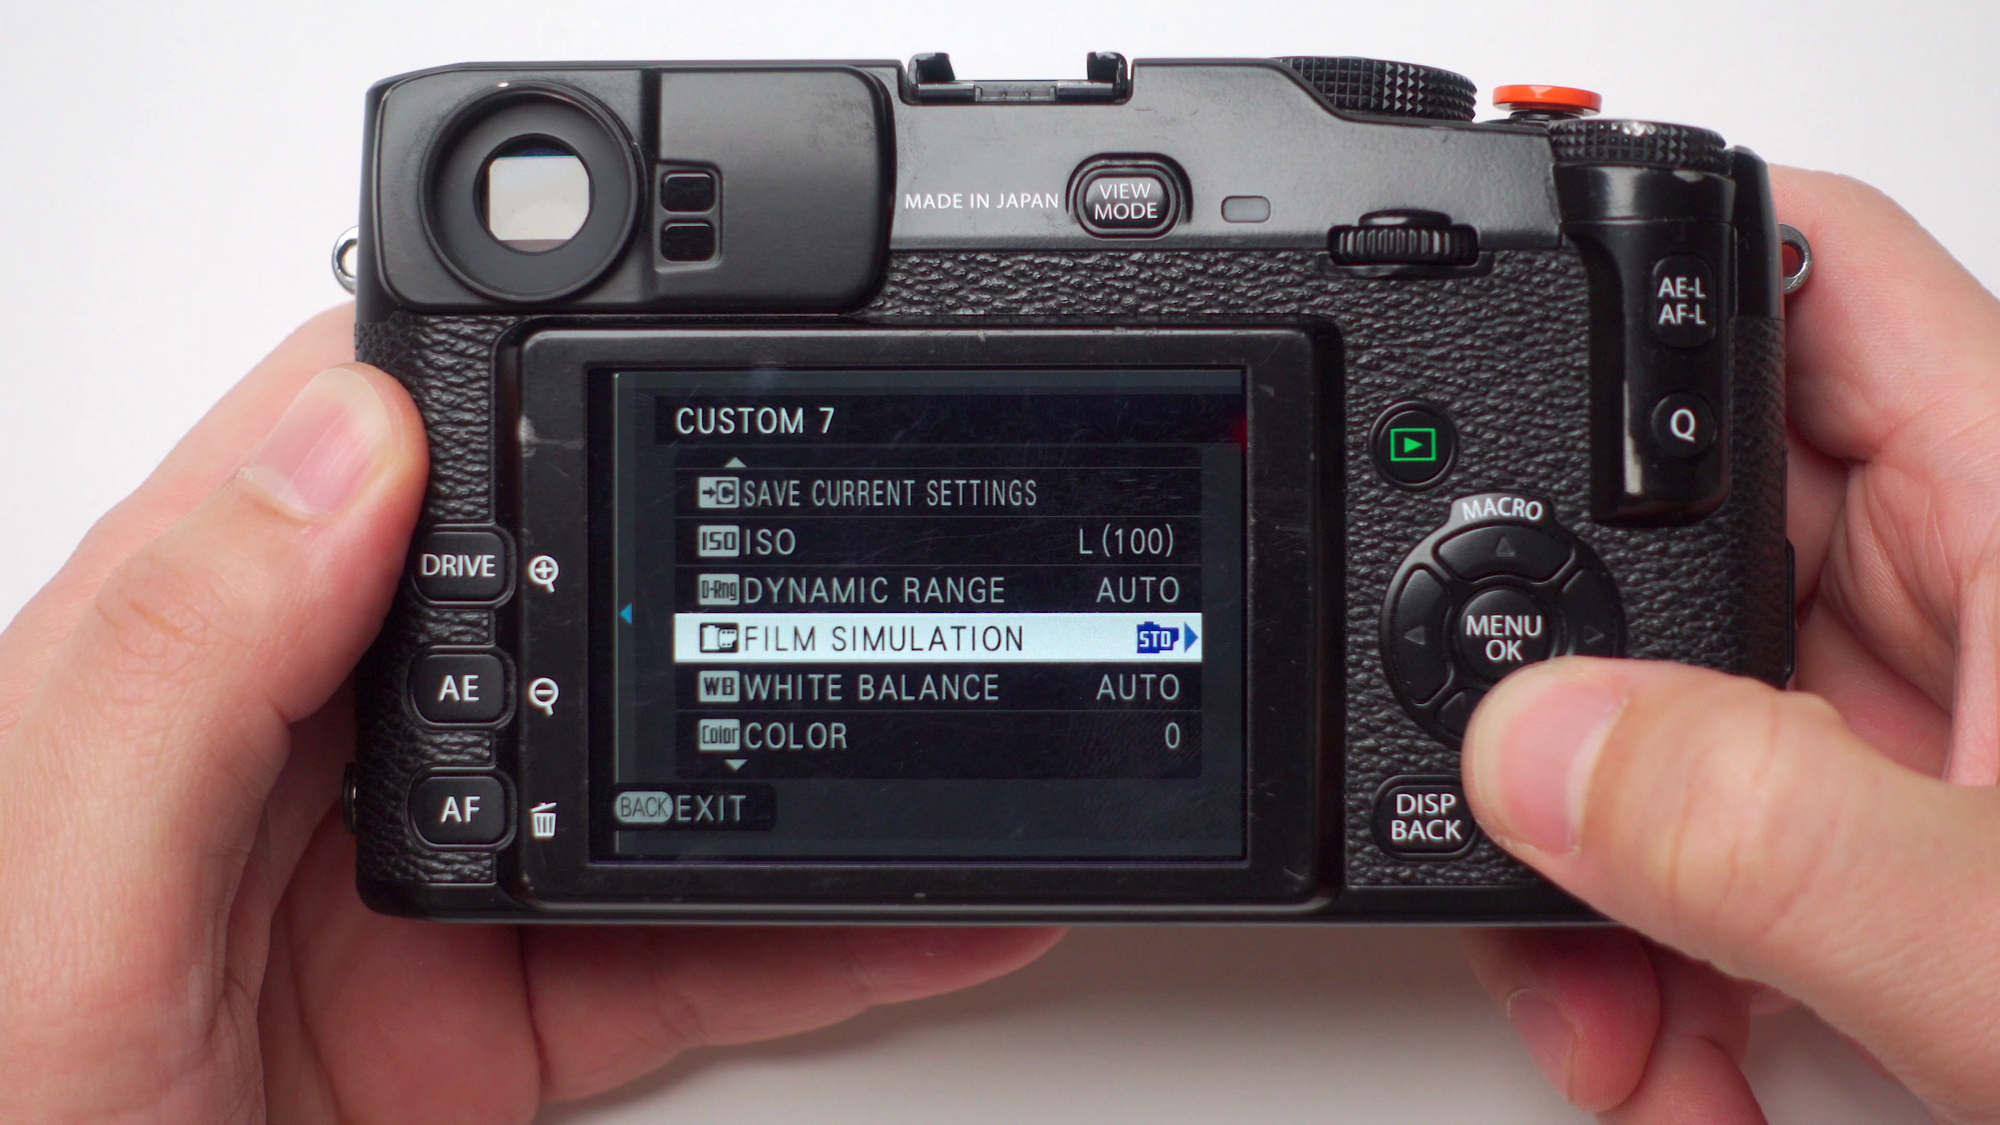
Back to our custom profile #7, we are going to change our base film simulation to Pro Neg Standard.


Next, scroll down to the colour setting. We'll set out the colour to +1 or medium-high, the same thing.
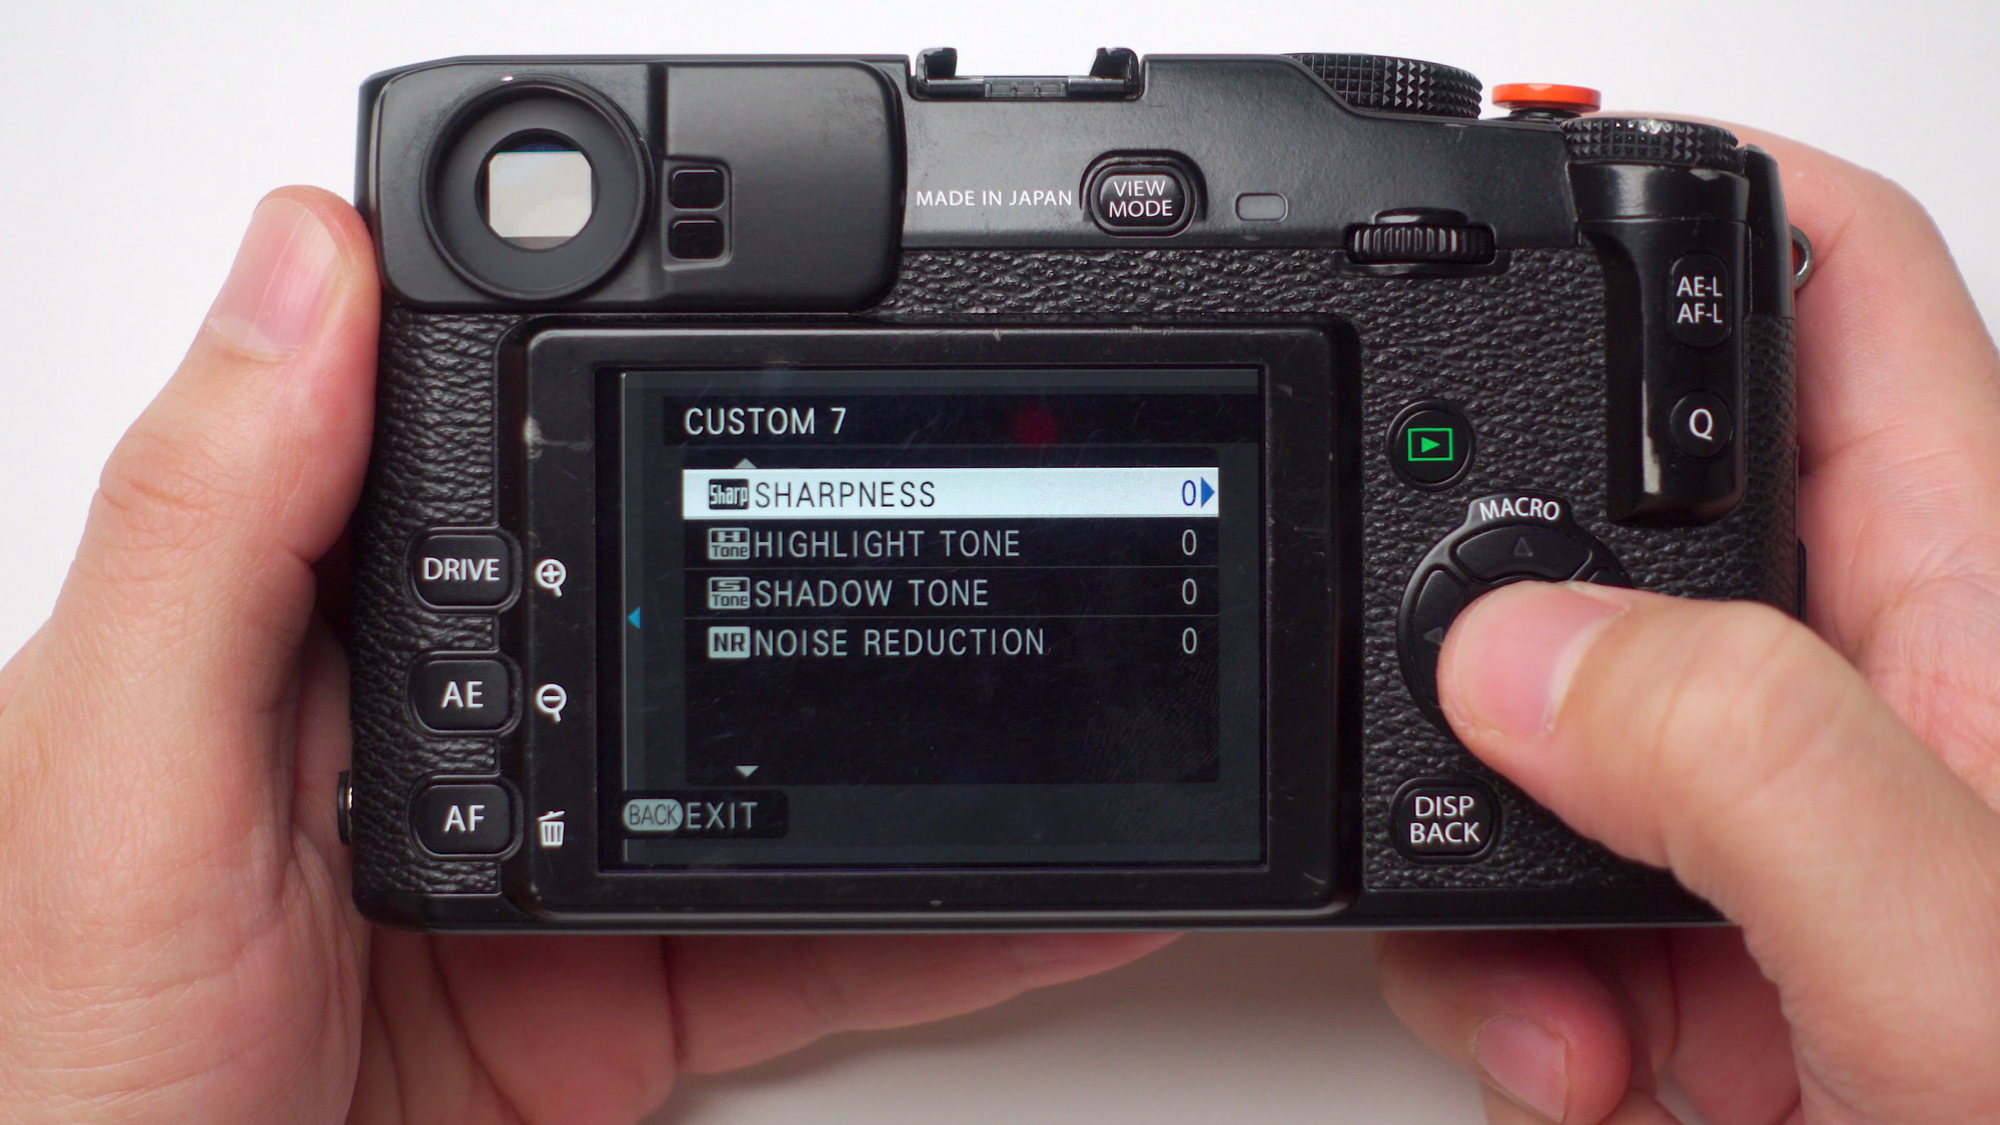
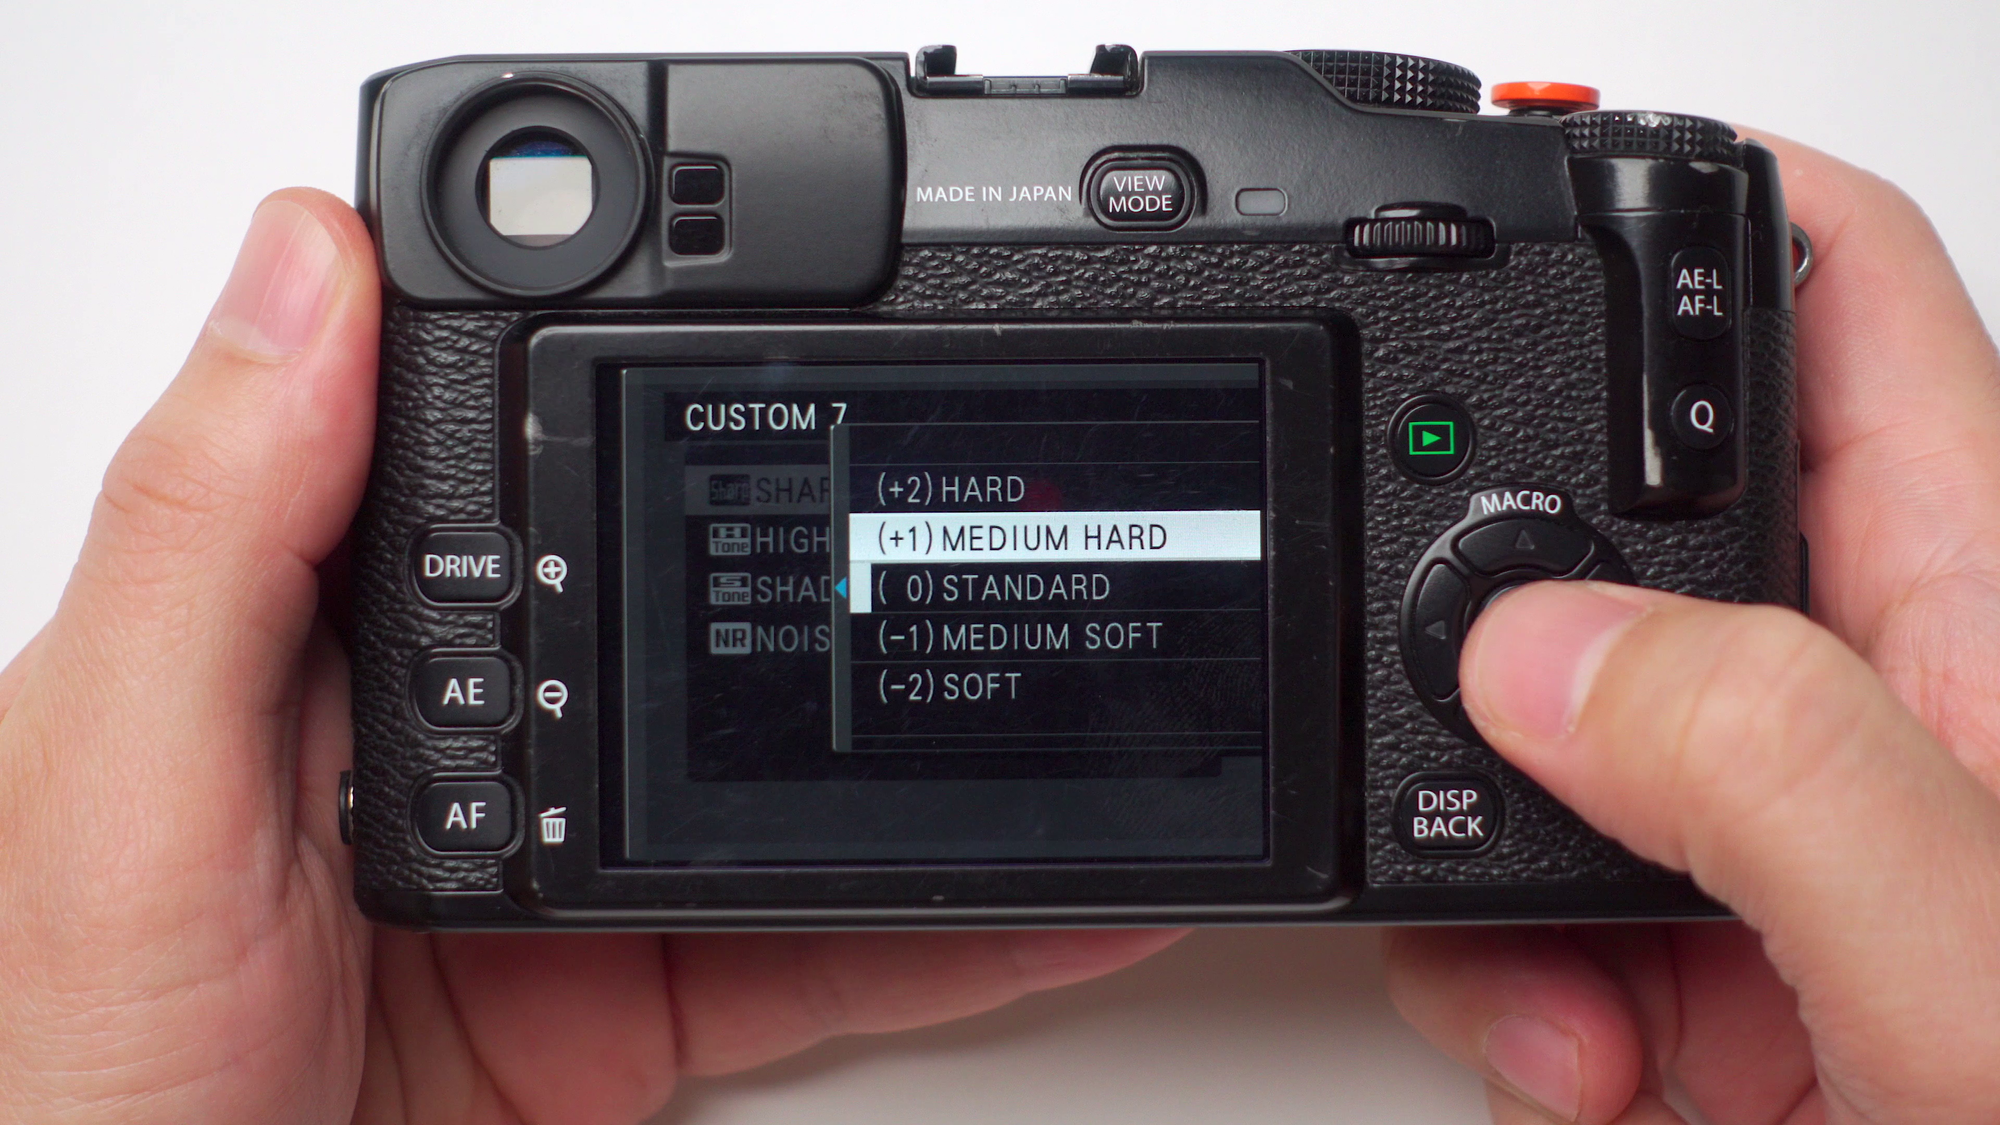
Next, scroll down to the sharpness setting. We'll set out the sharpness to +1 or medium-high, the same thing.
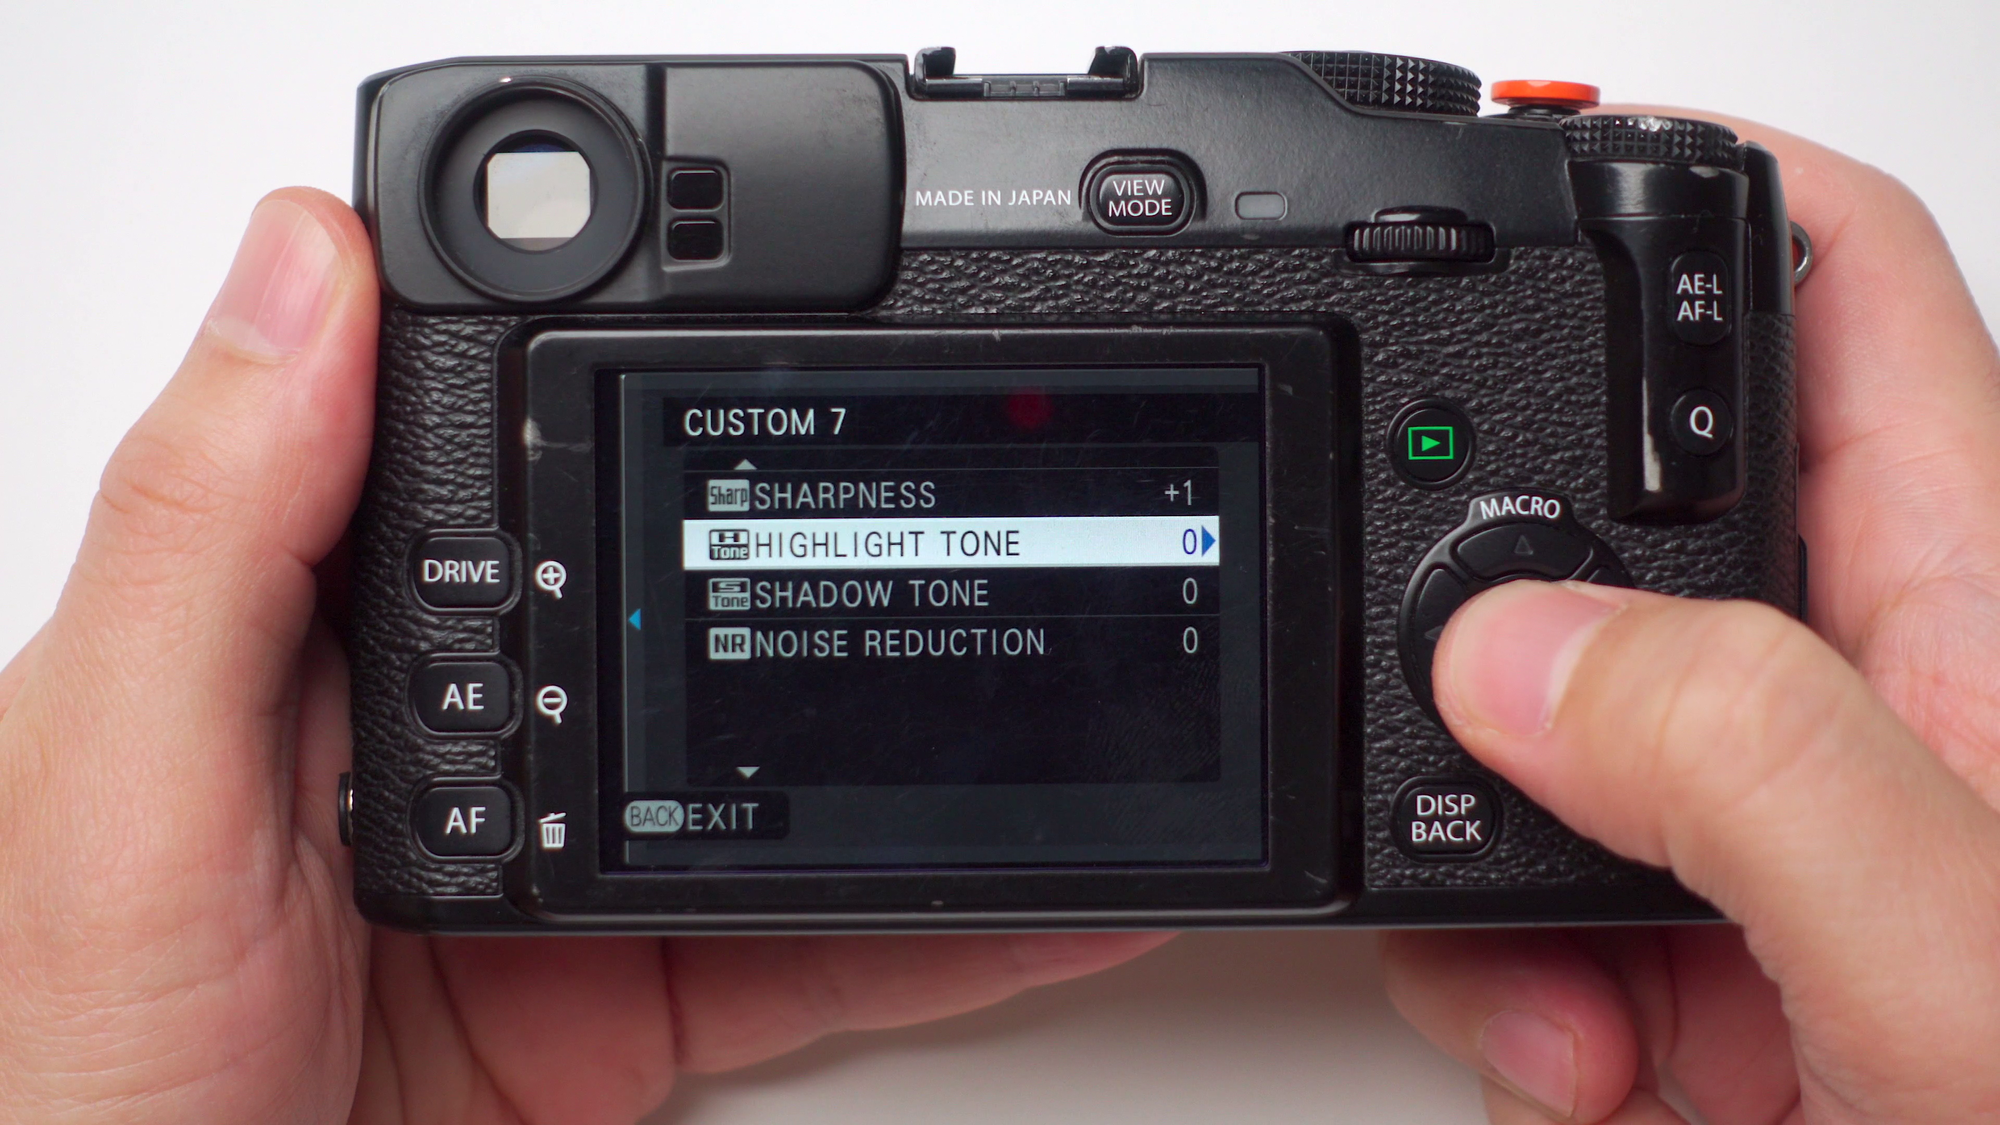

Next, scroll down to the highlight tone setting. We'll set out the highlight tone to +1 or medium-high, the same thing.
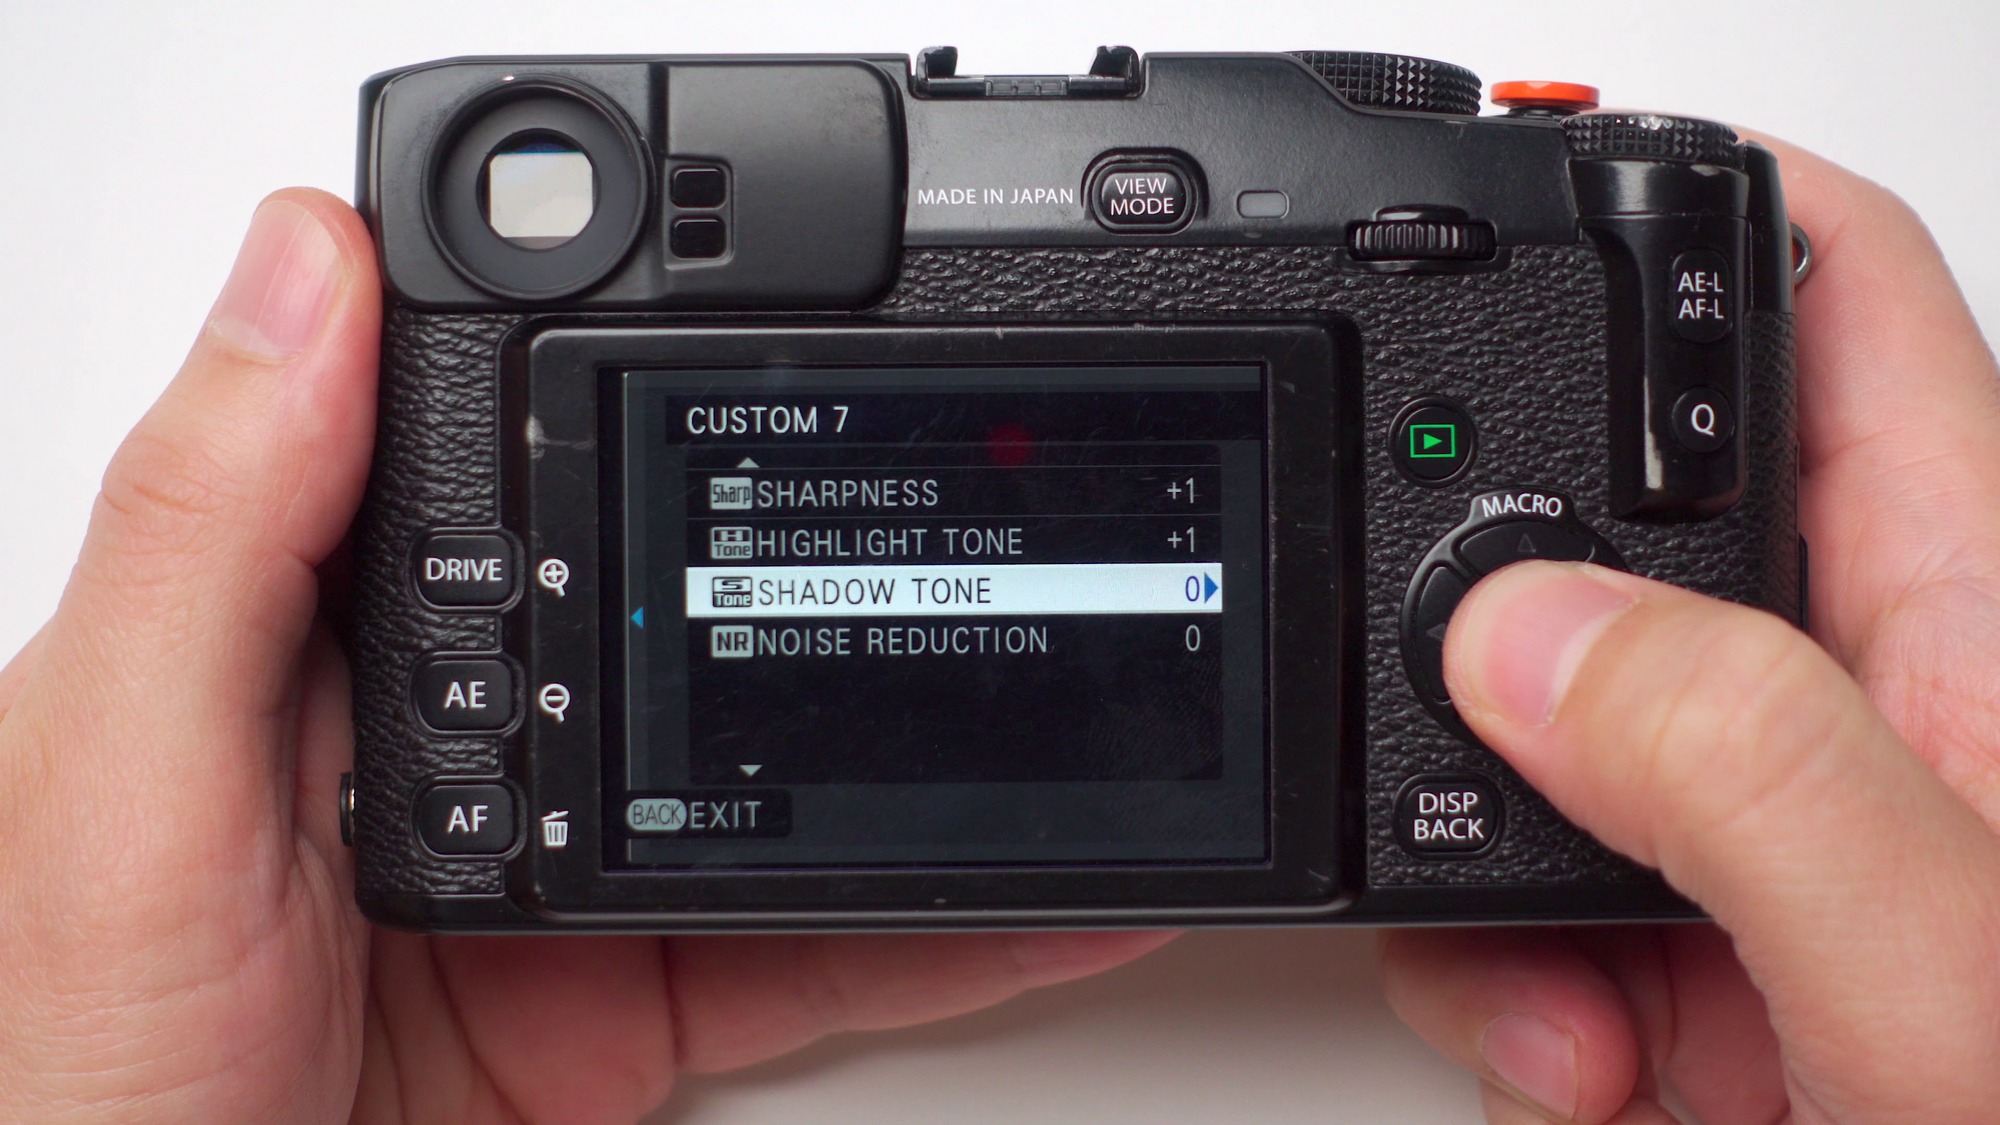
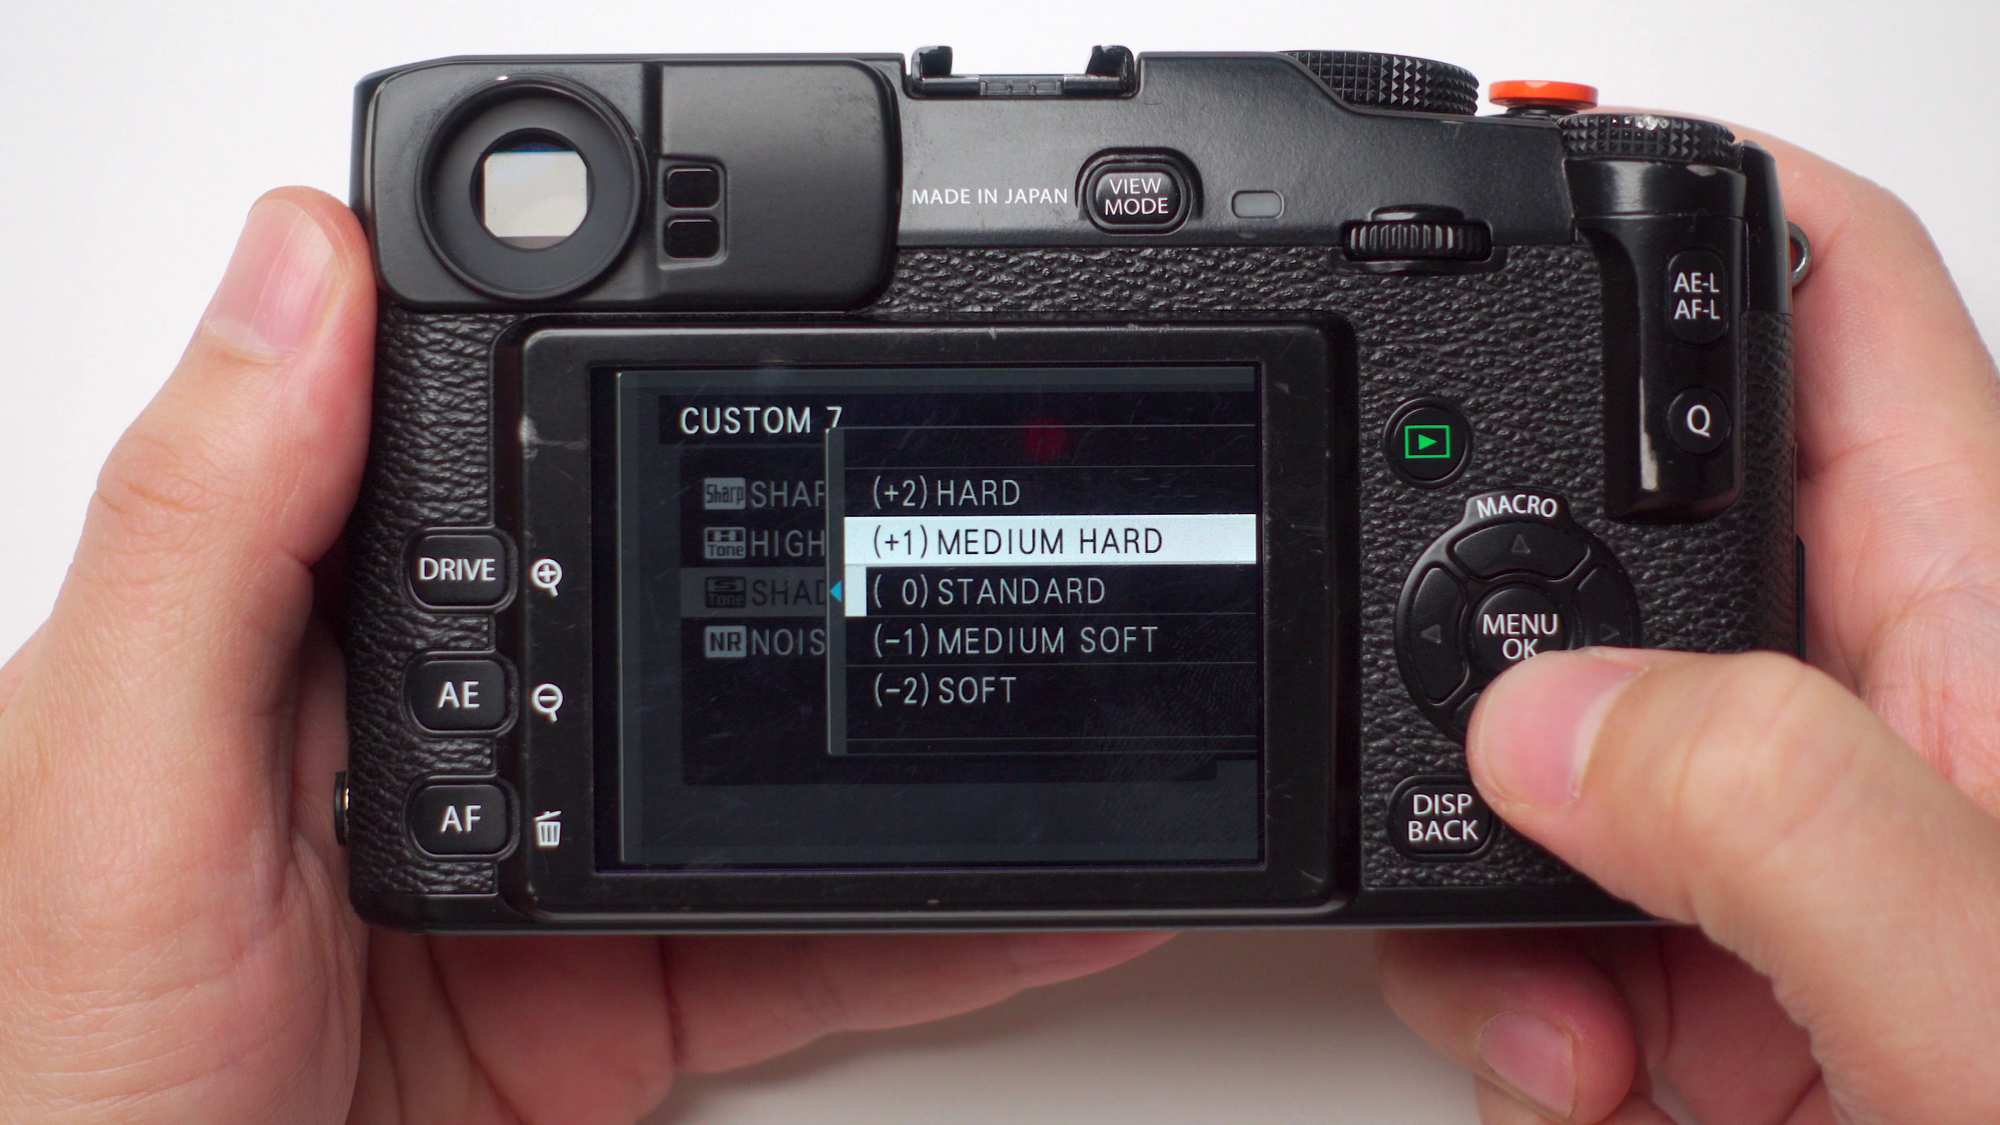
Next, scroll down to the shadow tone setting. We'll set out the shadow tone to +1 or medium-high, the same thing.
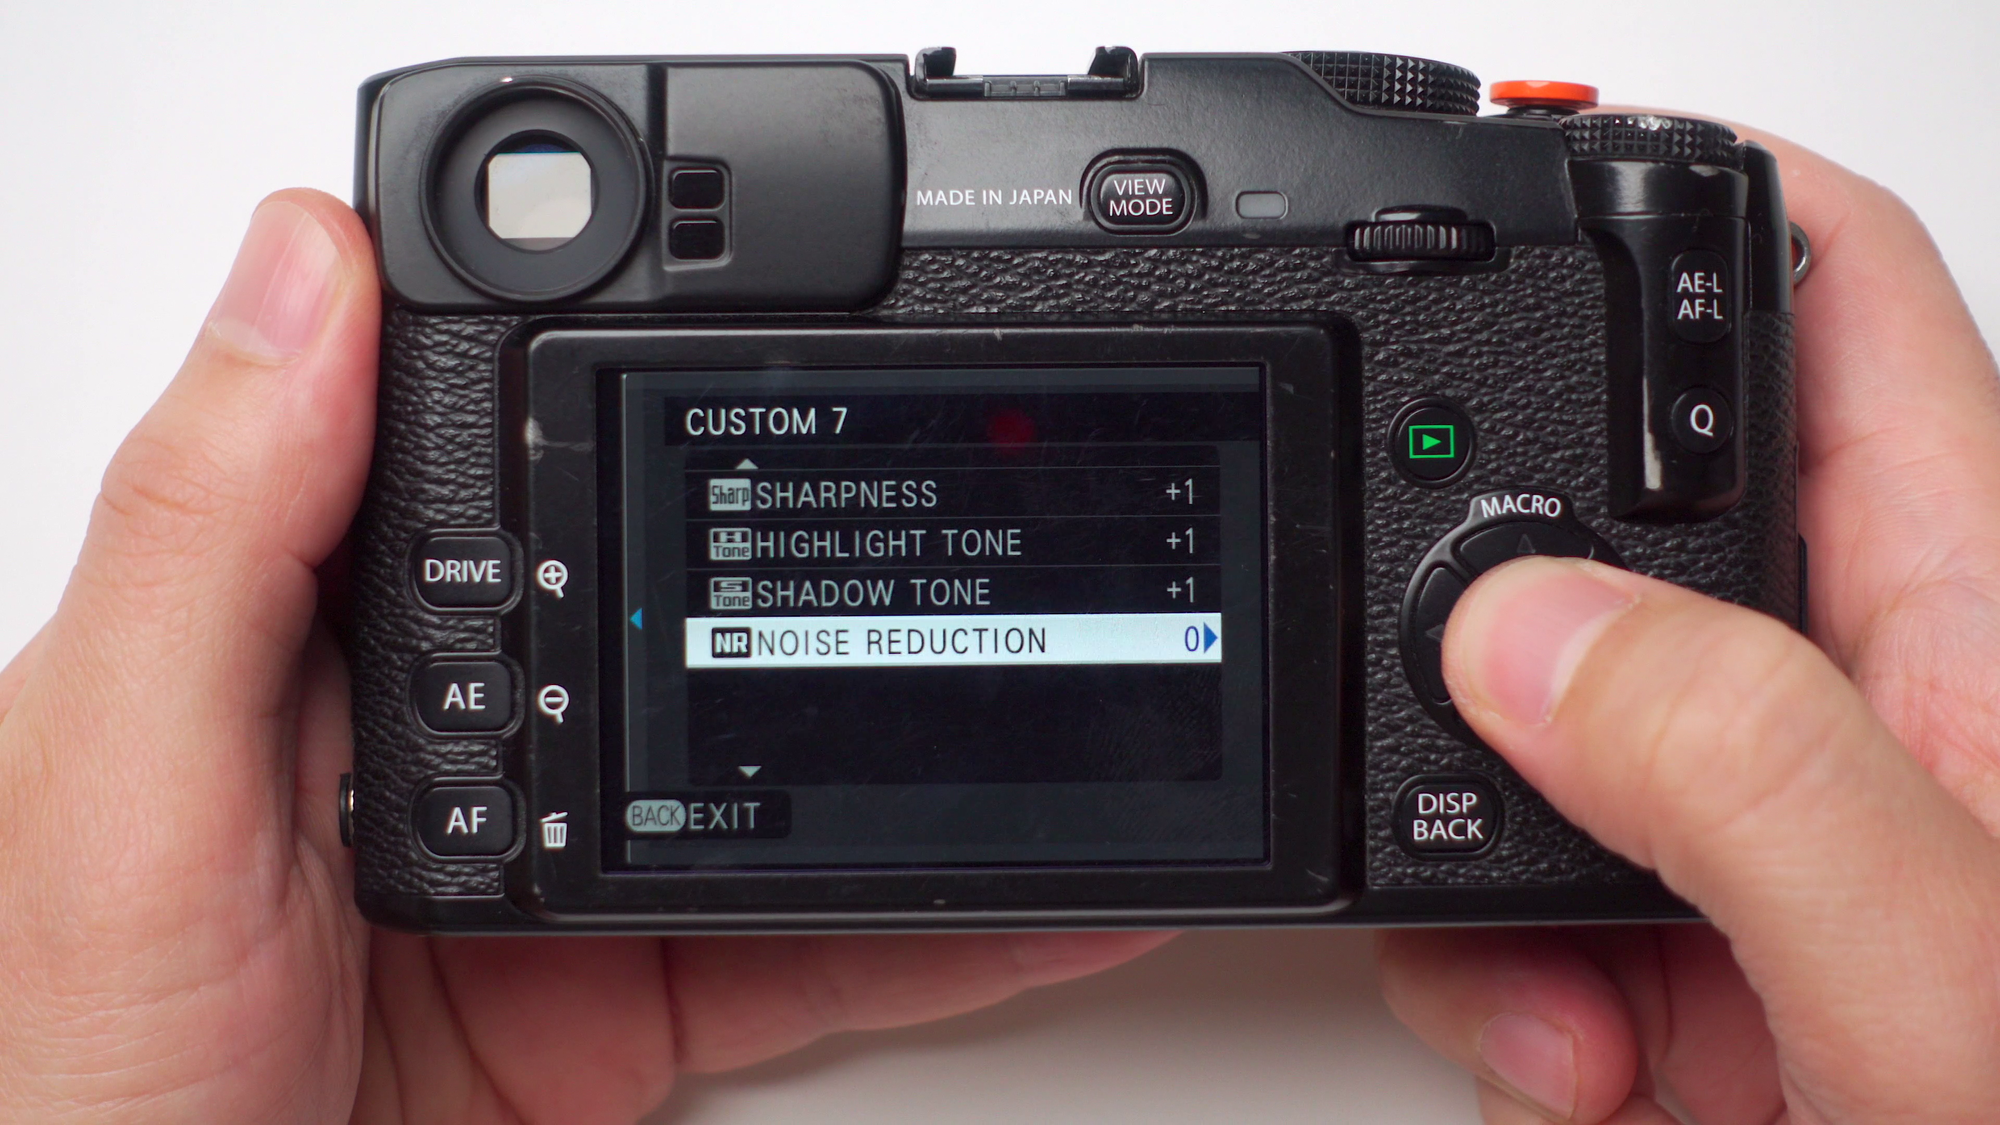
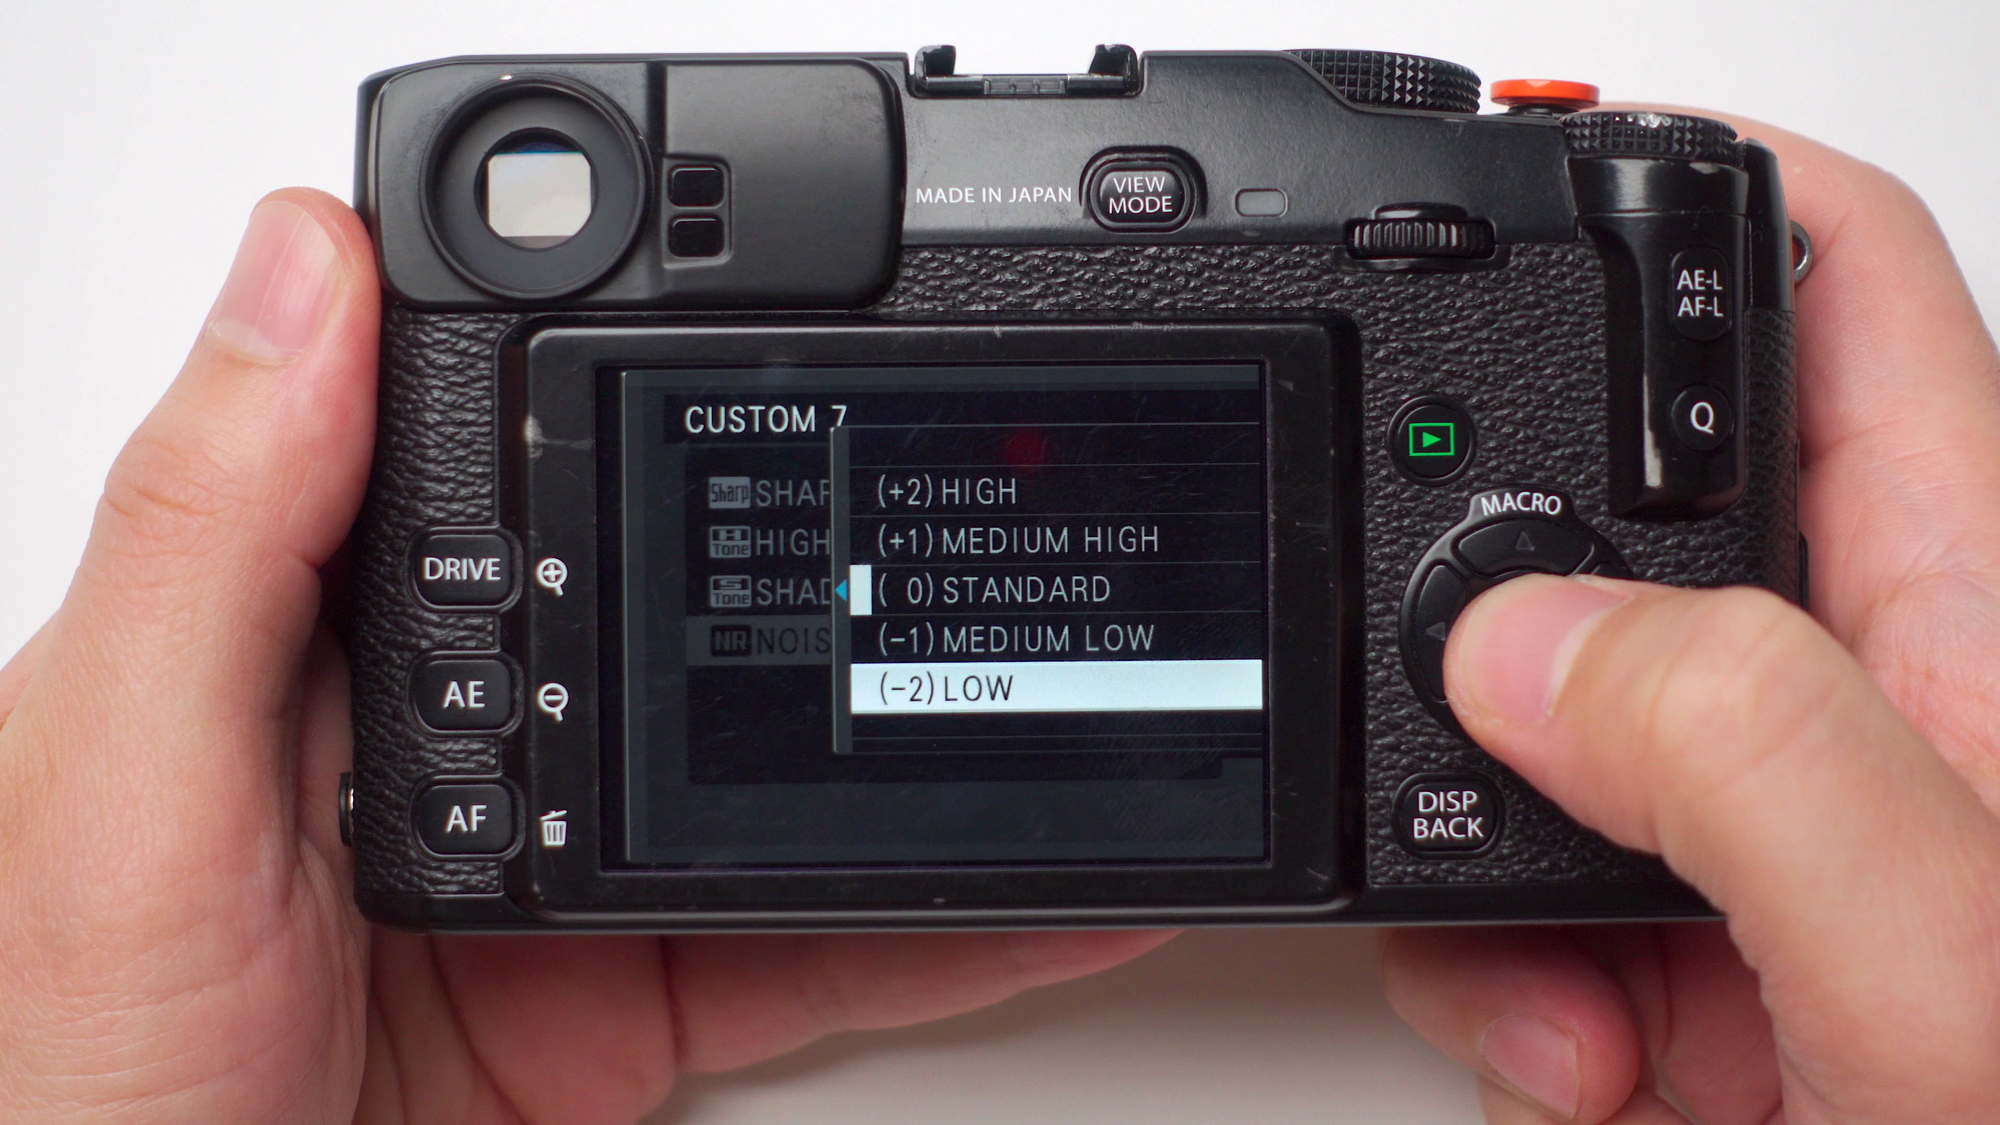
Last but not least, scroll down to the noise reduction setting. We'll set out the noise reduction to -2 or soft, the same thing.
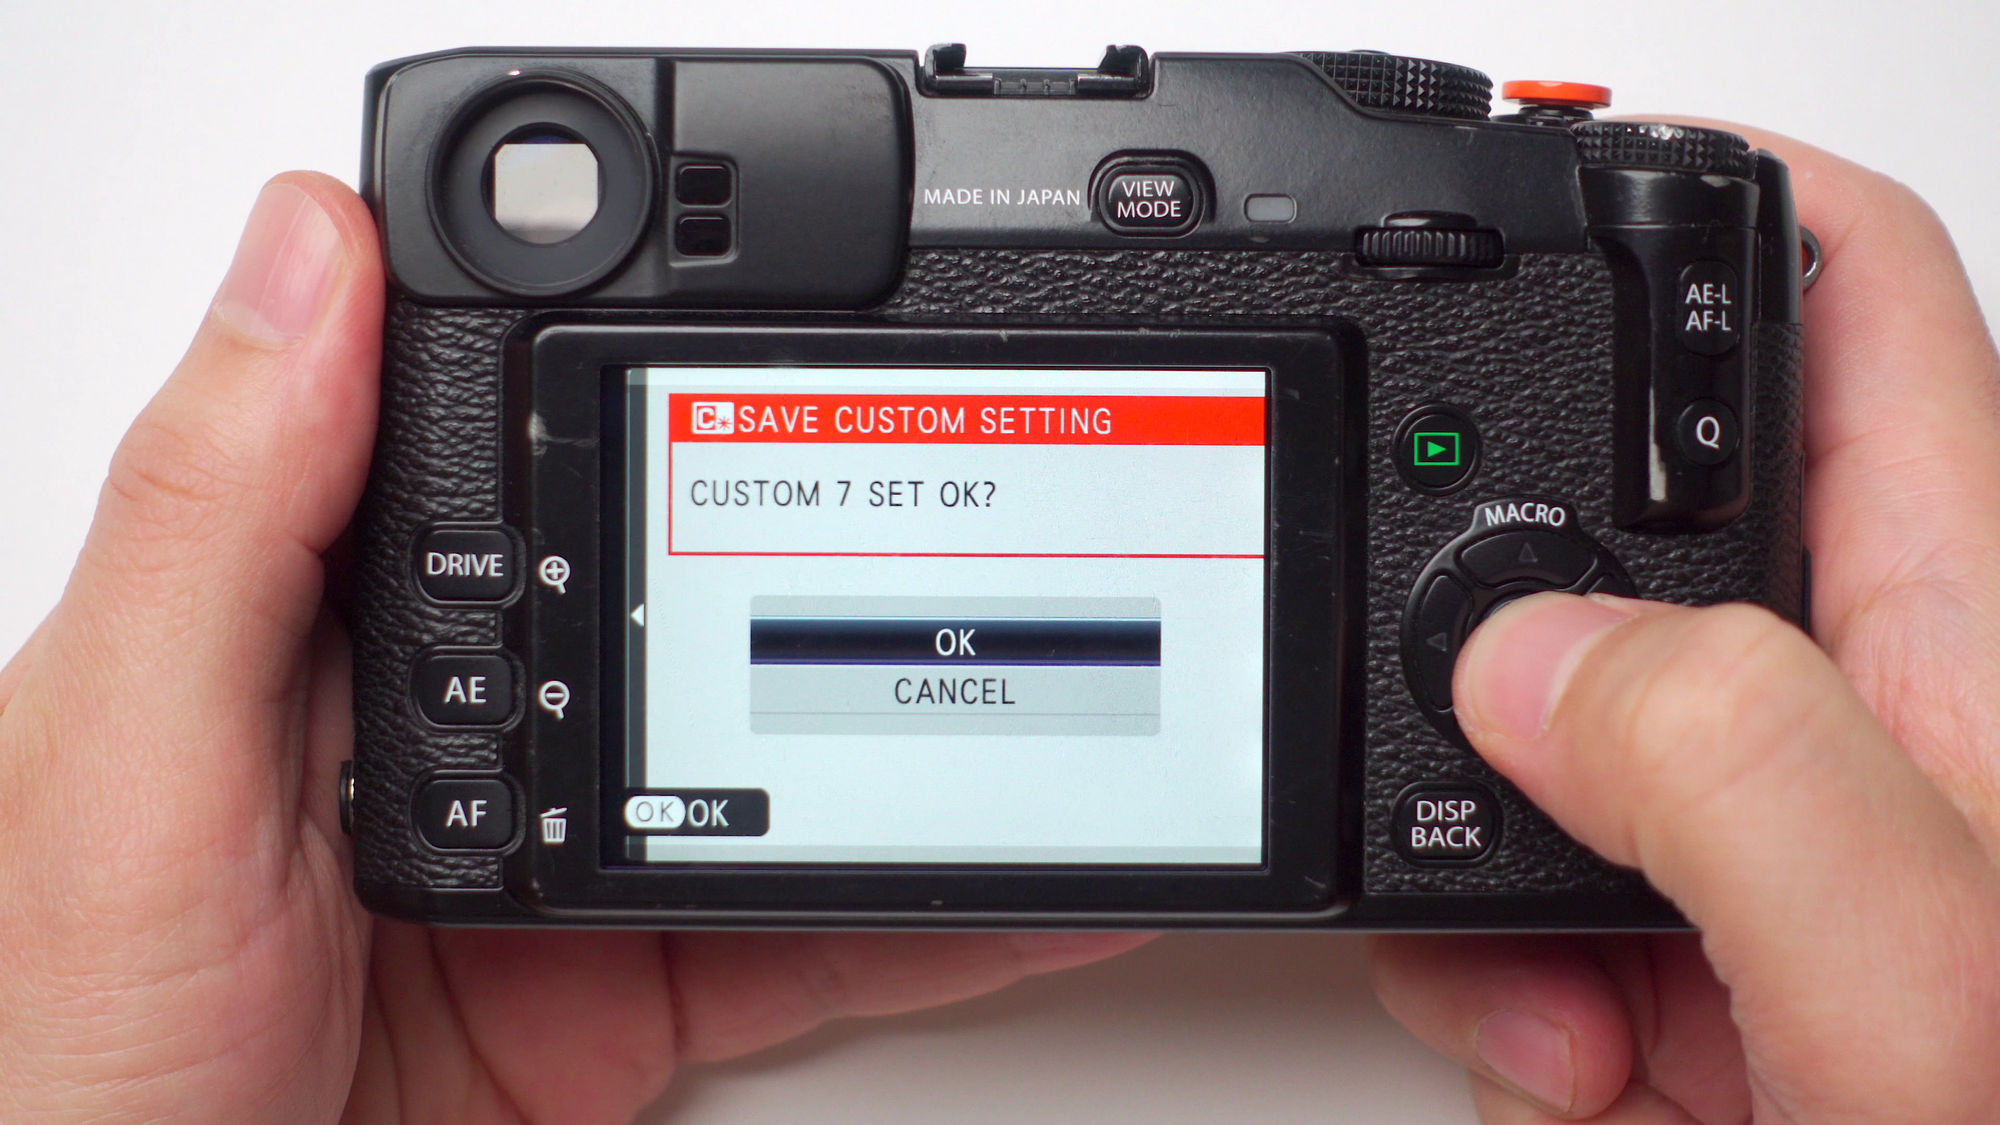
Alright once we have finished the settings that we want, we’re going to press the back button and it will ask us if we want to save the settings we have selected. Press okay and that’s it, you’re good to go.
You can switch between custom profiles using the Q-button and quickly cycle between them, but do remember that if all of them have different white balances, then you have to manually change it.
Once again, credit where credit is due, head down to the Fuji Weekly blog to see this and many other simulation recipes and find the one you like best.
Ritchie Roesch
As well as the X100p Instagram account. I highly recommended it, linked below.


"Dark Knight" - My Custom B&W Simulation Recipe

The last thing I’d like to share with you is my own custom B&W film simulation for the X-Pro1, I call it the "Dark Knight". I say my own, but the options are so limited with older cameras like the X-Pro1 that I’m sure someone out there came up with this recipe before.
Regardless, these are the settings that I chose, settings to try to get as close as possible to the ACROS simulation from the newer Fujifilm cameras. The "Dark Knight" is the only B&W profile I use with the X-Pro1.
The recipe is here on my website, linked down below.
 Jorge Perez
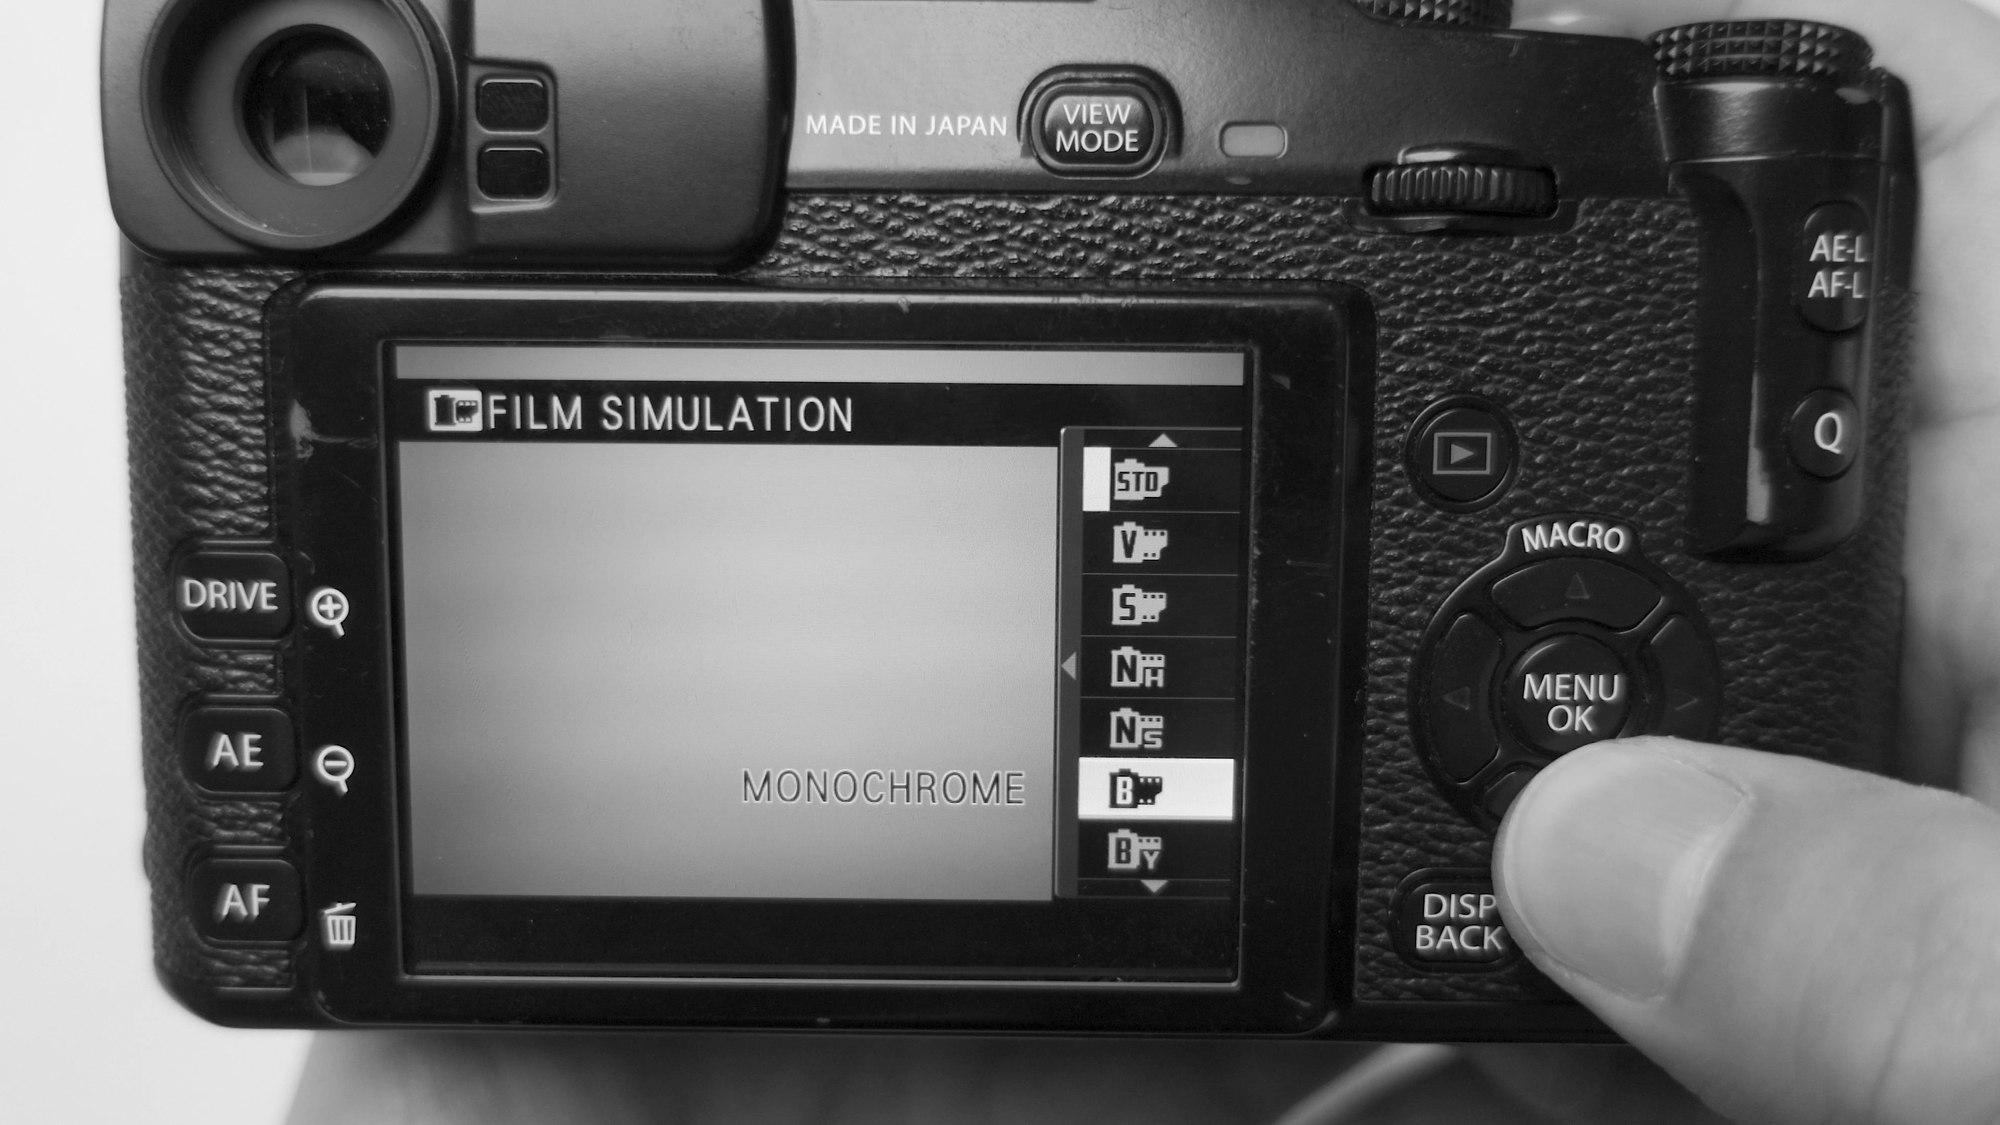
Hope this post was helpful or useful, If you'd like to watch this in video form, check out my full YouTube video here:


